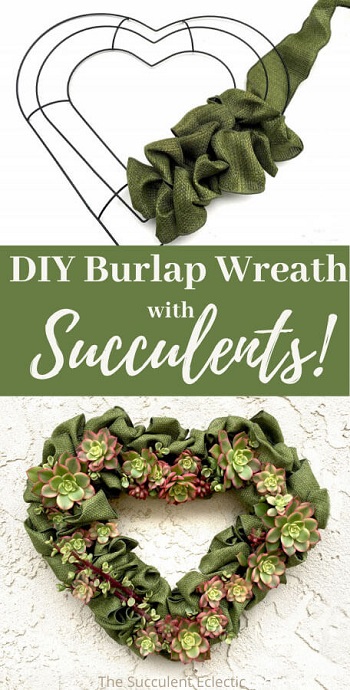
I have always enjoyed burlap wreaths, but of course, I think everything looks better with succulents! With Mother’s Day just around the corner and COVID-19 requiring we adjust our relationship with our plants, it seemed a natural time to combine a DIY burlap wreath with succulents! I used living succulent cuttings, and I expect them to root into the burlap just like they do into moss. Let me show you exactly how I made this heart wreath with burlap and succulents.
{Please note, some links in this post may be affiliate links to sites that pay me a small commission if you click on the link and make a purchase. This commission is at absolutely no cost to you. I only recommend products and companies that I have worked with and truly love! ~Kat}
How to Make a Succulent Wreath with Burlap
In this Post We'll Cover:
Gather Supplies for Your Wreath

Whether you want to make this DIY burlap wreath and stop there, or add dried flowers or other ornaments, or you go all the way and make it a succulent wreath, there are a few supplies you really need:
- Wire wreath form, any size or shape, but it must have at least 2 sections between the wires. (I used this heart wreath form).
- Burlap ribbon, at least 10 yards long and 2.5 inches wide. See the burlap discussion below. (I used this green burlap ribbon).
- Floral wire, any gauge. (I used 22 gauge wire).
To add succulents, you will need:
- Hot glue gun and glue sticks
- Snippers (I just love my Joyce Chen scissors!)
- Succulents! Actually, succulent cuttings. Take them from your garden or order cuttings online.
DIY Burlap Wreath – Choosing the Burlap
I chose this soft, sage green burlap ribbon to complement my succulents. Because I want my succulents to root into the ribbon, I needed one made of natural fibers. This one is not a true burlap and has a lightly wired edge that makes it easy to shape, but it is a natural fiber. Any burlap ribbon will work well, but for a full look, you want it at least 2.5″ wide and up to 5 inches wide. I used just a 12-inch heart wreath form, and it took every inch of the 10 yards of ribbon on the roll! If you intend to add succulents, it is perfect. But if you want the burlap wreath to stand on its own, I would encourage you to get an additional roll of ribbon so you can make the wreath as full as you like.
If you plan to skip the succulents, this DIY burlap wreath will be entirely reusable. The wreath form and the ribbon can easily be taken apart and used for other projects.
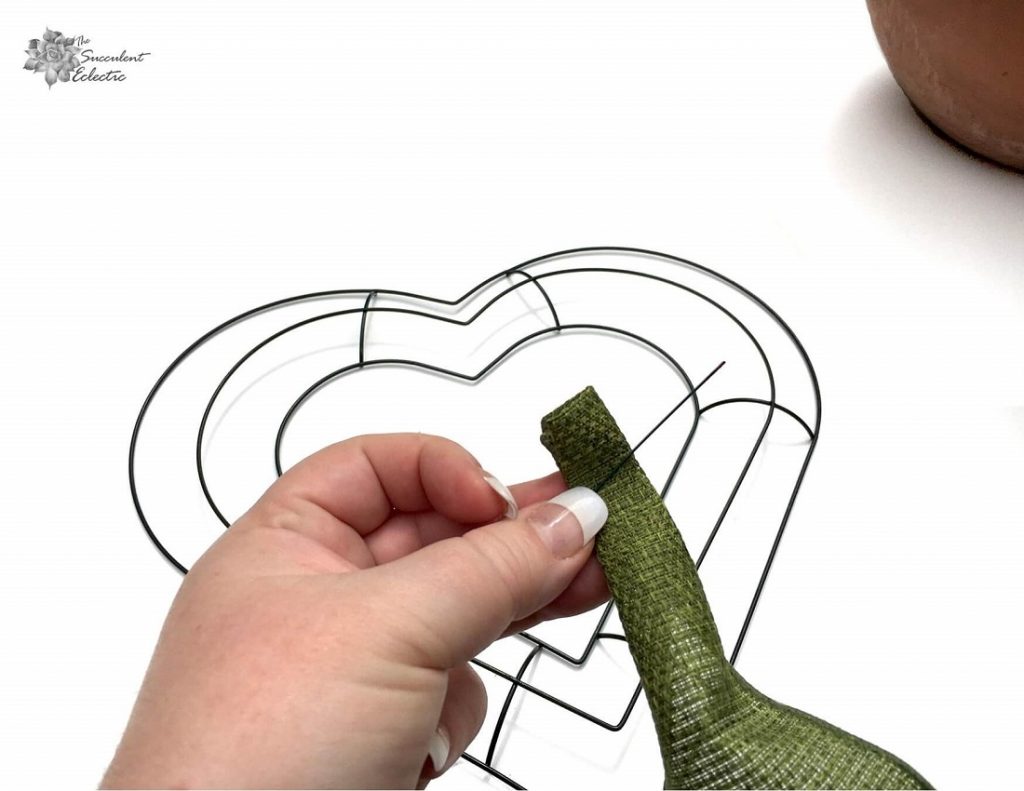
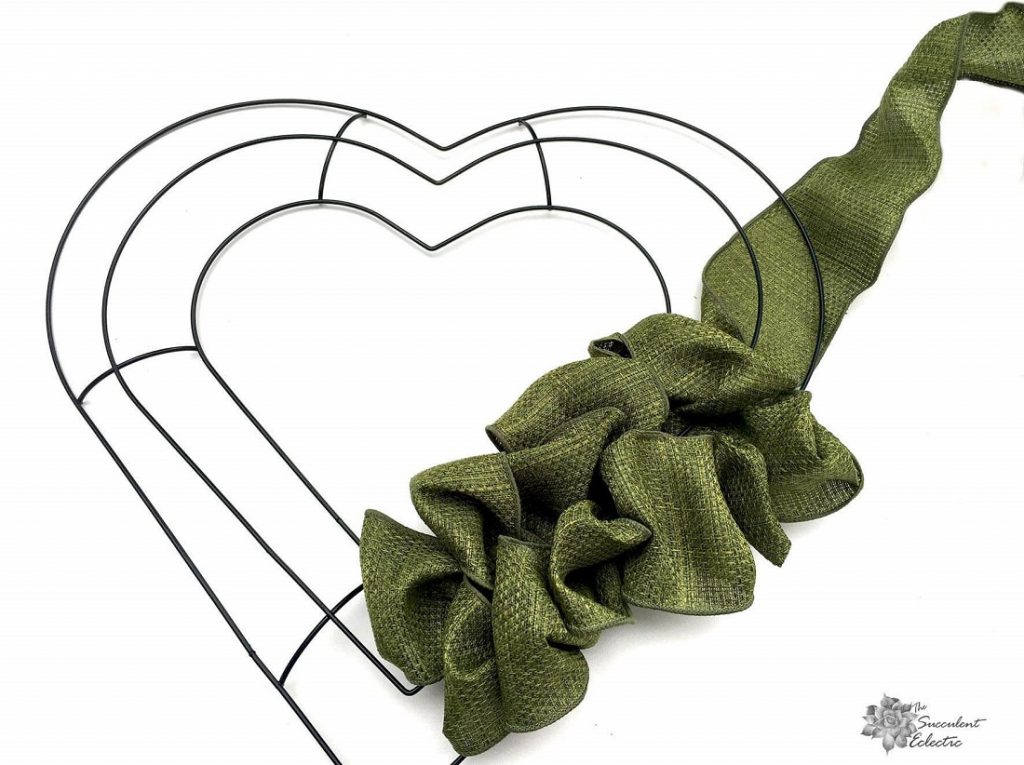
Start your burlap wreath by folding the end of the ribbon into quarters. Using the floral wire, secure the ribbon to the inner wire of the wreath form.
Creating the Burlap Wreath
As I have said before, I am not a naturally crafty person. I studied this burlap technique video tutorial. It’s quite simple and has impressive results! You will use the wire supports of the wreath form to weave the burlap through. Those wires create the structure to form and secure the ruffles.
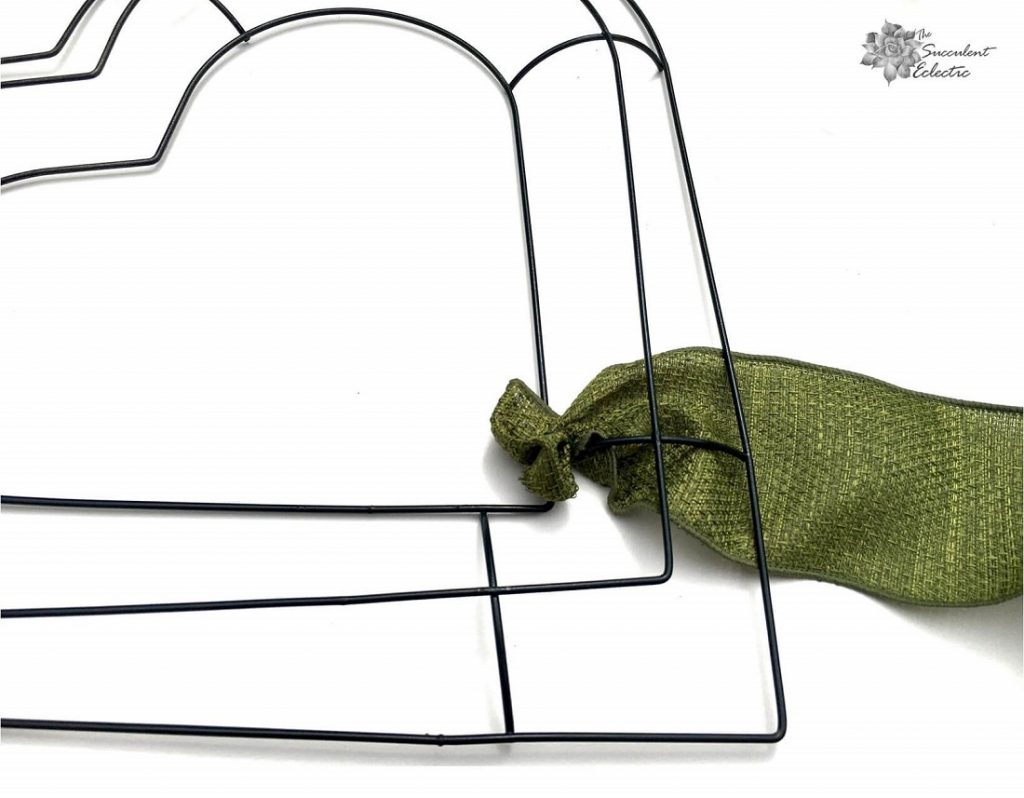
Start by pushing a single loop of the ribbon through from the backside of the wreath form. My heart wreath form is not flat but has a slight curve to it. I made my wreath with the convex side up, toward the front. But I don’t think it makes a difference in the final look of the wreath.
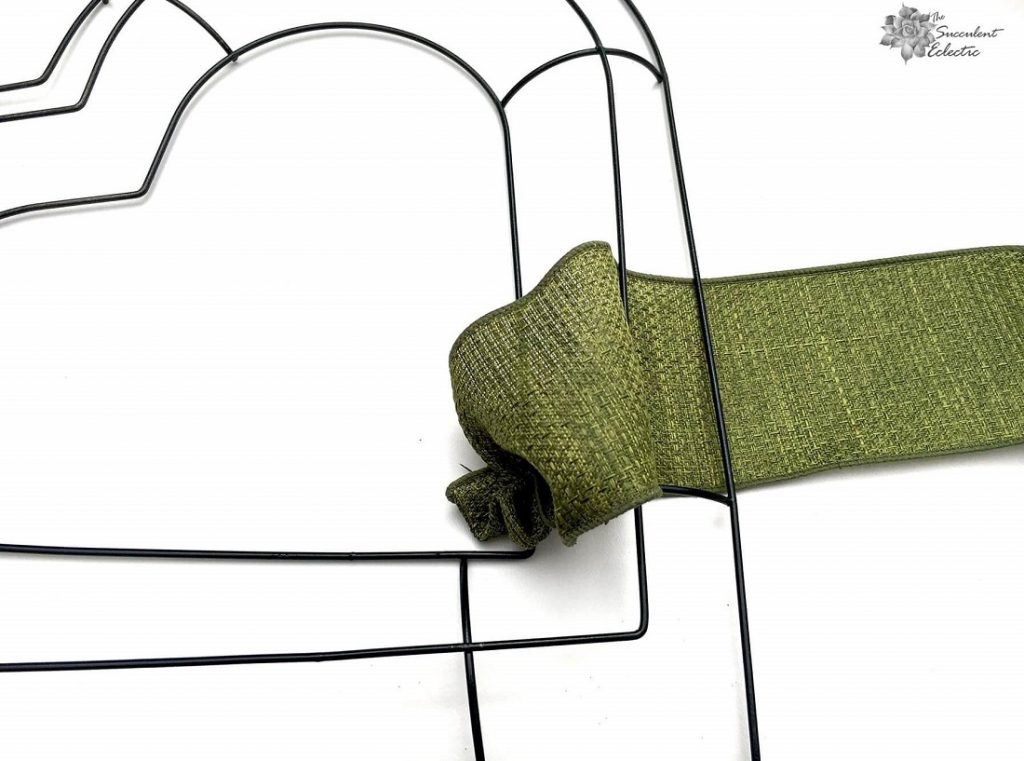
Now, push another loop of the ribbon through from the back. My form has just two sections between the wires, but many circle wreath forms have three sections. Form a loop through each section. Make each loop the same size. My loops are about 2.5 inches tall. No need to measure carefully; just keep them even. And smooth out each loop as you go.
Scrunch and Twist!

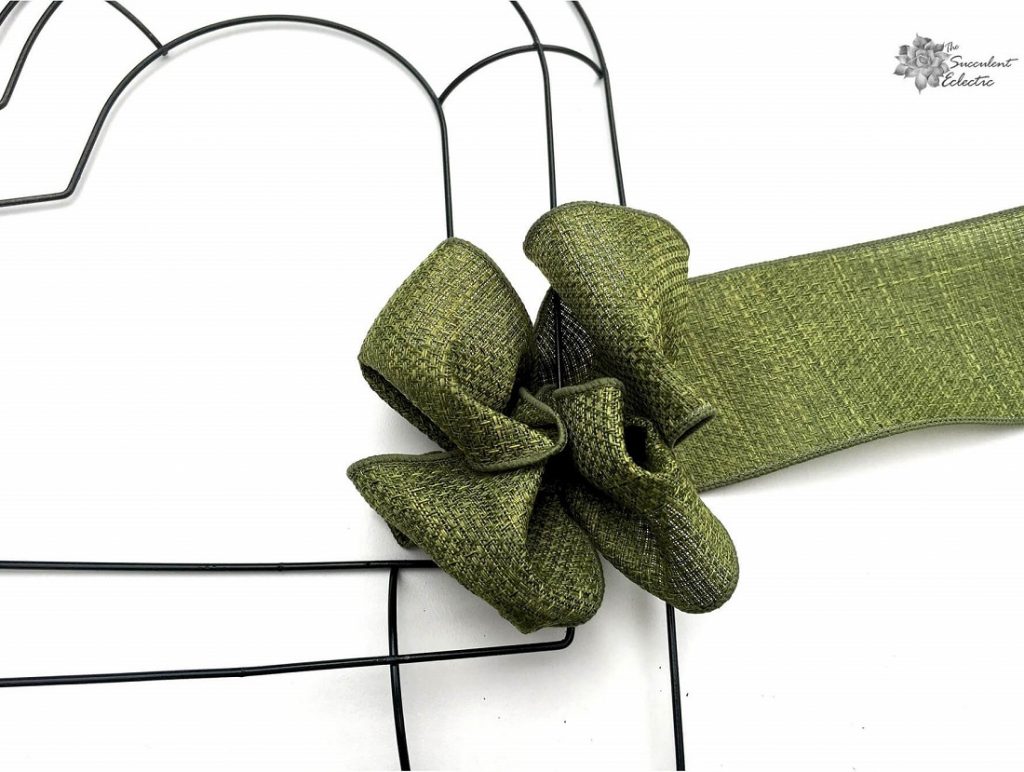
After forming a loop of burlap in each section of the wreath form, scrunch them close to the edge of the wire form.
On the back of the wreath form, tightly twist the burlap ribbon twice. Then, push the ribbon up from the back between the wires to make a third loop beside the first one (or the fourth loop beside the first if your wreath form has three wired channels instead of two like mine!). Make the loop smooth and as long as the first two. Then, make a fourth loop beside the second one.
With two sets of loops scrunched, it will look like this. You can see the ruffles starting to form! At the end of each set of loops, twist the ribbon tightly twice before starting the next loop.
Continue Adding Burlap Loops to the Wreath
When I first made this wreath, I made too many loops and ran out of ribbon before completing my wreath. Again, if you won’t add succulents, I suggest adding more burlap. But with the succulents, you don’t need to add as much burlap to fill in. I made six sets (two loops to a set) of loops for the straight-sided sections of the heart wreath form. I made eight loop sets for the rounded upper portion of the heart. The top center took five sets of loops, and the bottom point took four. It came out exactly even.
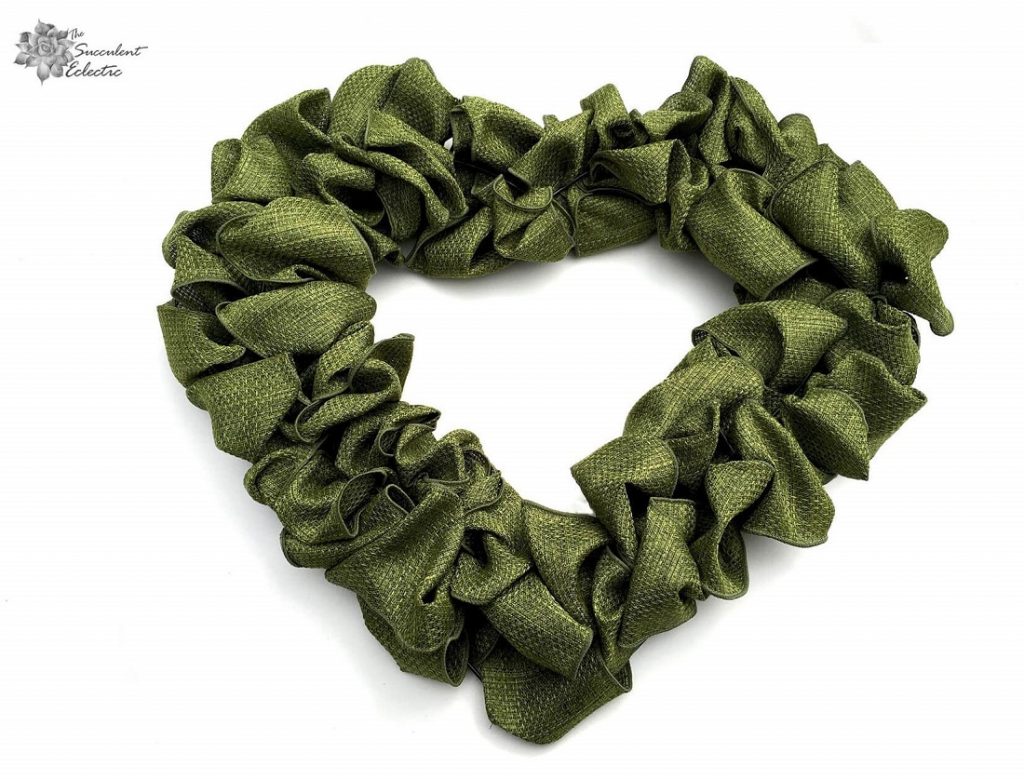
I am quite delighted with it! While it looks nice and full, close inspection will show the wires are not fully covered except by the folded burlap. Again, without succulents, you should add more loops of burlap.
Also, please notice that the way you weave the burlap through holds itself nicely, but it can be undone simply by tugging firmly on the burlap. To sell or give this wreath as a gift, I suggest securing the burlap loops in place with floral wire from the back of the wreath.
Preparing Succulents for Adding to Burlap Wreath
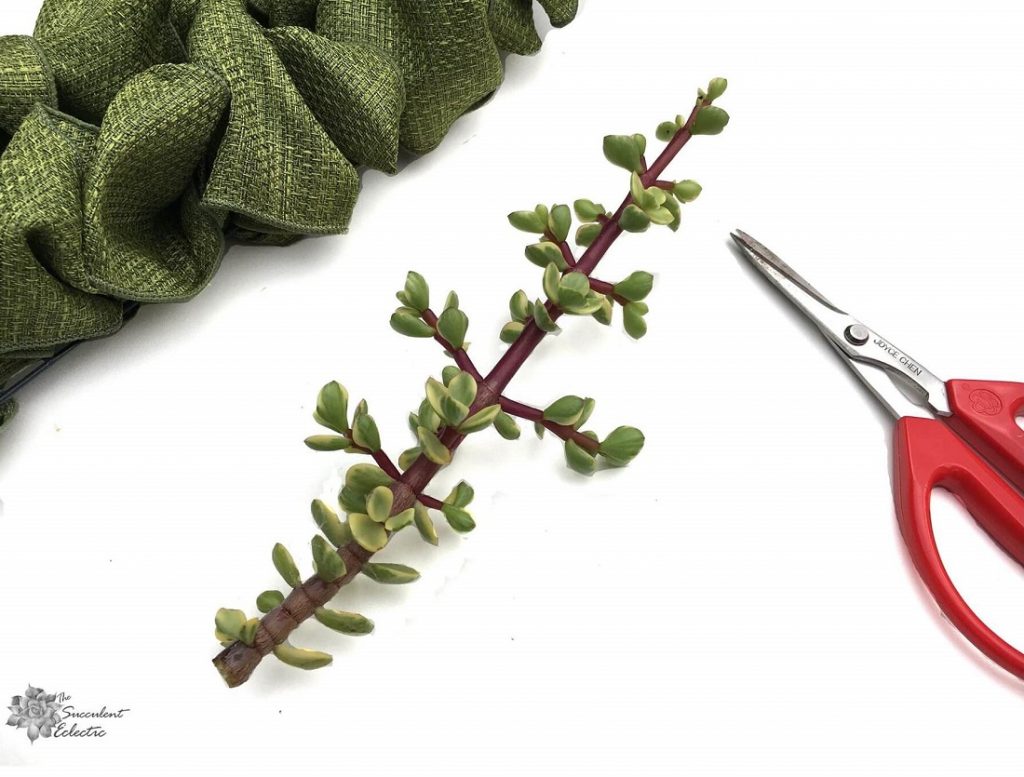
Now, the fun part! 🙂 Let’s add succulent cuttings. Spring is a great time to take cuttings in the garden. I went around my garden, looking for the succulents that looked the best with my burlap ribbon. I always love working with this Portulacaria afra variegata. The deep burgundy stems are perfect against the sage green burlap, and the variegated foliage just sparkles against it. I wanted to use the long, straight stems as well as the much shorter branches, but I wanted to use them separately:
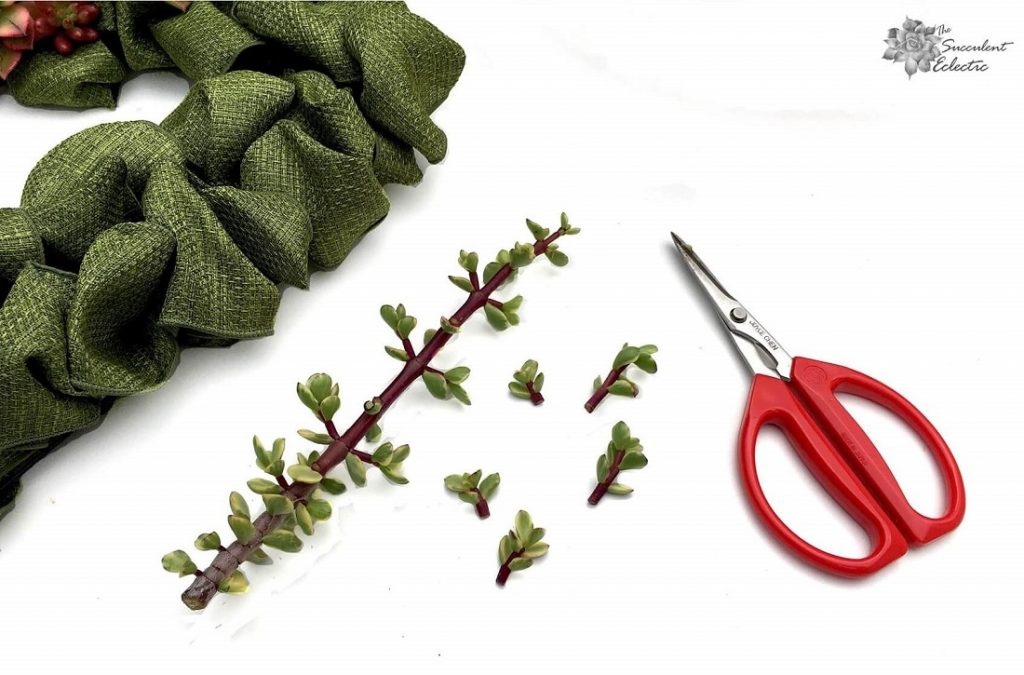
Before applying the succulents to the wreath, gather the cuttings and varieties you want to use. Some, you’ll need to remove some of the leaves. Set the individual leaves aside to propagate at a later date.
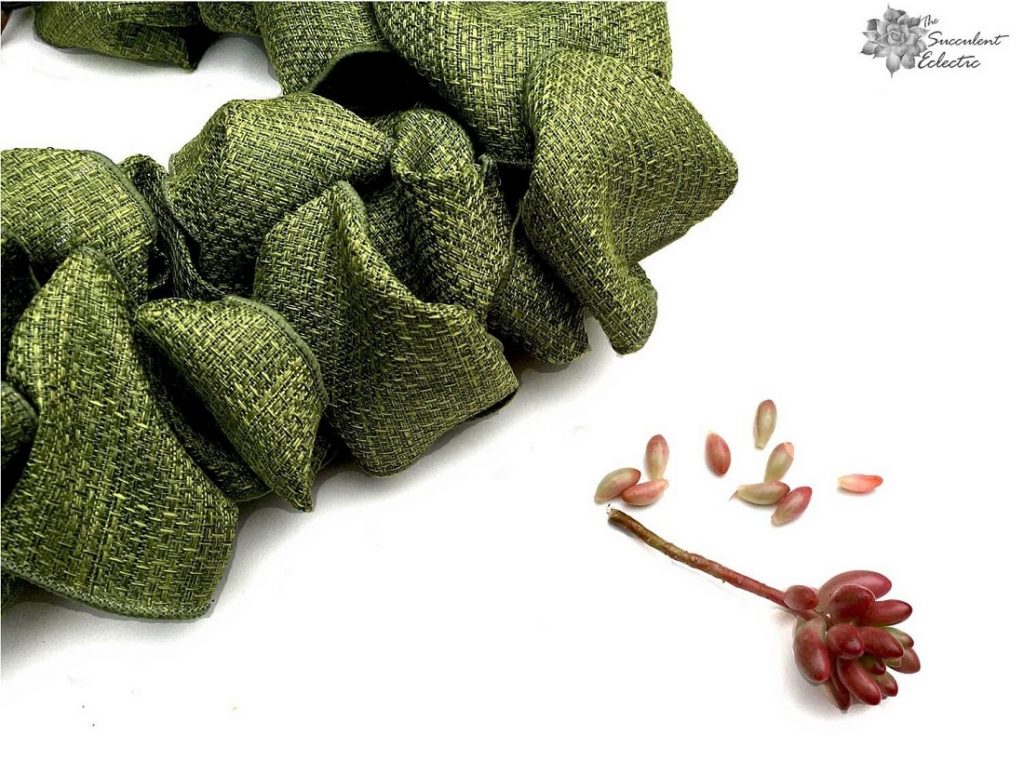
I love both the color and the texture of these Sedum rubrotinctum Aurora. The bright pink to burgundy jelly beans add such a great accent to any succulent arrangement. Keep as much as three inches of stem if you can hide in the folds of the burlap. This leaves the cutting plenty of resources for rooting.
Adding Succulents to DIY Burlap Wreath
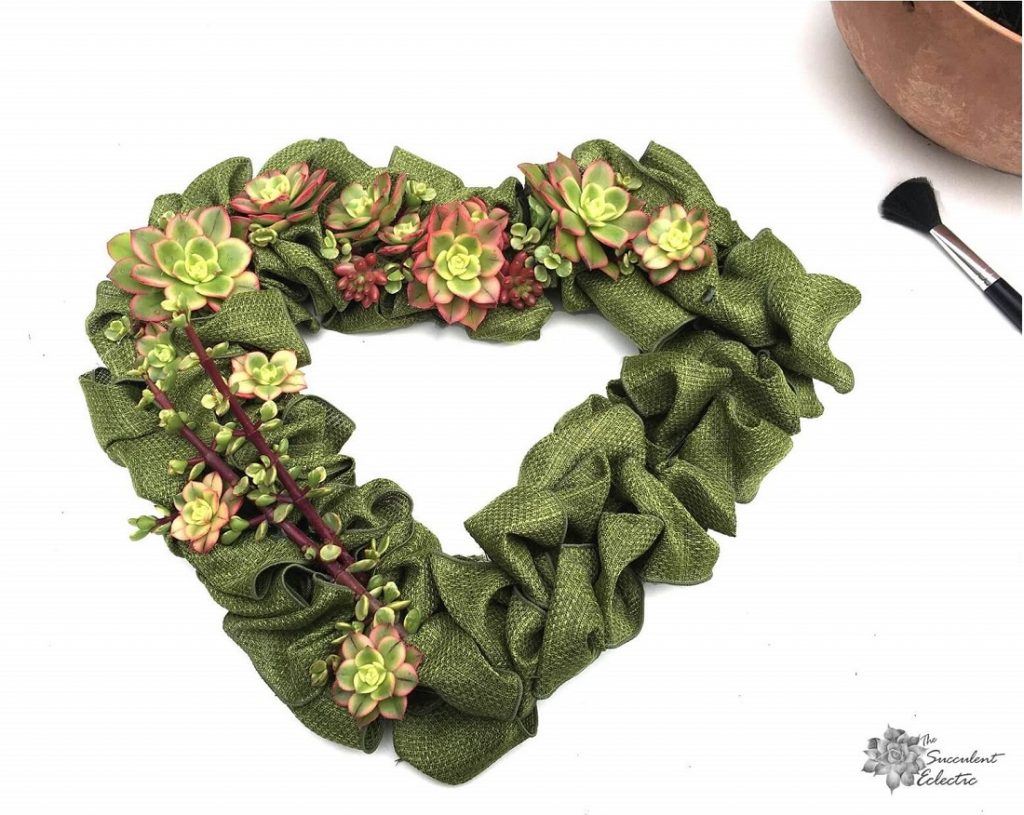
I confess this is not quite the way I originally imagined this succulent wreath. I had initially thought I would include just a few succulents in the bottom left quadrant. So, I started with a couple of Portulacaria and then added a few of the beautifully colored Aeonium Kiwi rosettes. But the more I added, the more I wanted to add — it sort of ran away with me!
Set each succulent cutting against the wreath to see the exact position you want. Then, add hot glue to the back of the cutting and press it firmly into place. Plan out your design and start with placing the largest cuttings first. Doing this reminded me a lot of “planting” succulent pumpkins.
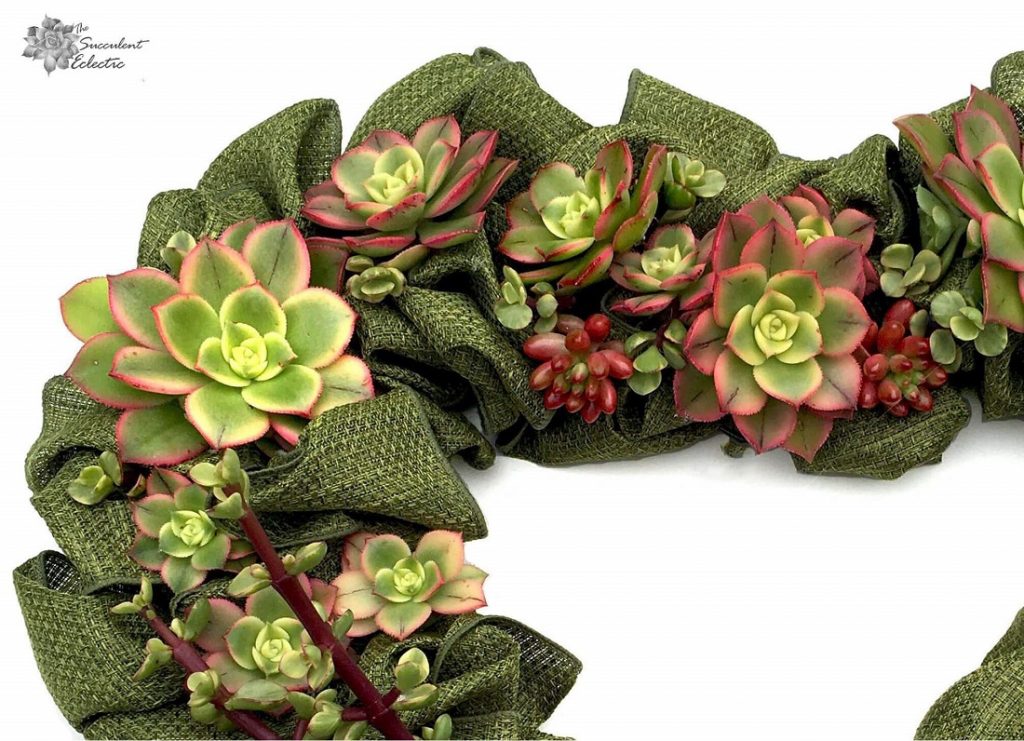
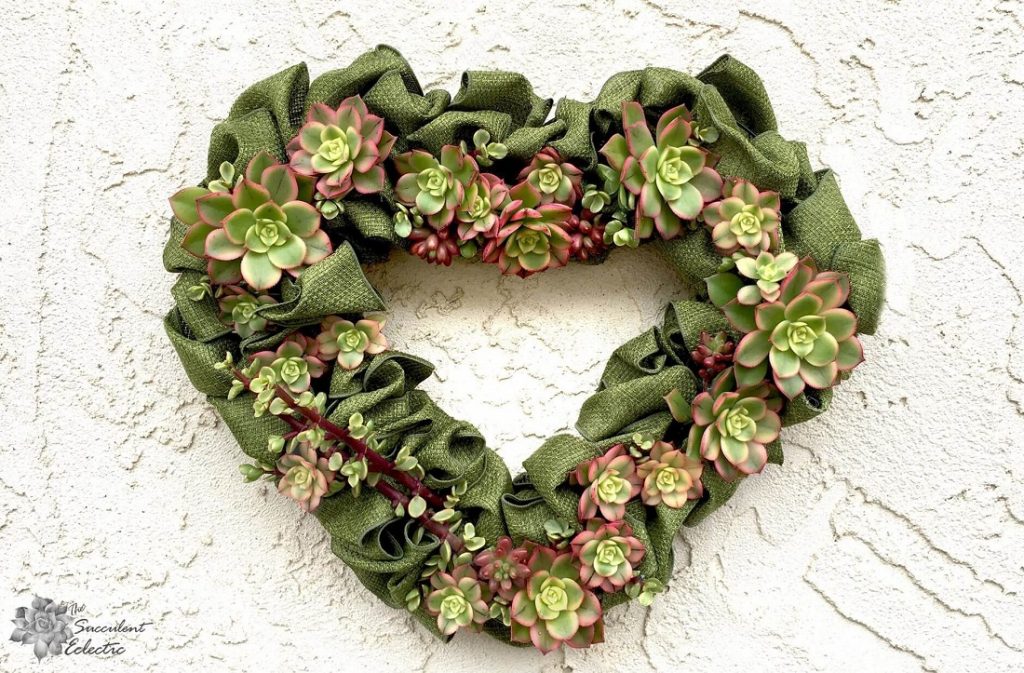
From a distance, it might appear like the Aeonium rosettes make up the entire wreath. But see how the small pieces of Portulacaria just seem to sparkle among the folds of the burlap wreath? And a few pieces of the Sedum make lovely accents of color. You’ll likely have a different selection of succulents to work with. But take a look at how you might use them. Which are the stars of the arrangement? Which works better as accents? Have fun with this!
Finished Succulent Heart Wreath
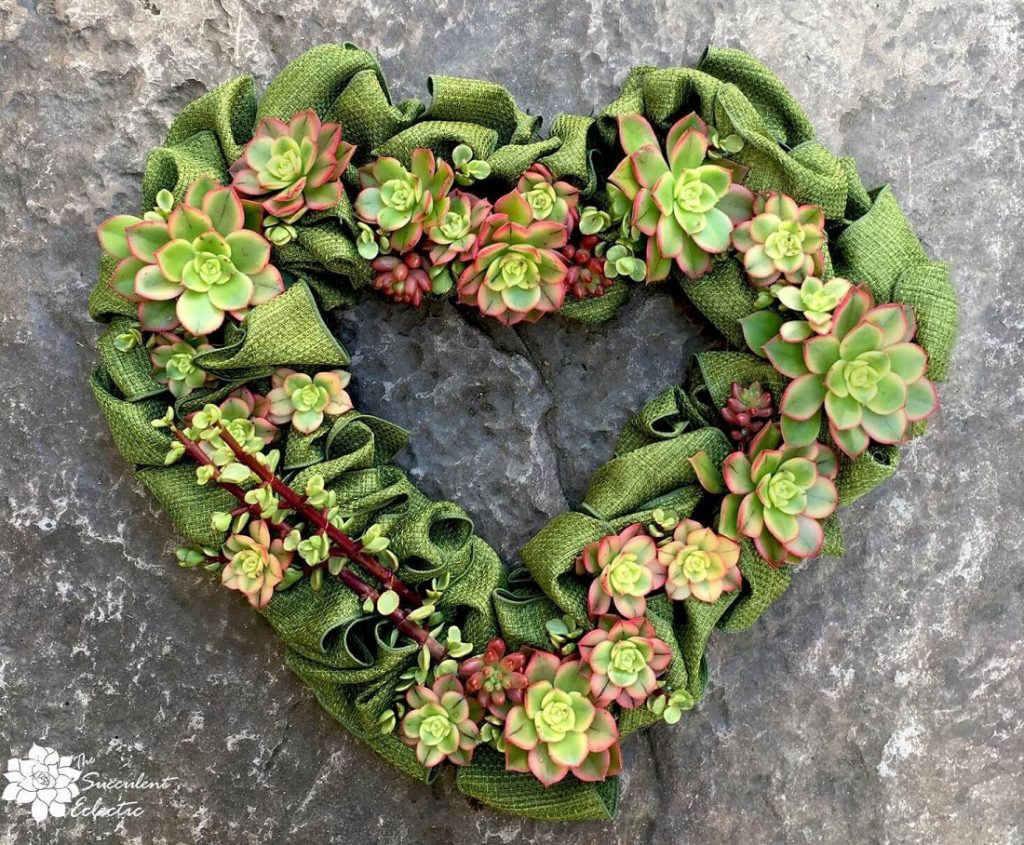
Use the floral wire to add a hanger to the top of the back of your DIY burlap wreath. To care for your succulent wreath, hang it where it will receive bright, indirect light. Remember, the succulents are still living and they need sunlight. They also need water. Every 2-3 days, mist the succulents with water. This burlap ribbon is colorfast and will not discolor – I checked! 🙂
I expect this wreath to last several months and possibly a year or more.
There you have it – my version of a DIY burlap wreath with succulents! What do you think? Are you planning to make your own? I would love to know! Please take a moment to leave a comment. I’m also open to any suggestions!
For Mother’s Day and every day — say it with succulents!

P.S. For more succulent DIY’s and information, please subscribe. You will receive my FREE course, 7 Steps to Succulent Success. Enjoy!
P.P.S. Why not join my Facebook Group for succulent lovers? We talk about succulent care, propagation, succulent identification, and design. It’s a warm and welcoming group that would love to meet you!