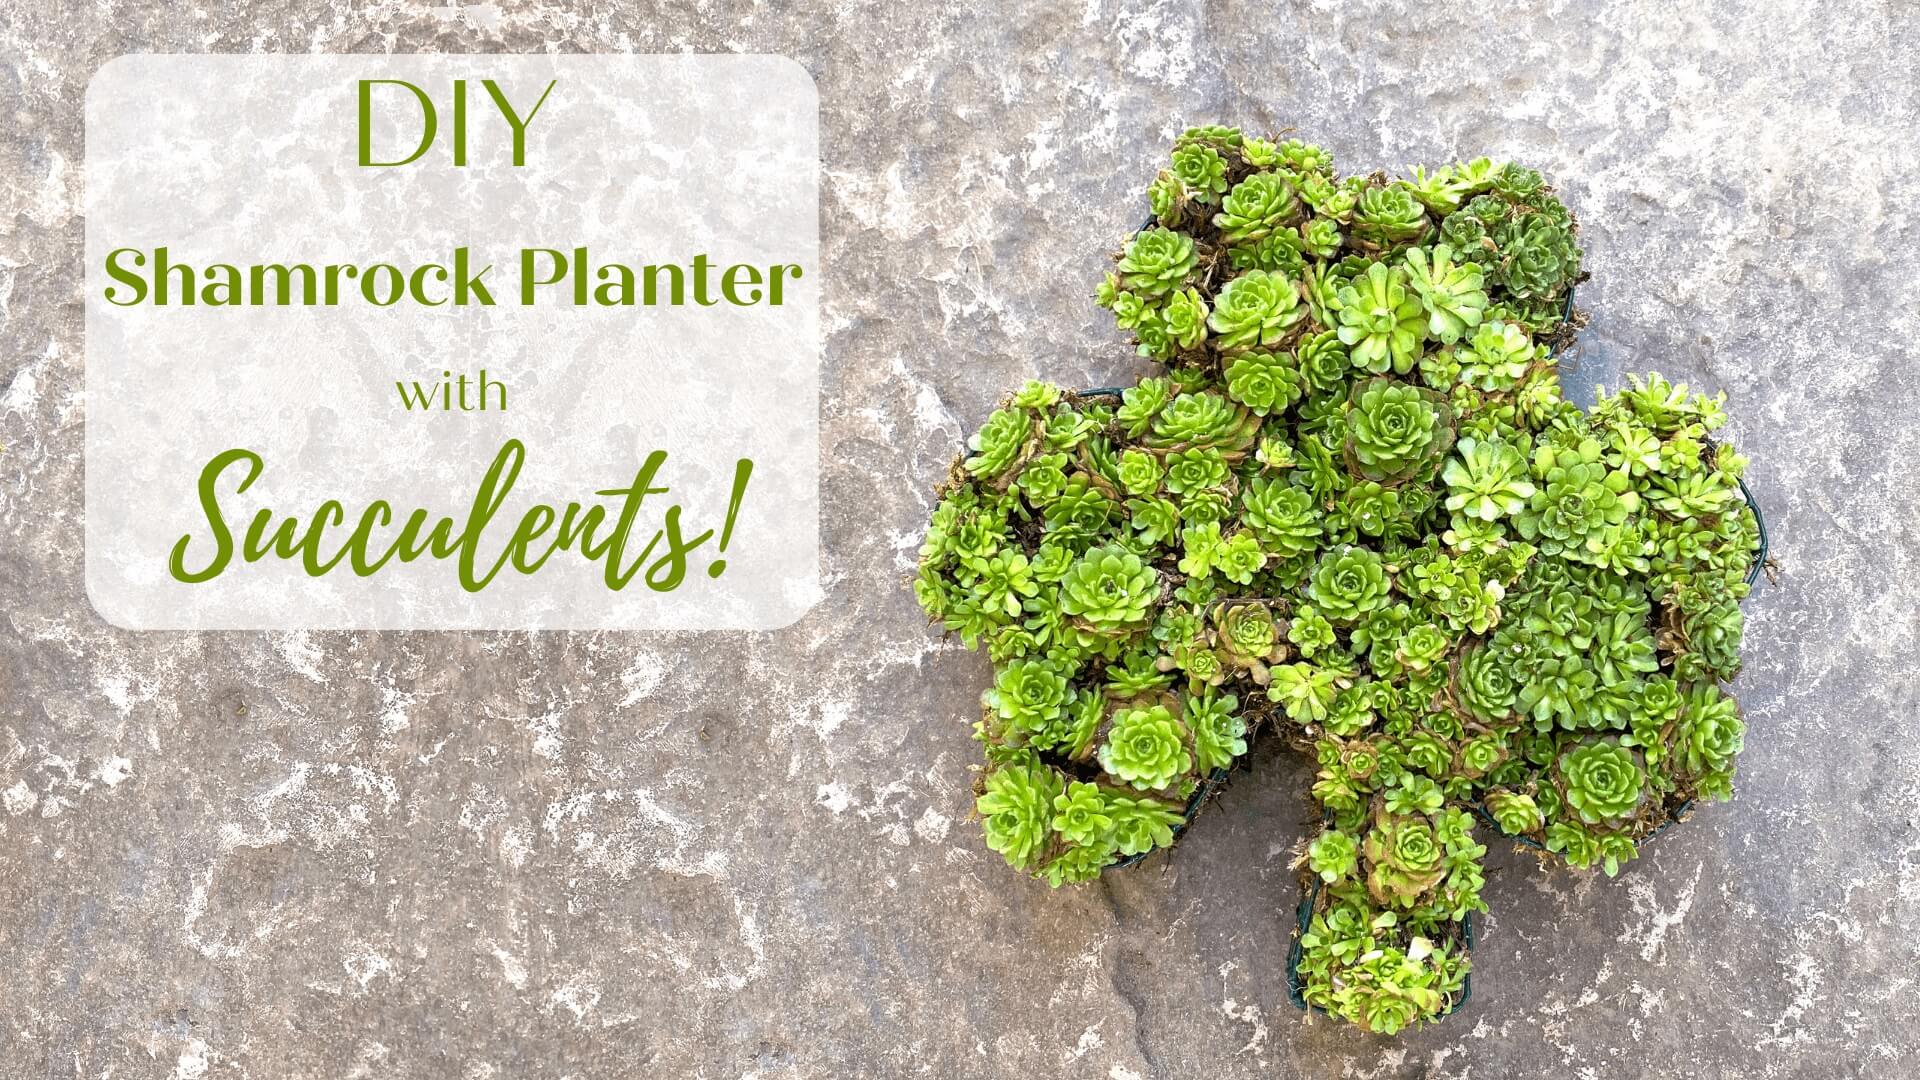
I have always wanted to make a St. Patrick’s Day DIY, but I could never find just right thing. What I was dreaming of was a shamrock-shaped planter filled with succulents. But I couldn’t find a single one! Sure, we could paint shamrocks on a terracotta pot, but I wanted something really different. Finally, I devised my own DIY shamrock planter, and I absolutely love it! Best of all, you can use the technique I’ll show you to make any two-dimensional shaped wire planter you’d like. Maybe a heart-shaped planter or a cat-shaped planter? How about a butterfly or dinosaur-shaped planter — how cool would that be? For now, we’re sticking with a shamrock in honor of Saint Patrick’s Day.
DIY Shamrock Planter – Gather the Supplies
In this Post We'll Cover:
{Please note, some links in this post may be affiliate links to sites that pay me a small commission if you click on the link and make a purchase. This commission is at absolutely no cost to you. I only recommend products and companies that I have worked with and truly love! ~Kat}
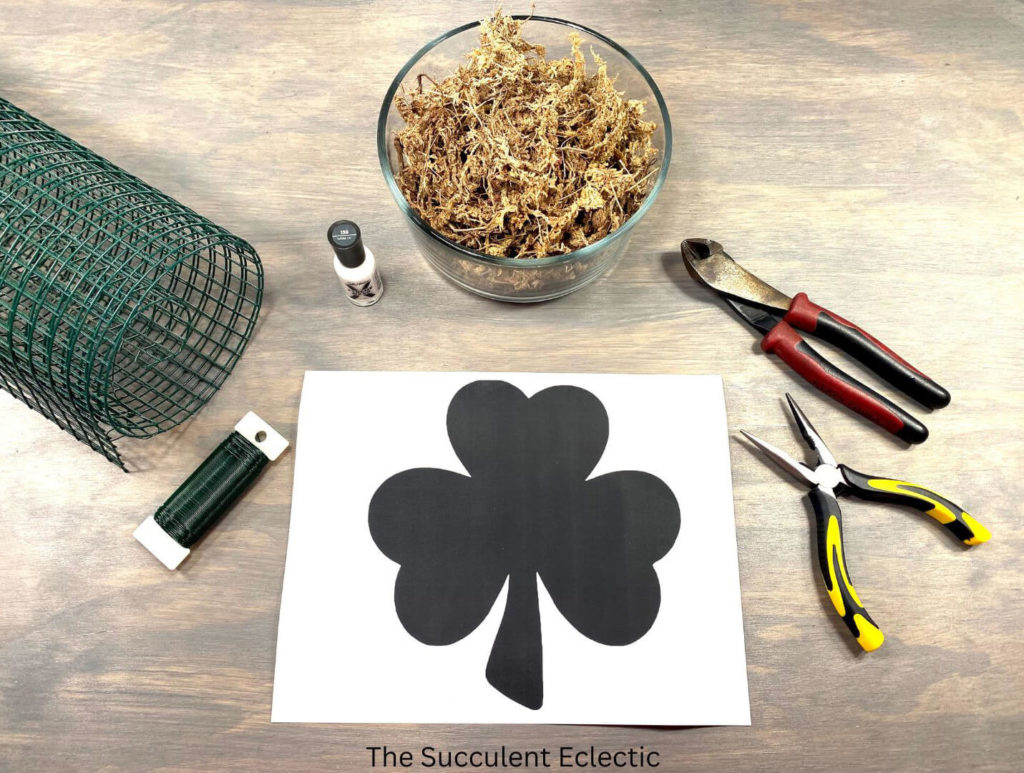
To make your DIY shamrock planter or a wire planter in any shape at all, you will need the following supplies:
- Vinyl-coated 1/2-inch mesh steel hardware cloth (wire mesh)
- 22 gauge floral wire
- Sturdy wire cutters
- Needle-nose pliers
- Work gloves for fine detail work (optional)
- Long-fiber sphagnum moss
- Shamrock shape printout (below) or any shape printed out
- White or bright-colored nail polish
- Wooden chopstick
- Soft-bristle brush
- Low-growing succulents (best types and quantities discussed below)
I’m going to walk you step-by-step through the entire process of making and planting this DIY shamrock planter. First, let’s focus on making the wire planter. Then, we’ll discuss how to choose the right succulents for it. It makes a difference!
As I described in my succulent topiary heart, I prefer to work with the vinyl-coated hardware cloth because it is less pokey and easier on my hands. The hardware cloth is a sturdy wire mesh that needs strong clippers to cut through it. Lighter wire clippers intended for jewelry-making will not be up to the job. And the cutters on the needle-nose pliers are too awkward for the tasks. You’ll want both the cutters and the pliers for this project.
Creating the Wire Planter Shape
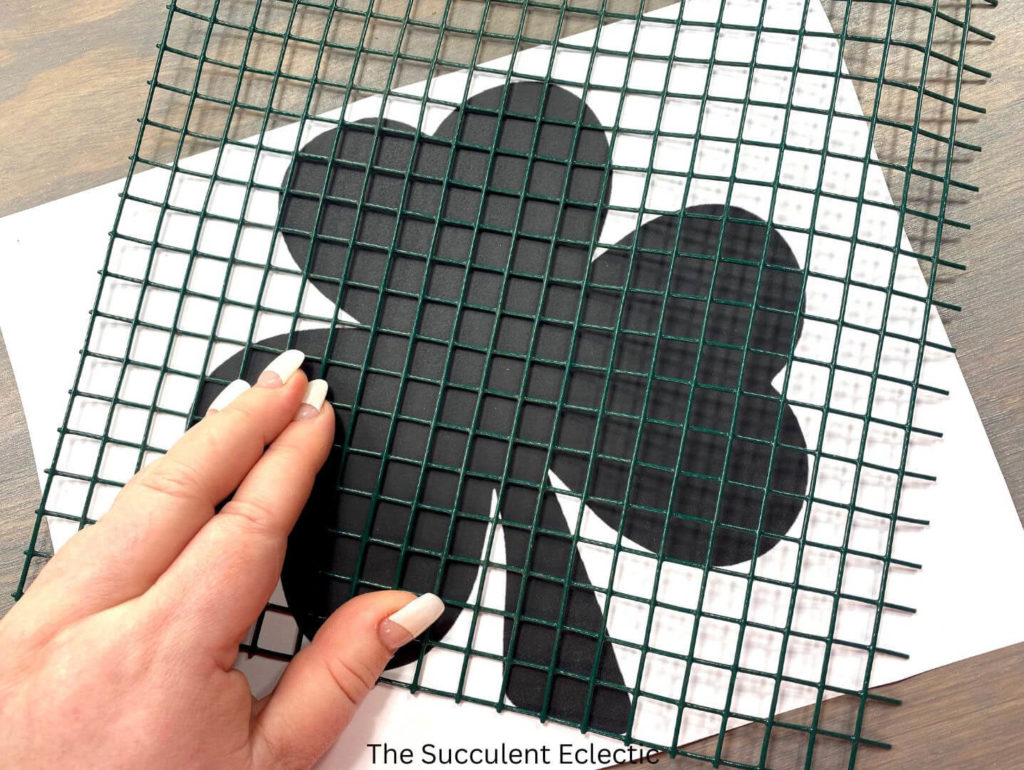
To create a wire planter in any shape you choose, you must start with a printout of the shape in the size you want the planter to be. Lay the wire mesh over the printout. You can download the shape I used for my shamrock-shaped planter here:
Since the base of my shamrock’s stem is straight, I lined it up with the edge of the hardware cloth. This isn’t necessary, but it is a helpful reference point later.
Mark the Shape on the Wire Mesh

To create the shamrock planter, first, we need to cut out the shamrock shape from the hardware cloth. To do this, we use the printout as a template. Using the white nail polish, mark each wire along the outline of the shape. Take care not to move the paper or the wire mesh as you work. Make a mark at every single place the wire overlaps the edge of the shamrock.
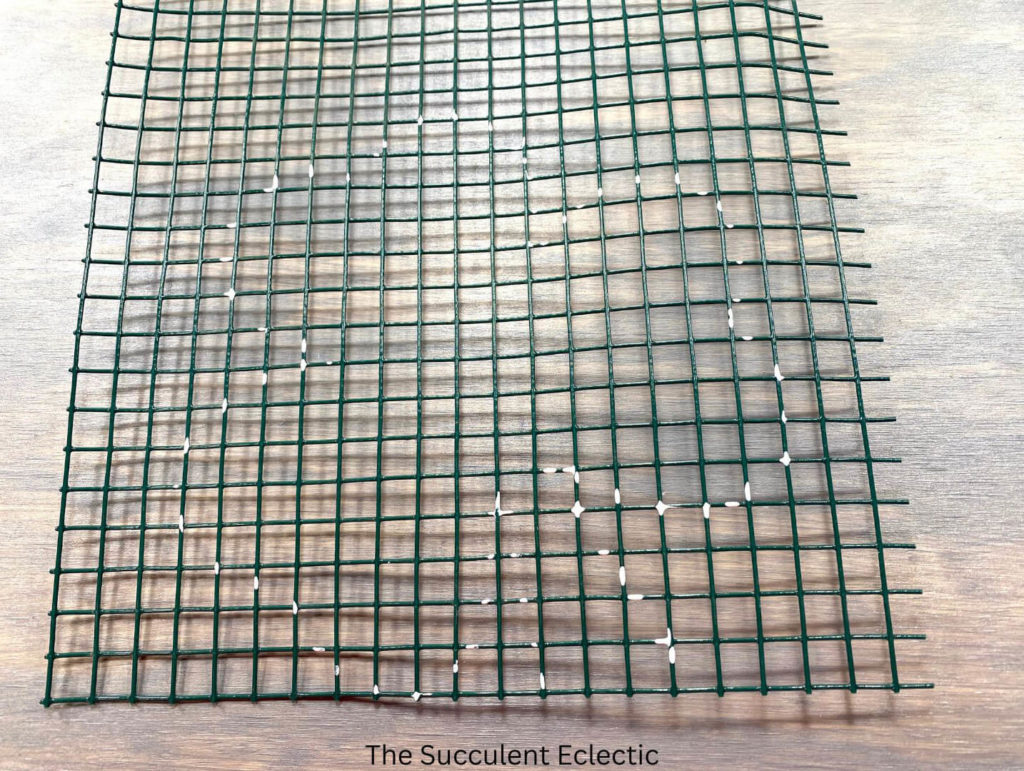
When you have marked the entire shape, remove the template. Do you see the shamrock shape here? Now, carefully cut the wire mesh at every place you painted white with the nail polish. As you do so, if you get lost in the shape, lay the wire mesh over the template again to see where you are. I needed to do this a few times, and having the edge line up with the stem base really helped.
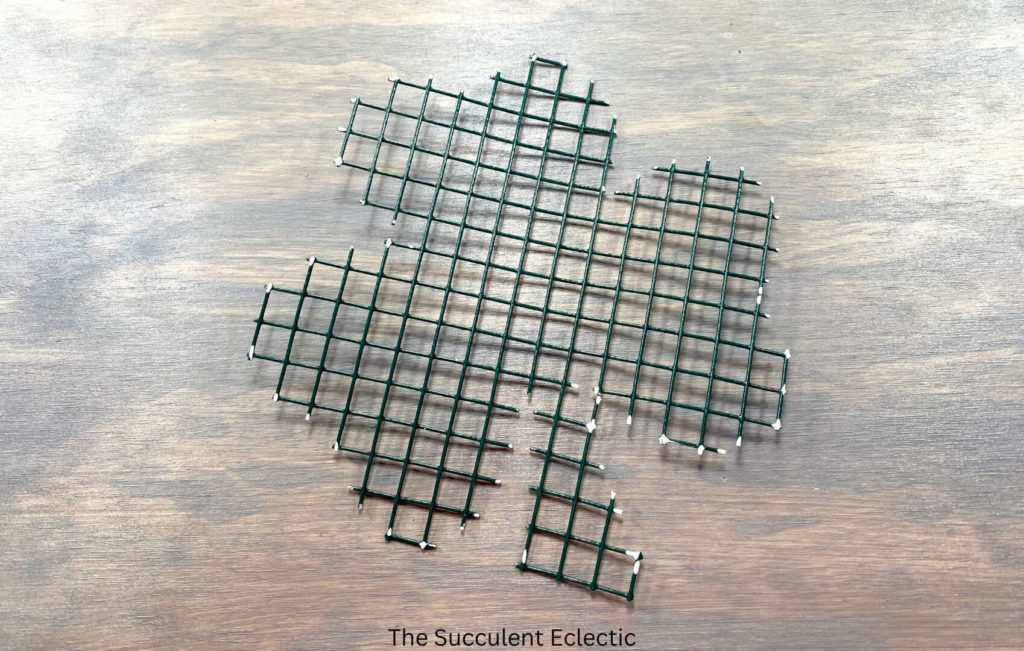
When you finish making the cuts, you’ll have the base of your DIY shamrock planter all cut out. Now, we need to add the sides.
Making the Sides of the Wire Planter
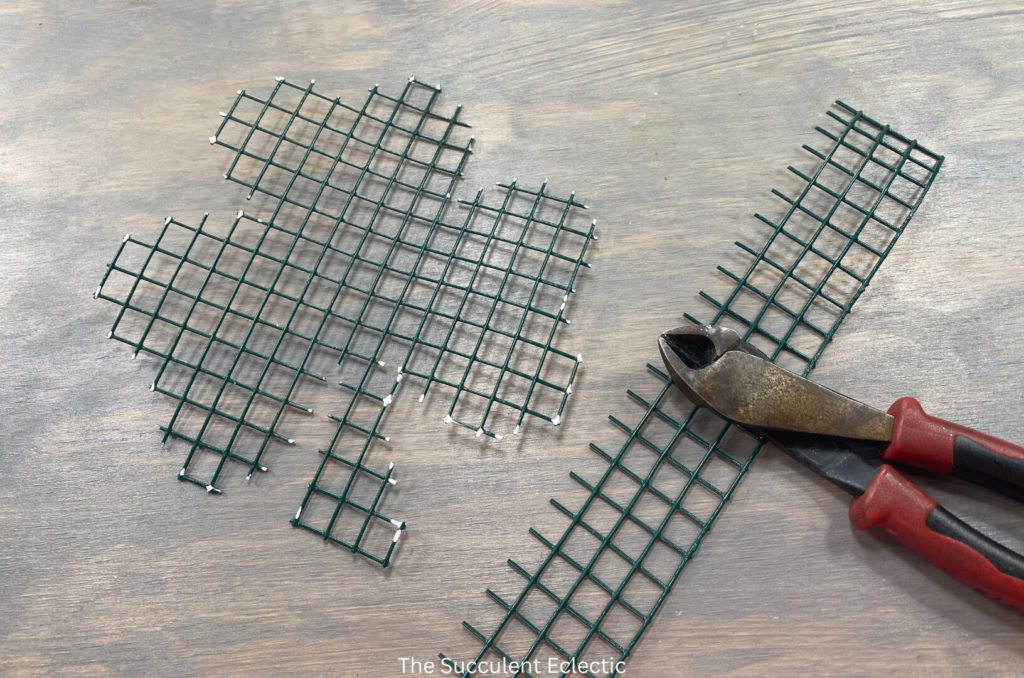
I made a few of these planters as I worked out the concept. I decided that making the sides three squares high gave me the right depth for the succulents I was working with. It also gives the planter a nice stability. My hardware cloth is 1/2-inch at each square, so the side of my wire planter is 1.5 inches high. To make it easy, cut one long strip from the finished edge of your heardware cloth. It took me 77 squares to go all the way around my shamrock. Give yourself some extra length to work wiith. You can certainly make the wire edge in pieces, but I found it easier to make it in one long piece.
Bend the Cut Edges of the Wire
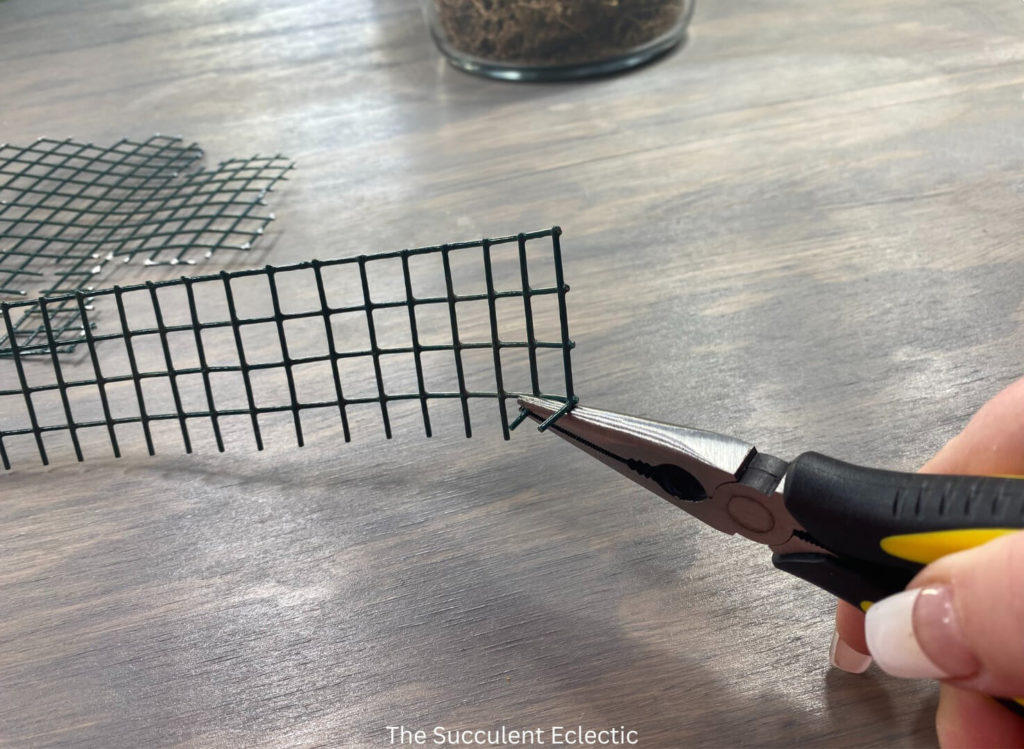
Before connecting the wire side to your shamrock planter, use the needle nose pliers to bend the cut wires into a 90-degree angle. Be careful with this step. Just make one bend on each wire. Although the hardware cloth wire is strong, it is a bit brittle, and will break with repeated bending.
Stitch the Side to the Wire Planter Base
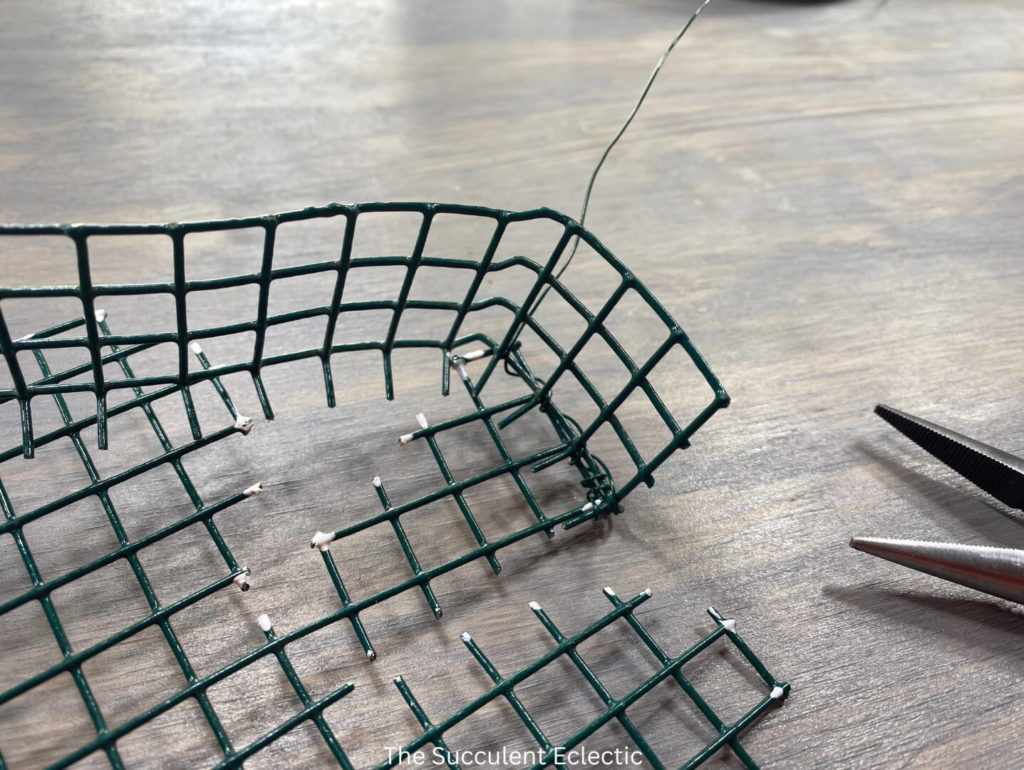
Cut a strand of the floral wire, and start stitching the side to the planter’s base. While the floral wire is far thinner than the hardware cloth, it stands up to repeated bending and curling. Using the needle nose pliers, pull each “stitch” taut. I started at the flat end of the shamrock stem. Bend the wire mesh of the side to follow along every bend and curve of the base that you cut.
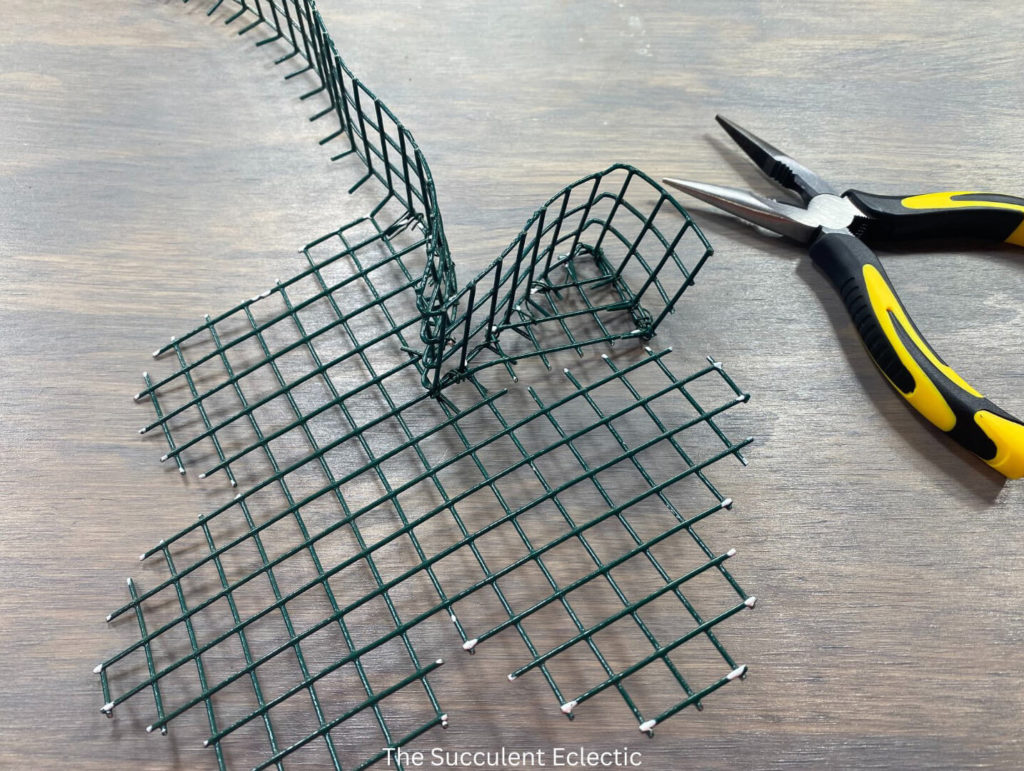
Make as many stitches as you need to securely attach the wire mesh side to your planter’s base. Occaisionally, loop the floral wire around the bent wire from the side as you stitch the bottom and side together. Take your time and follow the shape you cut out. It took me about two hours to completely stitch together the wire planter. Put on your favorite pod cast or an audio book.
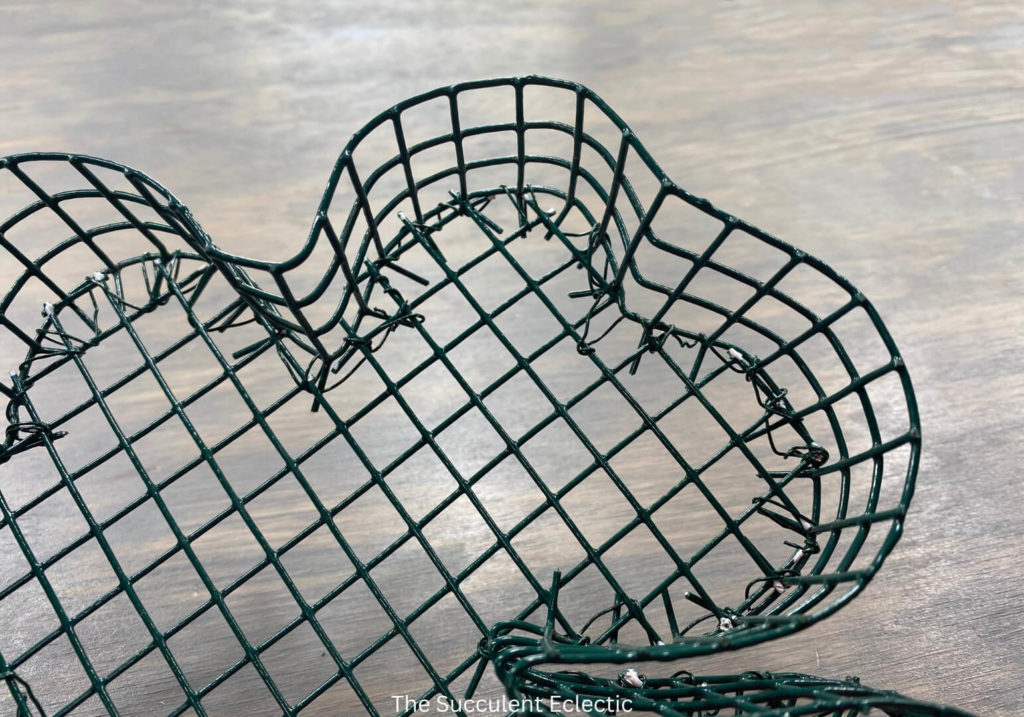
I tried to be neat, but you can see that my stitching won’t win any awards! But that’s ok. No one will see it.
The final planter is impressively sturdy. Now that your planter is built — it’s time to fill it with succulents!
Planting Your Shamrock Planter
Soak the long-fibered sphagnum moss in water to make it soft and pliable. Then, squeeze out the excess water, and fill the planter with the moss. This is the growing medium for your succulents, so be generous. The succulents will happily root and grow in the moss. Before continuing, let’s discuss the choice of succulents for your wire planter.
First, you want only low-growing succulents. You don’t want any plants that will grow too tall and fall out of the planter. And, while the moss is a good growing medium, it will not anchor the plants as firmly as soil would, so we don’t want any that will grow top heavy. And you don’t want plants with thick, bulky root systems (Haworthia, I’m looking at you). Fenestraria, Sempervivum, Sempervivum heuffelii, Rosularia, and low-growing Sedum are ideal choices. How gorgeous would Anacampseros ‘Sunrise’ be? Because I was planting a shamrock planter, I wanted to stick with all the same plants in green. I selected cold-hardy Rosularia platyphylla, a bright, chartreuse green rosette succulent with occasional salmon pink margins. Lovely!
I am delighted with my choice for the shamrock. However, I am already looking forward to making a new wire planter in a different shape. I think a bunch of different colored Sempervivum mixed with low-growing Sedum will look fantastic! I just haven’t decided what to make — there are so many options! What do you think? An initial? Maybe a kitty cat, a saguara cactus, or the state of California? What to choose?!
Dividing Riosularia
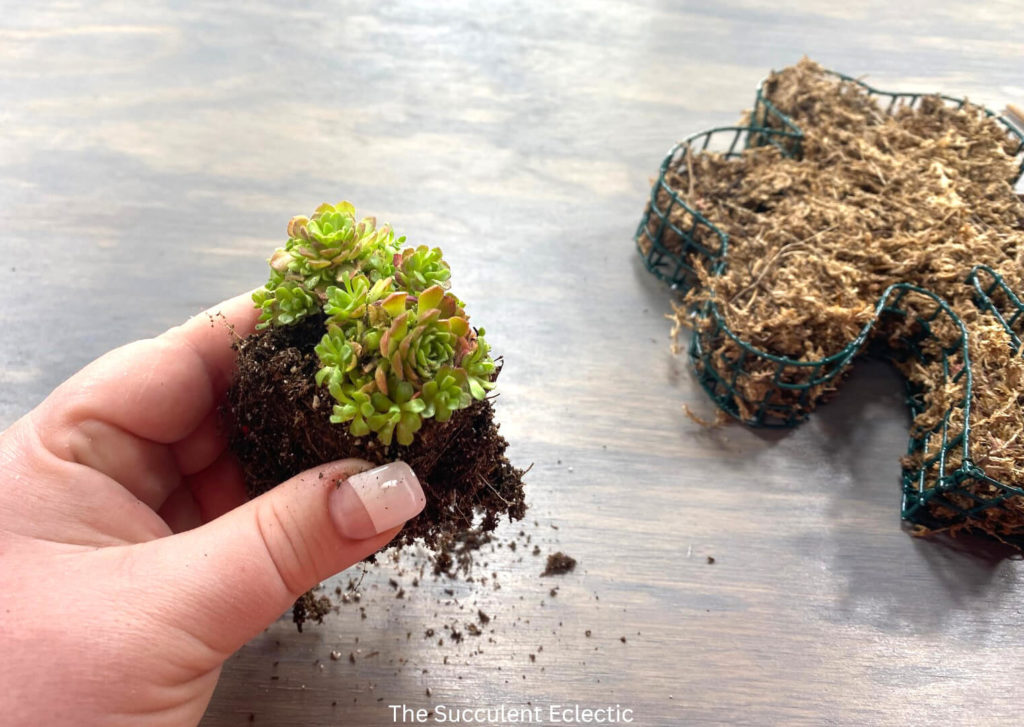
Rosularia makes loads of rosettes that tuck into one another and even build on each other. That’s exactly the look I wanted. However, to avoid any bare spots of soil and to give the rosettes a bit more room to grow, I gently divided the succulents.
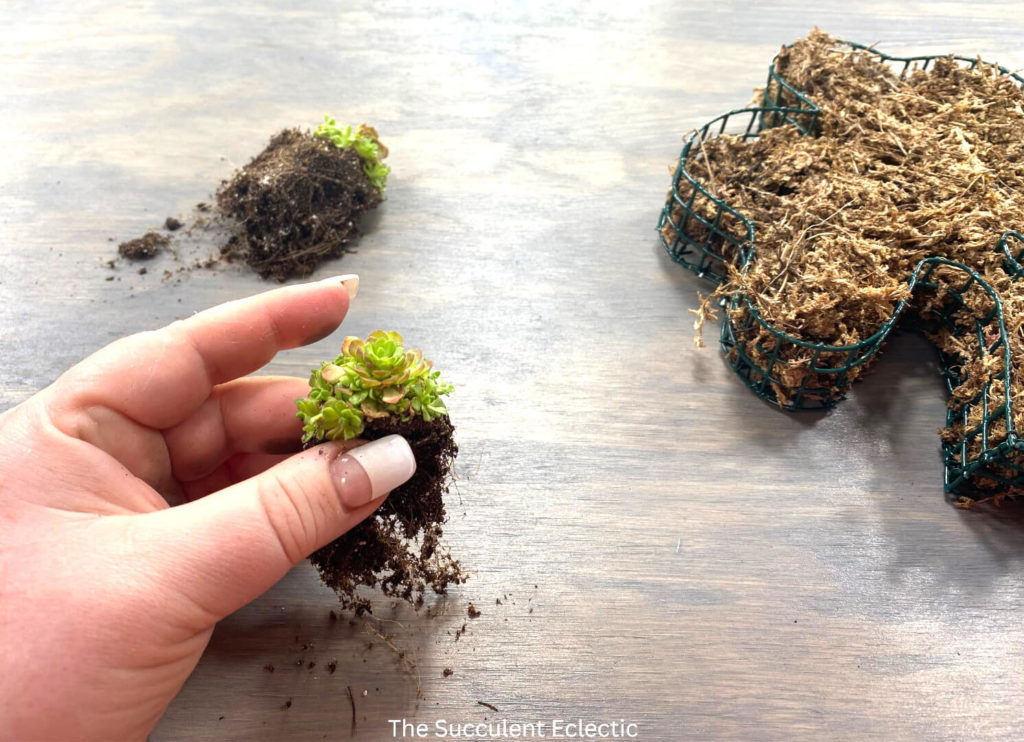
Next, knock away all loose soil. This allows you to tuck the roots right down in the moss.
Planting the Shamrock Planter
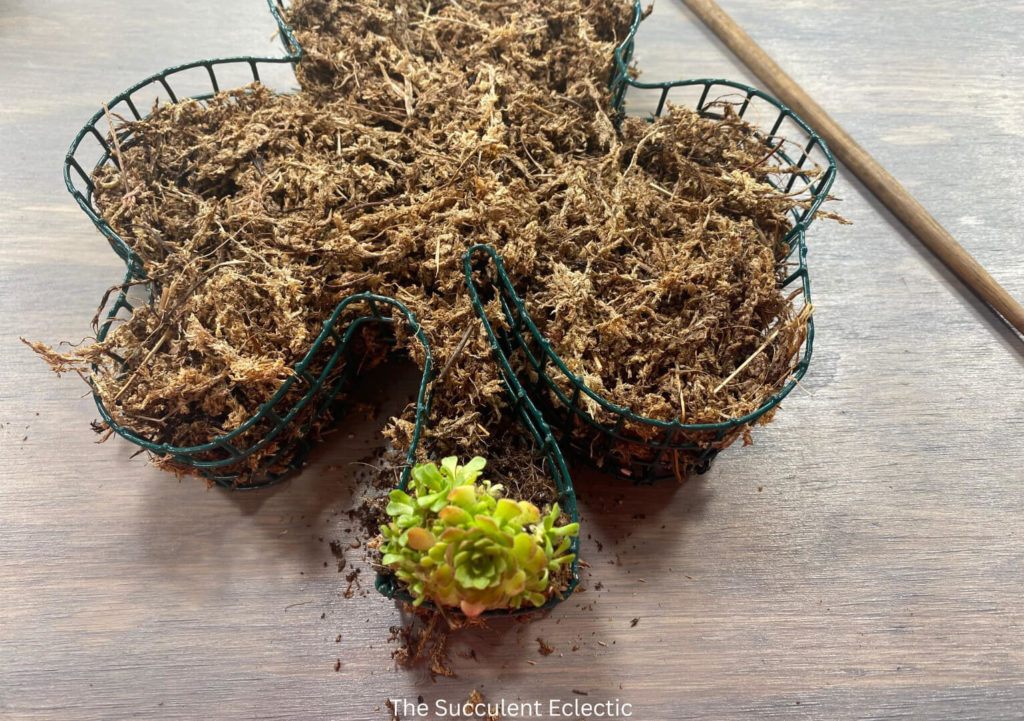
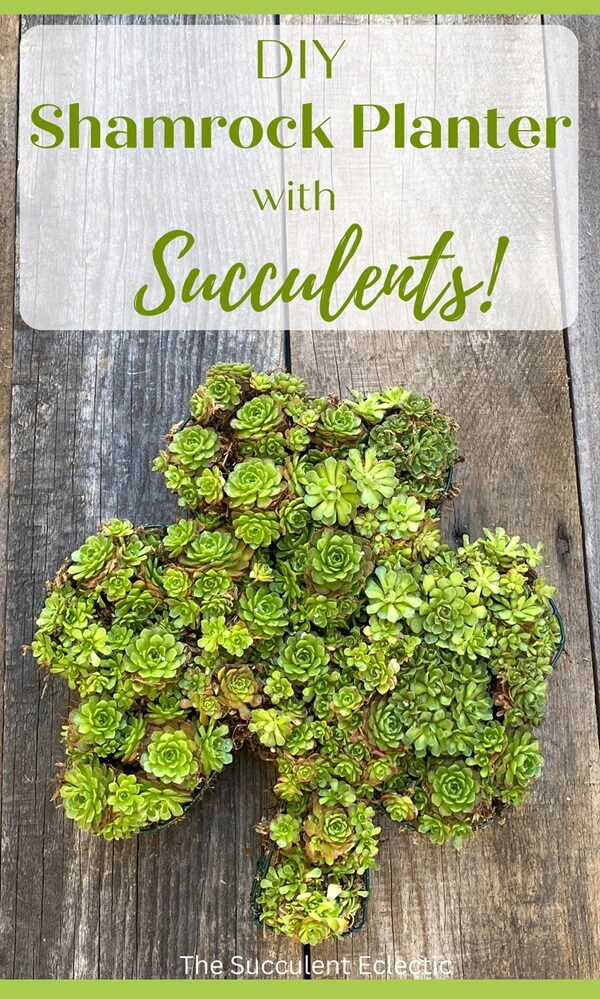
As I planted my shamrock planter, I wanted it full os succulents from edge to edge. Rosularia with its many (many) small rosettes was a perfect choice! I was able to divide each plant into pieces that filled each niche of the planter.
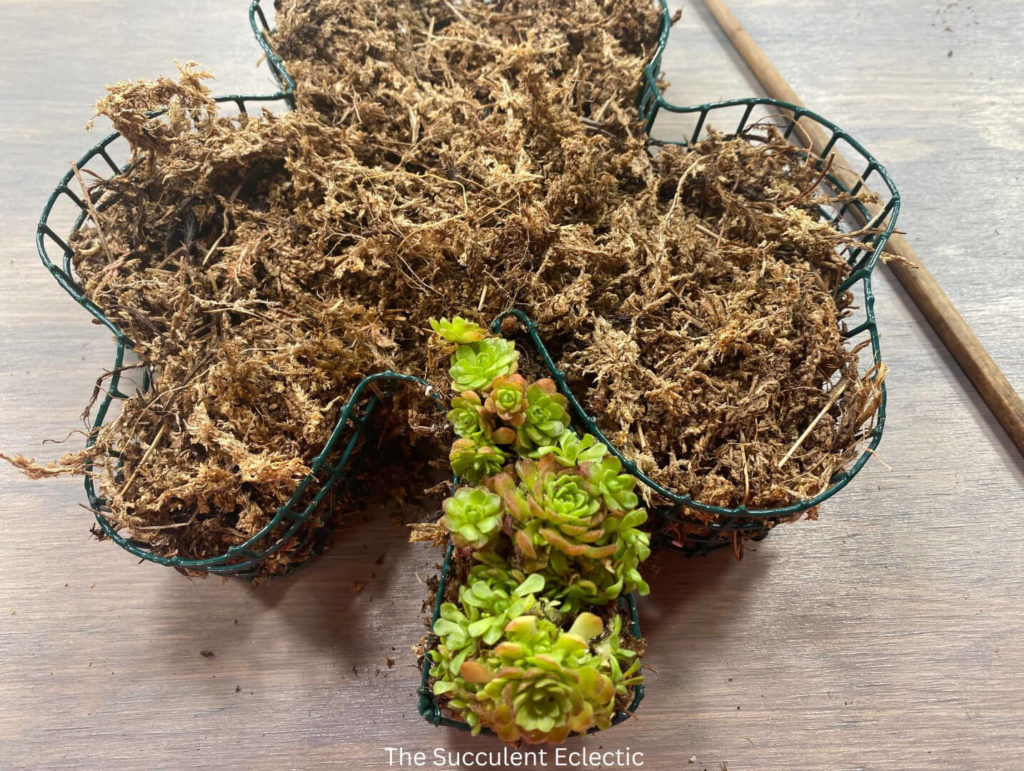
In this closeup, you can really see the lovely margins on the Rosularia! As you plant, remove some moss, tuck in the plant roots, then cover them with more moss.
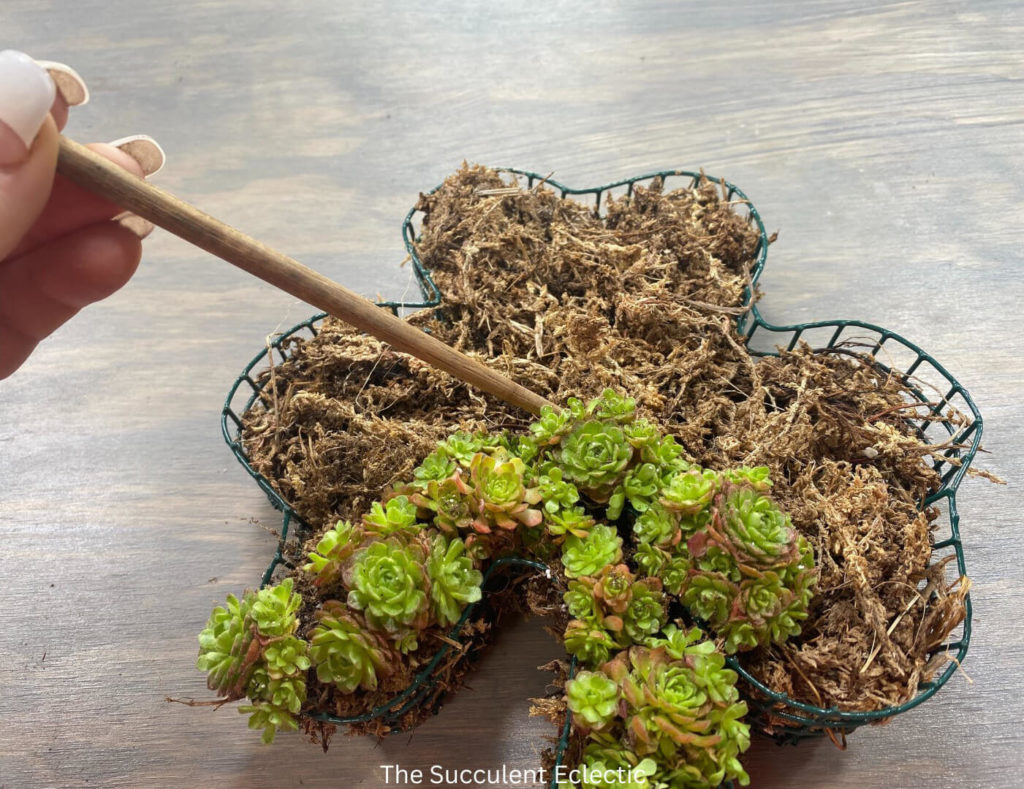
The chopstick is the perfect tool for making space in the moss and tucking in the roots
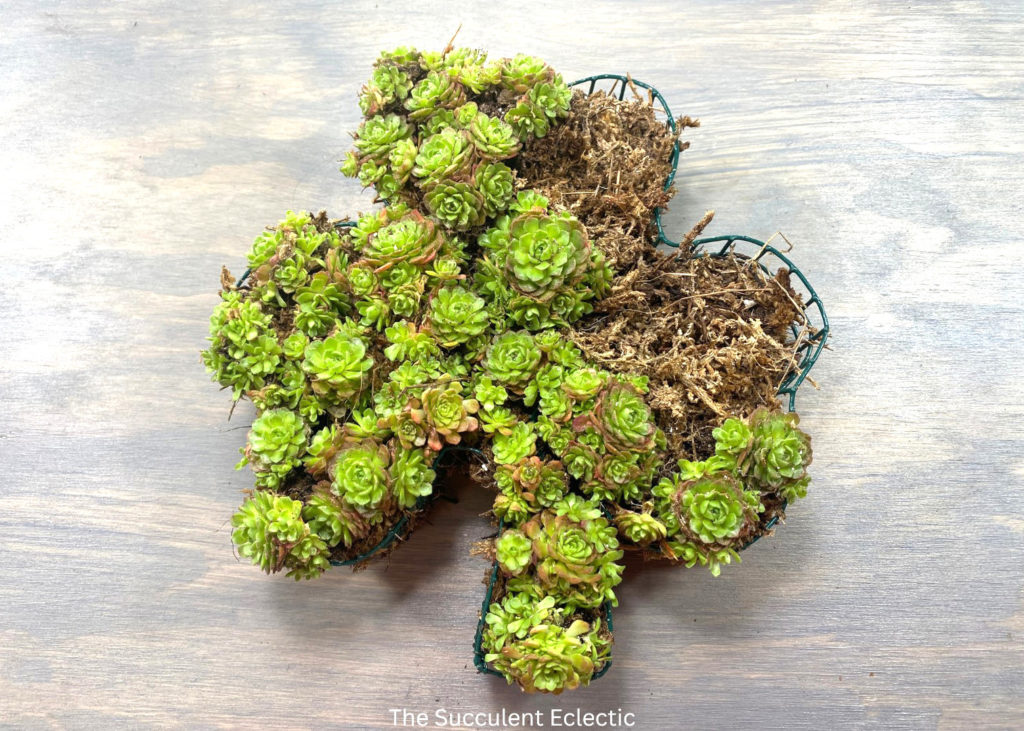
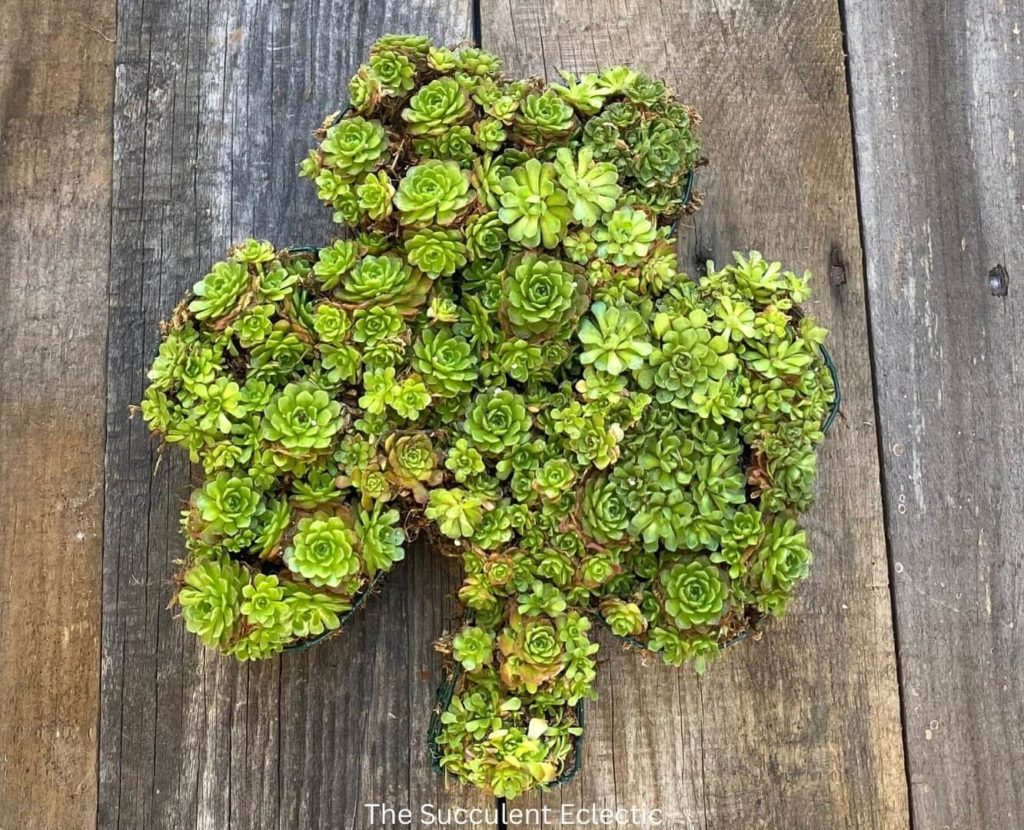
Originally, I ordered twelve 2-inch pots of Rosularia for my planter. But planting them as close as I like — this is how far I got. It took me another six plants to complete the shamrock planter. Once it was filled, I went back, tucking in small bits of moss and tiny rosettes into any spaces that needed it.
Finished Shamrock Planter!
And here is my finished DIY shamrock planter with succulents! What do you think? I am ridiculously pleased with it.
Watering your wire planter couldn’t be easier. While you can water from the top, I prefer setting the planter on a plate or in a catch tray of water. The moss soaks up the water well, yet releases it easily, so the roots remain healthy. And, of course, you simply cannot beat the drainage on this planter!
Once your succulents have had a chance to fully root in, say two weeks or so, you can hange your planter on a wall or a fence.
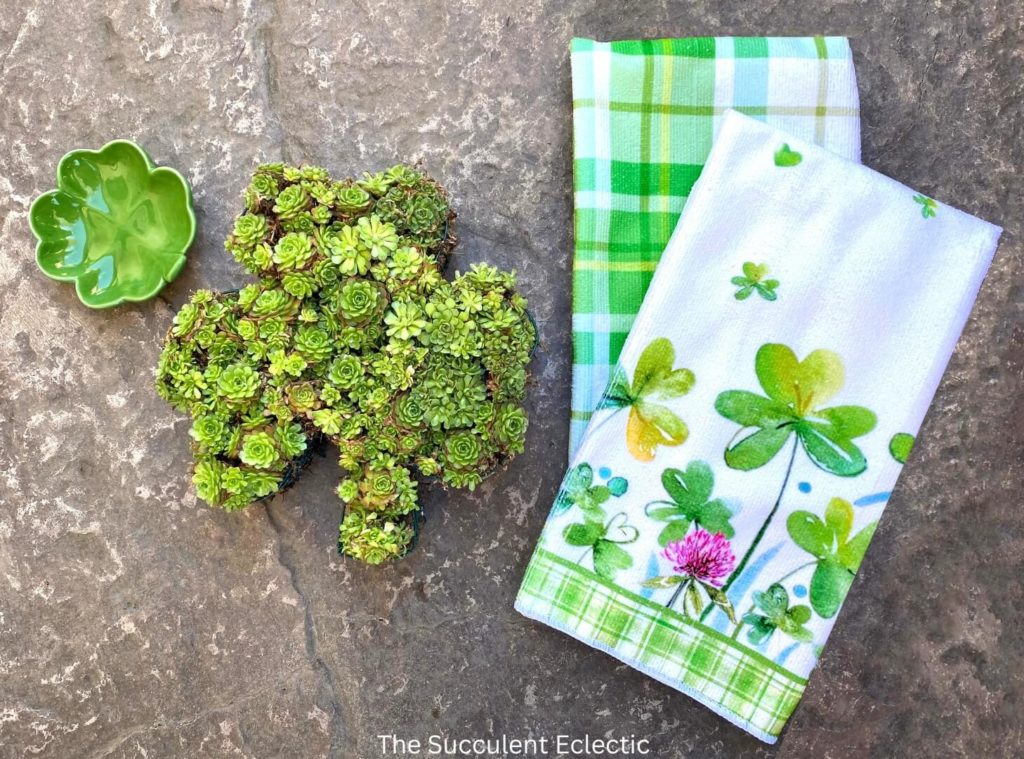
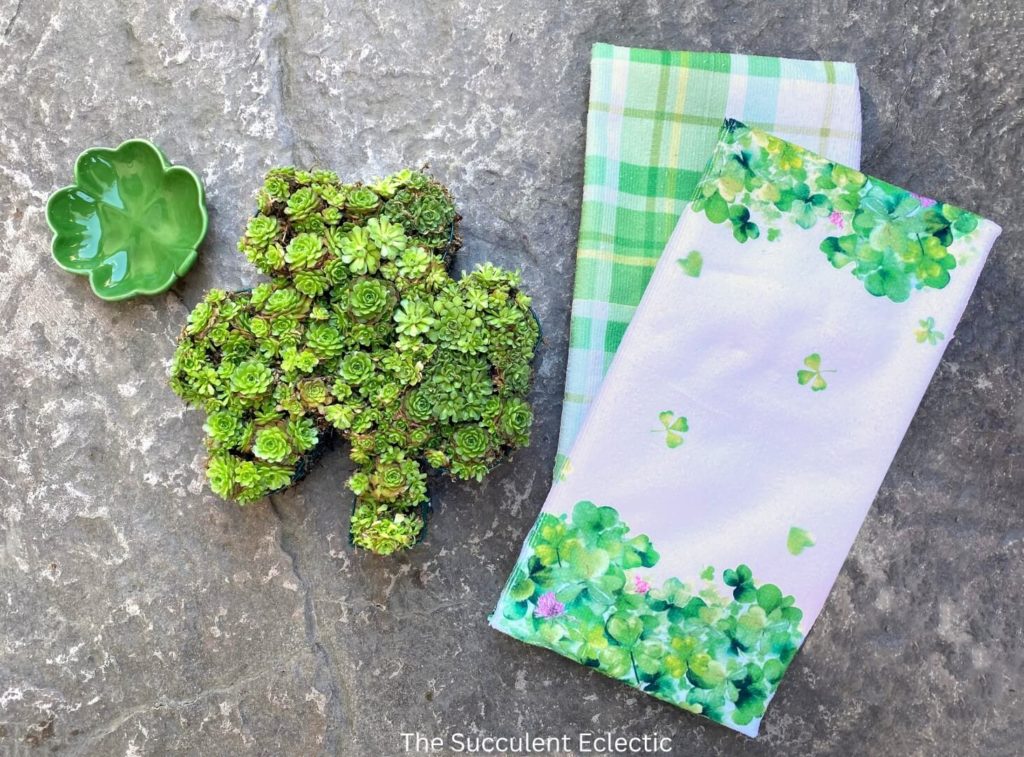
I found these adorable shamrock dish towels and the ceramic ring dish on Amazon. Bring on St. Patrick’s Day!
So, what do you think? Will you be making your own DIY shamrock planter? Or maybe a wire planter in an entirely different shape? I would love to hear! Please take a moment to leave me a comment. And be sure to have a
Happy Saint Patrick’s Day!
Because life is just better with succulents!

P.S. For more fun succulent projects and care info, please subscribe. I’ll send you my FREE course, 7 Steps to Succulent Success! Thanks so much!
P.P.S. Why not join my Facebook Group for succulent lovers? We talk about succulent care, propagation, succulent identification, and design. It’s a warm and welcoming group that would love to meet you!


Thanks, Vong!
Definitely want to be careful with the type of succulents you use in this planter. Those with fine, shallow roots are ideal.
~Kat
Thanks so much!
And you’re so right! My stitching will never win any awards! LOL! But you don’t notice it in the final planter.
I would LOVE to see your ME planter filled with your questionable life choices! 🙂
~Kat