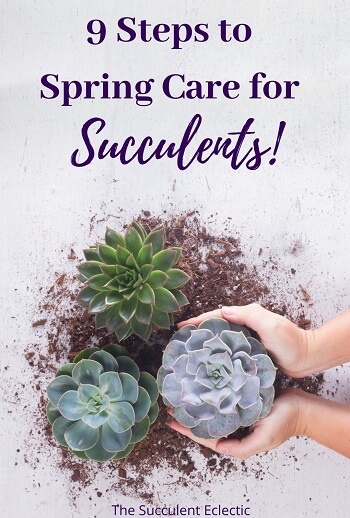
Can you feel it? Spring is just around the corner! There’s a lot to do in the garden to get ready for the season. Although some succulents go dormant in summer and some in winter, all succulents are wide awake and actively growing for spring! Now is the time to get your succulents ready to make the most of this season of light and warmth so they’ll grow healthier and more beautiful as well as larger. So, let’s take a look at the 9 steps you should take toward spring care for succulents.
Spring Care for Succulents
In this Post We'll Cover:
{Please note, some links in this post may be affiliate links to sites that pay me a small commission if you click on the link and make a purchase. This commission is at absolutely no cost to you. I only recommend products and companies that I have worked with and truly love! ~Kat}
Preparing Succulents for Spring

Every step of spring care for succulents is important. But if you want to jump ahead to specific steps, they are:
- Cut Back Etiolated Succulents
- Acclimate Overwintered Succulents to the Outdoors
- Review, Clean and Tidy Succulents in the Garden
- Prune Overgrown Succulents in the Garden
- Root Cuttings and Propagate Leaves
- Refresh Succulent Planters
- Refresh Worm Castings
- Refresh Top Dressings
- Fertilize Succulents
Click the link above to jump to that section of this post. But be sure to review all 9 steps at some point! 🙂
Cut Back EtiolatedA plant is etiolated (EE-tee-oh-late-ed) when it grows very ... Succulents

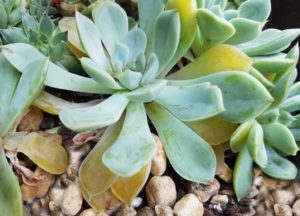
If you overwintered your succulents indoors, you almost certainly have seen many of them etiolating or stretching for more light. In the image on the left, you see three different ways this Echeveria is striving to maximize the sunlight on its leaves. First, it has stretched unnaturally tall, reaching for the sunlight it “knows” must be up there, somewhere. It also is leaning severely to one side. Any time your succulent leans off to one side like this, it is an indication that it is leaning toward a visible source of more light. You can also see that each leaf is pointing down. This is to expose the maximum leaf area to the available light.
The best way to prevent etiolated succulents when growing them indoors is by using a succulent grow light. But that’s an issue for next winter. Step 1 of spring care for succulents is to correct any etiolated succulents you have. To do this, you want to cut off the top of the stretched succulent, essentially beheading it. This sounds drastic, I know, but I promise you, this does work! Make your cut leaving ideally one to two inches of stem below the compact rosette. Gently remove the leaves below the rosette to uncover the nodes and leave the stem bare. See below for information about how to root your cuttings. Set the leaves aside for leaf propagation.
Continue to care for the rooted base of the plant. It will produce new top growth. This is your opportunity to grow it in a more balanced form.
Acclimate Overwintered Succulents to the Outdoors
When it’s time to move overwintered succulents back outdoors, remember to acclimate the plants to direct sunshine. No matter how strong your grow lights are or how sunny your windows, they don’t have the plant-burning power of the sun. Move your succulents from indoors to direct sun outdoors gradually, so as to let them gradually build up their protective pigments. This gradual acclimation is necessary to protect your succulents from sunburn.
Acclimation is an important part of spring care for succulents, but it is equally important any time you introduce a succulent to a new environment. Almost certainly, the succulents you buy at the nursery, big-box store or online were grown under shade cloth. So be sure to take the time to let your succulents prepare themselves before exposing them to potential scarring or even death due to sunburn.
Review, Clean and Tidy Succulents in the Garden
Spring care for succulents isn’t just about reintroducing over-wintered succulents to the outdoors. It’s also about getting the succulents growing in your garden ready for spring growth. This is the season all succulents are wide awake and actively growing, so get them off to the best start possible.
It’s a good idea to remove spent leaves, inspect the succulents for broken stems, insect activity or any winter damage. The most effective pest control is prevention, so take this time to clean up fallen leaves, dust away cobwebs, remove spent blooms and in general tidy up your plants. Debris and dead plant matter make a great home for a variety of insects and their eggs. Set aside any fallen leaves that are still plump for later propagation.
This review also provides you an opportunity to review your garden succulents’ needs. Do you have an empty space to plant? Are some of your succulents becoming crowded and need to be moved? Maybe some need more light or more protection from full sun. Make note of these issues, to address in the near future.
Prune Overgrown Succulents in the Garden

The next step for spring care for succulents is pruning back any overgrown succulents or succulent branches. This is important to keep plants from becoming lopsided, stressing the plant as it grows. You may also notice a breach growing inward, towards the center of the plant. Now is the perfect time to remedy this with some corrective pruning.
Always use a share pair of pruning shears or succulent shears to make a clean pruning cut. Your pruning cut is not just to remove a piece of the plant, but to direct new growth. Take care to make your cut just above an outward-facing node, leaf or branch. The pruning cut will stimulate new growth at that point.
Root Cuttings and Propagate Leaves
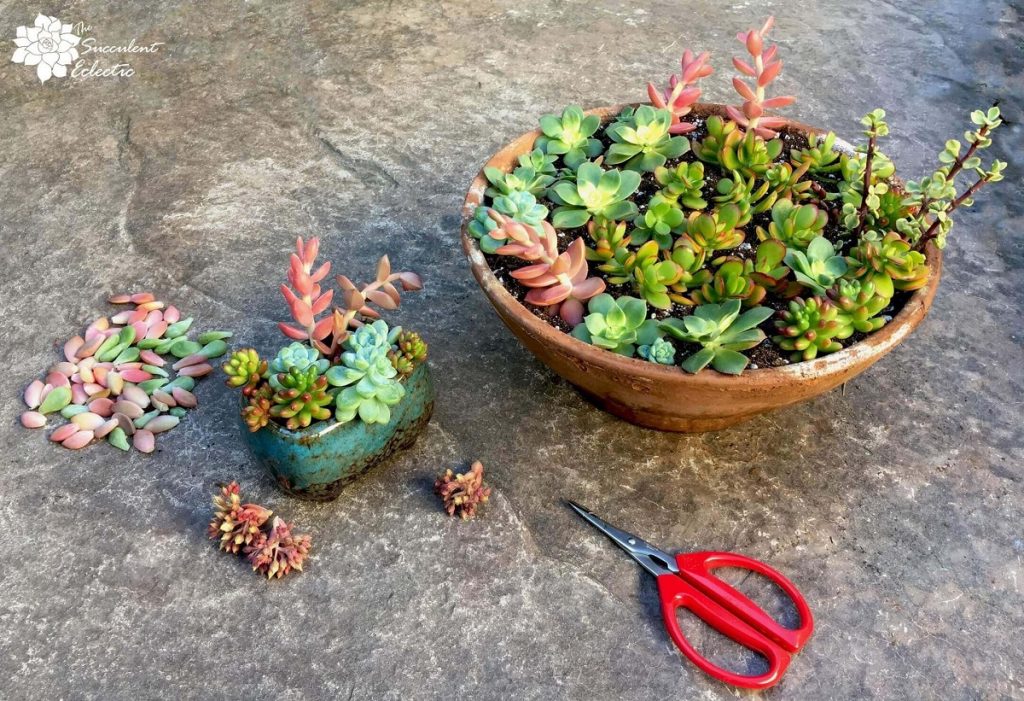
Spring is the ideal time to propagate your succulents. The cuttings you took in the prior steps of spring care for succulents are ready to be rooted to grow into new plants!
Stem cuttings must be prepared with the end that was closest to the roots on the original plant treated as the rooting end of the cutting. You can successfully root large cuttings or small, but you’ll have the best success with cuttings 2-4 inches in length with at least two nodes for rooting and two sets of leaves to support the new plant. Remove leaves to uncover the nodes by gently rocking the leaf on the stem. This ensures the leaf will have some meristemMeristem (MEHR-i-stem) tissue in plants contains undifferent... tissue and can be propagated, too! Remove any bloom stems from your cuttings. They will sap the cuttings’ energies that should be directed into rooting.
Slip the cut, bare stem into dry succulent soil, in a container with good drainage. Leave it in bright, indirect light for two weeks without water. After two weeks, gently lift up on the cutting. If it slides right out, replace it and wait another two weeks. But if it resists your touch, it has begun rooting! Now, you can water lightly. I also set individual succulent leaves on dry soil, so the roots can reach soil as they develop.
Refresh Succulent Planters
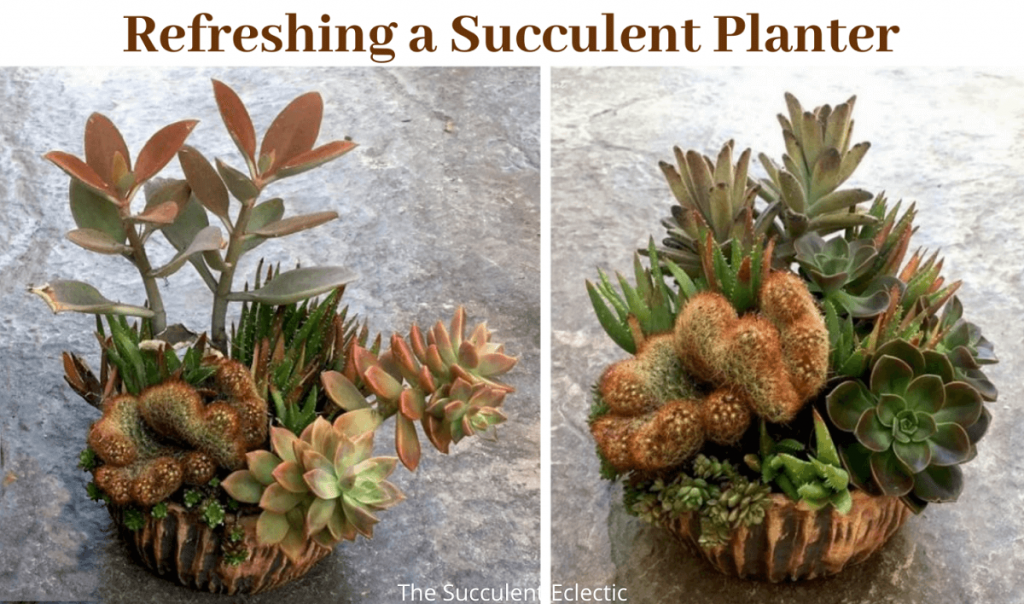
Some succulents, like Echeveria or Aloes, grow larger by adding girth. They get larger around or wider as the grow, but not significantly taller. Other varieties, like Graptopetalum, Aeonium or Portulacaria afra, grow taller as they grow. These different growth habits can cause succulent planters to become lopsided as they grow. That’s why I include refreshing planters as one of the steps in spring care for succulents.
One year after I planted up my first-ever Susan Aach pot, the Graptosedum ‘California Sunset’ and Kalanchoe orgyalis ‘Copper Spoons’ outgrew the rest of the plants in the arrangement. The rest of the plants continued to look really good. So, I refreshed the succulent arrangement by taking the arrangement apart and removing the overgrown plants. I removed as much soil as I could, replacing it with fresh succulent soil and more worm castings. I then replanted this pot, replacing the Graptosedum with Echeveria ‘Melaco’ and I used Kalanchoe tomentosa ‘Chocolate Soldier’ in place of the Copper Spoons.
When you refresh a succulent planter, there’s no waste. Replant the overgrown succulents in another container, and always set aside the cuttings and fallen leaves for propagation!
Refresh Worm Castings

Worm castings are the unsung hero of the garden! Black gold! I include the use of worm castings in my top 7 tips for new succulent owners, my essential succulent supplies and worm castings are my very favorite insect control and one of my favorite fertilizers for succulents. So — what are worm castings, and why are they sooooo valuable for spring care for succulents?
Worm castings are earthworm manure or poop. Earthworms eat the dirt, decaying roots, leaves and decomposing remains of dead animals and insects. And they poop out gardening gold. Earthworms radically and dramatically improve the quality of your soil in myriad ways. But here’s the golden point: Worm castings are rich in chitinase, an enzyme that dissolves the exoskeleton of insects, killing them. When you include worm castings in the soil of your succulents — or any plants — the roots take up chitinase and share it throughout the tissues of the plants. In time, it works like a systemic, organic insecticide, making the plant toxic to any insect that feeds on it. Best of all, the insects can smell the deadly chitinase in the plant tissue, and they wisely avoid feeding on the plant.
So, not only does the inclusion of worm casting support healthier growth for your plants, it also prevents insect infestation. Worm castings are effective against mealybugs, whiteflies, thrips, scale, weevils, mites and other insects. You can work worm castings into the soil when you plant your succulents. I use 2 tablespoons worm castings in the soil for a 4-inch pot, 3 tablespoons for a 6-inch pot and so on. But you can also apply worm castings to established succulents in pots or in the garden as a top dressing. Apply about 1/4=inch worm castings to the soil of established plants. Then. apply an inorganic topdressing over top of it to help keep the worm castings in place. Every spring, I replenish the worm castings for all my plants.
Refresh Top Dressings
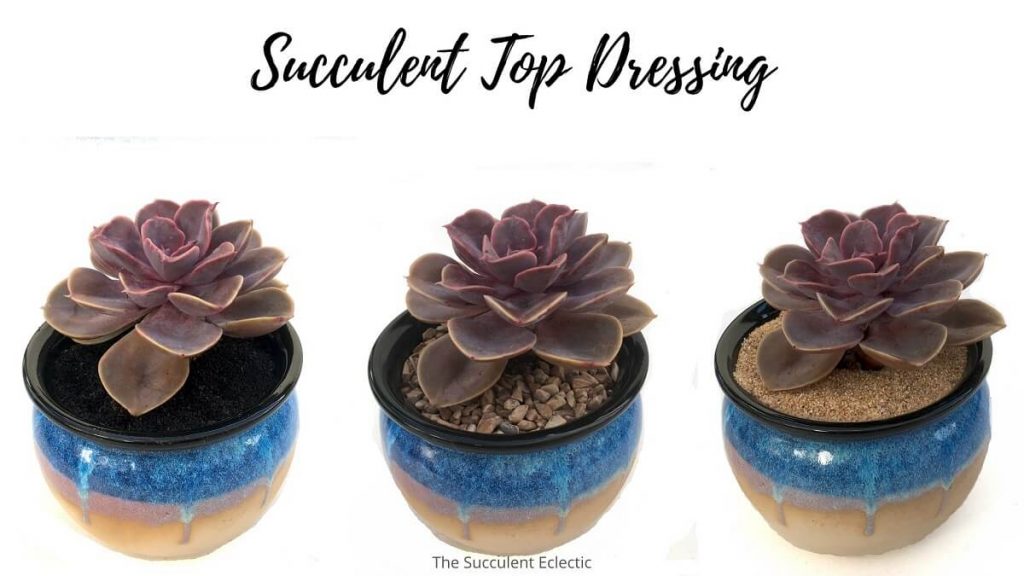
The use of inorganic top dressings for your succulents is about more than looks, but there’s no denying that coordinating your top dressing to the container really dresses up the look of your plants. In addition to looking great, a 1/3-inch layer of an inorganic top dressing creates a weed-barrier, interrupts the life-cycle of fungus gnats and some other insects, insulates roots against temperature fluctuation, stabilizes weak or new plants, cuts down soil erosion and keeps your succulents clean.
There are a range of substances you can use as an inorganic top dressing, including pea gravel, pumice, sand, crushed granite and crushed (and washed) sea shells. When you apply the top dressing, make it 1/3 inch thick, from stems to the rim of the pot, or well past the drip line for succulents that are in the ground. Top dressing makes keeping your plants and planters tidy much easier, because insects and weeds are minimized. But between plant growth, weed pulling and watering, it’s a good idea to check and refresh the top dressing once a year. That’s why I include this step in spring care for succulents.
Have fun with your choice of top dressing, using it to compliment your succulents and pots. Check out some of my favorite top dressing options, and get creative with your choices!
Fertilize Succulents in Spring
Spring is the perfect time to fertilize your succulents, so feeding is the final step in spring care for succulents. Succulents will certainly survive without ever being fertilized. But proper succulent fertilizing will result in larger, healthier succulents with better coloring that are better able to survive environmental stresses and withstand pest attacks.
You don’t want to use a general planter fertilizer for your succulents. Succulents have evolved to thrive on such scant resources that a general-purpose plant fertilizer is likely to burn succulents. There are a number of succulent-specific fertilizers on the market, or you can dilute a general-purpose plant food to 1/4 strength to use on your succulents. My preference is to use an organic fertilizer loaded with micronutrients. This supplies your succulents with the wide array and low levels of nutrients they need to thrive, while feeding the soil they grow in.
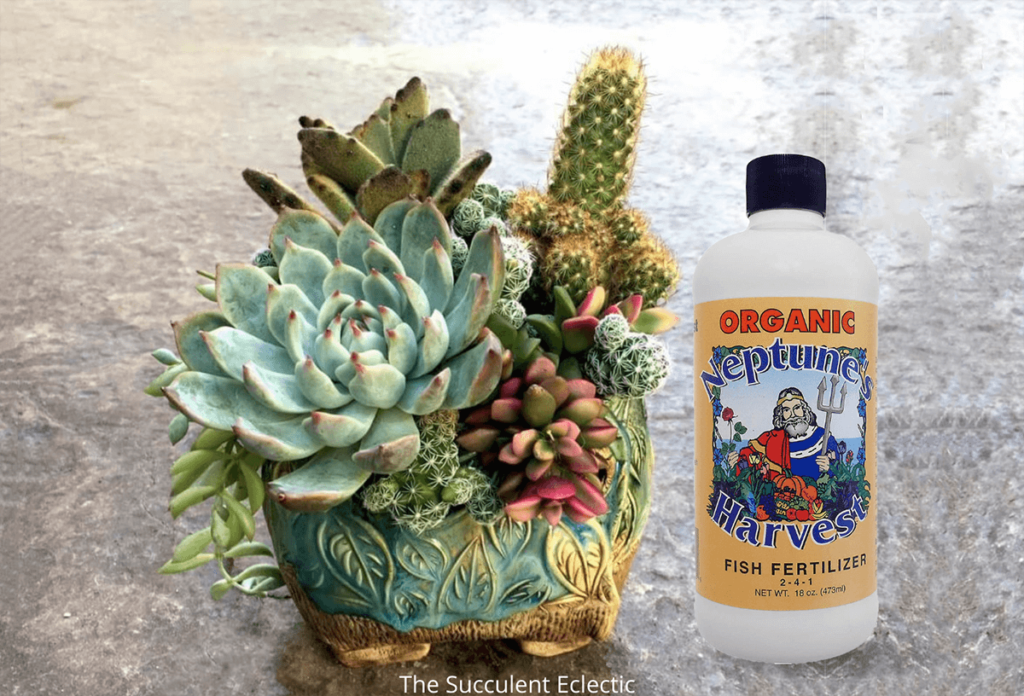
I feed all of my succulents, both in containers and those in the ground at a minimum in the spring and fall, when all succulent varieties are actively growing. I apply worm castings once a year, as described above. And I love using fish emulsion. This is an organic fertilizer made from whole fish or fish parts. Do you remember learning in the 4th grade that Native Americans taught the pilgrims to bury fish at the base of their crops? Same idea! As fish decompose, they add exceptional nutrients to the soil. I particularly like Neptune’s Harvest. It includes the fish proteins and oils, but not the fishy odor! Win-win! My succulents love this!
Succulents truly are low care, but that doesn’t mean “no care”. Follow these steps to spring care for succulents to get your plants in their best condition for the new season. You’ll see healthier succulents with more perfect form, better coloring and fuller blooms. How’s that for incentive? 🙂 If any of these steps to spring care for succulents is unclear or you have any questions, please let me know! Leave a comment and I’ll get right back to you!
Happy Gardening!
P.S. For more succulent care info, please subscribe to The Succulent Eclectic! I’ll send you my FREE e-course, 7 Steps to Succulent Success. Thanks!
P.P.S. Why not join my Facebook Group for succulent lovers? We talk about succulent care, propagation, succulent identification, and design. It’s a warm and welcoming group that would love to meet you!