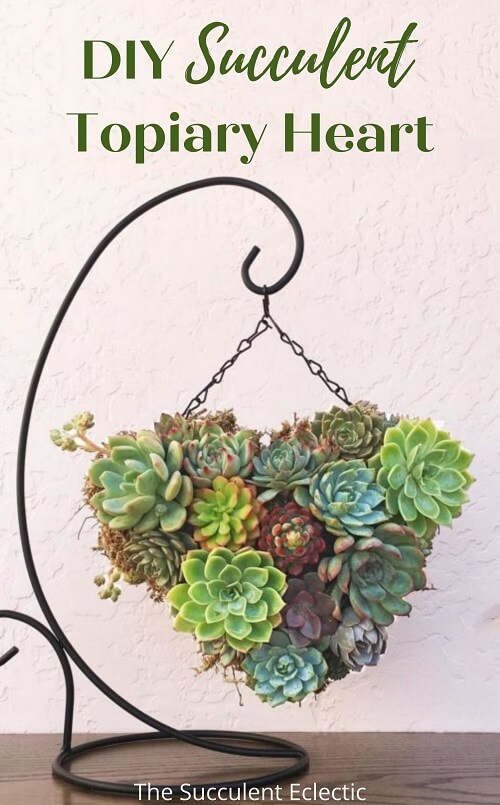
I was so excited to figure out how to make this living succulent topiary heart for a Mothers Day DIY. Then, Mountain Crest Gardens reached out and wanted me to do a DIY post with them and their new line of succulent cuttings — and it seemed like kismet! I have always loved the selection and top-quality plants that MCG delivers, and I was curious to see their succulent cuttings. I was absolutely blown away! I have shared — in detail — all about the cuttings I got from Mountain Crest Gardens in another post. For now, these echeveria rosette cuttings will make for a perfect Mother’s Day gift! Let me show you exactly how to make this living succulent gift that will remain lush and lovely for months or even years!
DIY Succulent Topiary
In this Post We'll Cover:
{Please note, some links in this post may be affiliate links to sites that pay me a small commission if you click on the link and make a purchase. This commission is at absolutely no cost to you. I only recommend products and companies that I have worked with and truly love! ~Kat}
How to Make Succulent Topiary Heart
Remember the fun of making craft projects in school for Mother’s Day gifts? I was never very good with the macaroni, but I was always so proud to make something special for my Mom. The pink paper mache elephant was outstanding! And I think those childhood gifts were likely her favorites… I so enjoyed the nostalgia of working on this project. I was unable to find a topiary form of a simple heart — so I made my own! If you prefer to start with a premade form, this hanging heart wreath base will be perfect. And, of course, the same techniques work for any type of topiary form you like. Then, just follow along with the steps on how to apply the live succulents and how to care for the finished piece so that they will grow. It is not that complicated, but I have included a lot of pictures!
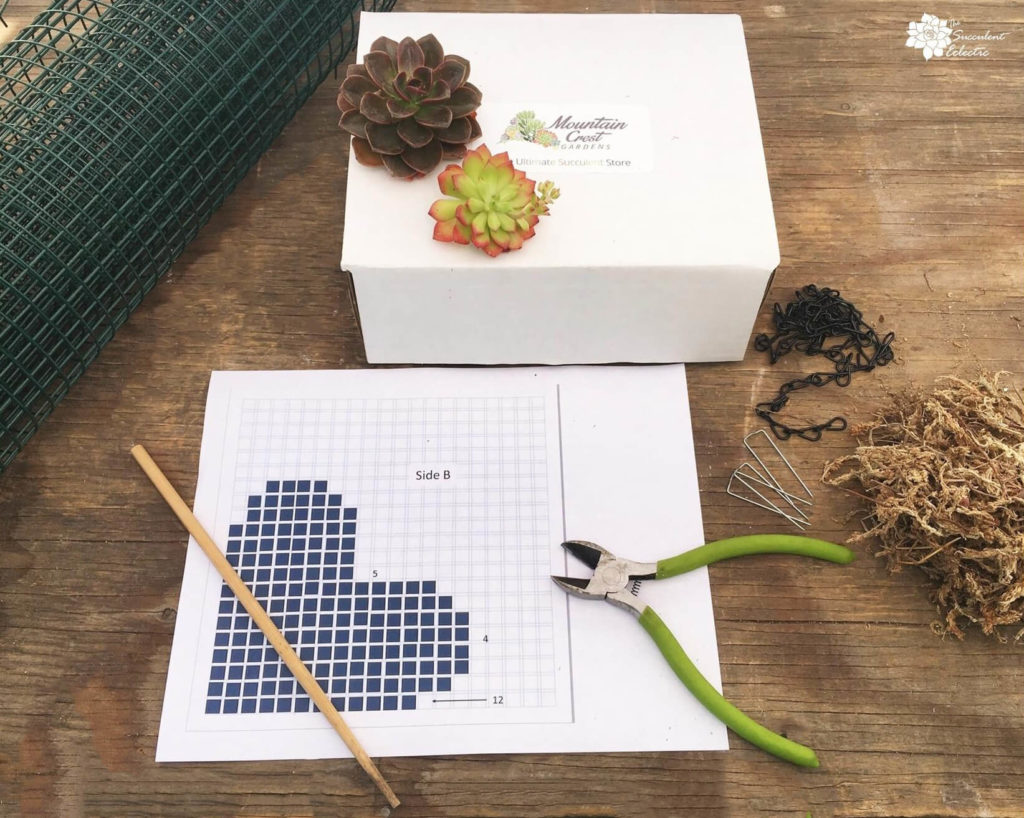
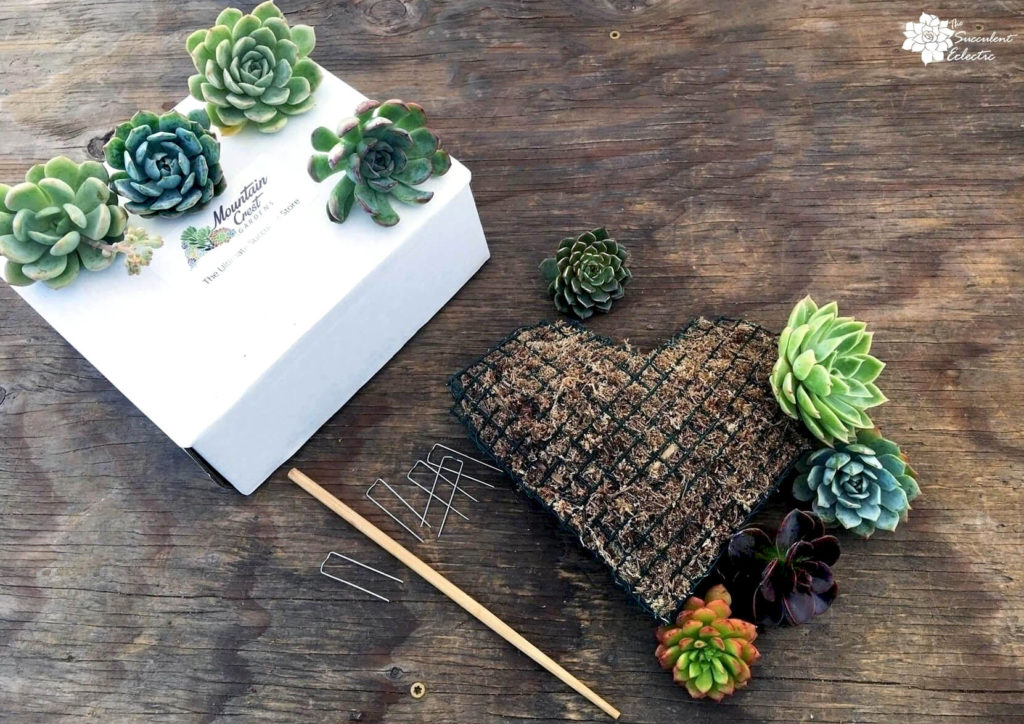
To make a living succulent topiary heart, you will need:
Hardware cloth, ½” mesh (PVC coated is easier on the hands)
Sphagnum moss (long fiber is definitely best for this project!)
Floral wire, 22 gauge
Chopstick or bamboo or screwdriver
Display stand, Large, 18″H x 9.5″ x 7″ W (optional)
Grid pattern – free download here!
Squeeze bottle or syringe for watering
Make Your Own Topiary Form
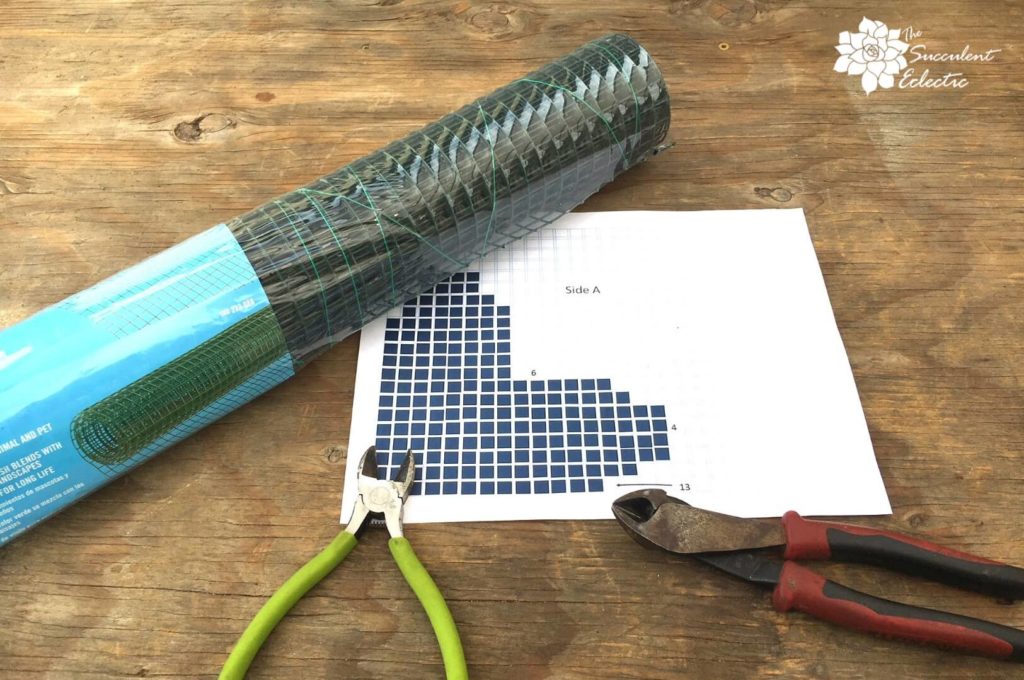
This is the first time I made my own topiary form — but it won’t be my last! 🙂 I used hardware cloth, which is a strong wire mesh. It is far easier on the hands than chicken wire, and I wanted the smaller openings to better hold the succulent cuttings in place while they root. I elected to use the PVC-covered mesh, so that it would not have so many sharp edges, again to be easier on the hands. The mesh also made it really easy to work out a grid pattern, which I have made available to you via a free download here. I played around with the pattern a good deal until I was happy with the results. I made further changes after I took the photos, so use the pattern in the download!
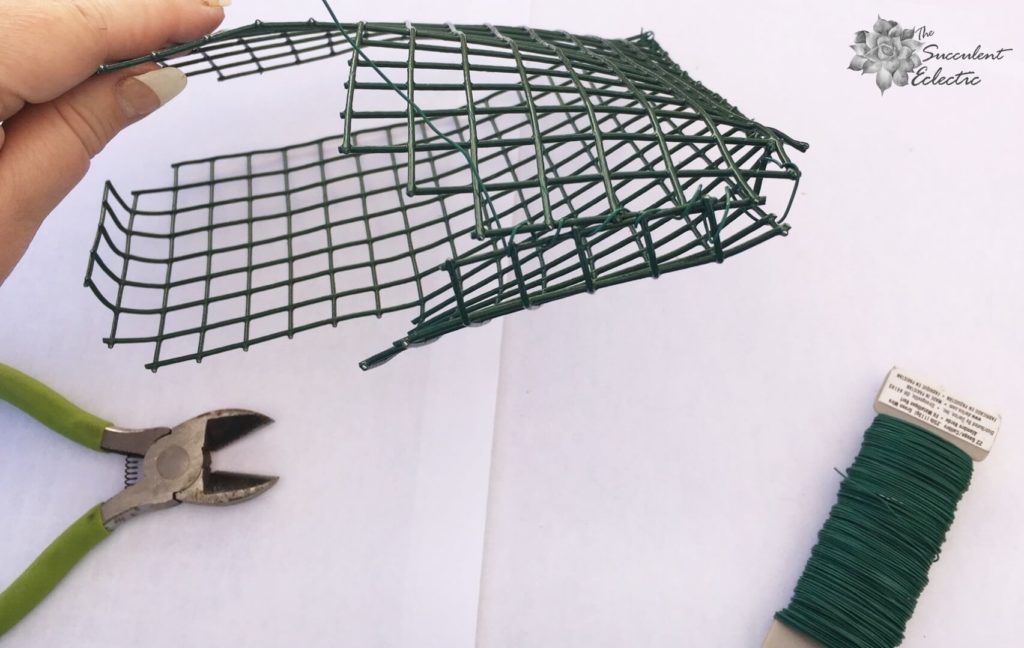
Cut the Wire Form for the Topiary Heart
As much as I love my cute little wire cutters, for this project, I swiped my husband’s larger pair. It made cutting so much heavy gauge wire a snap! I developed the pattern to use the edges of the hardware cloth to cut down on the cutting for the pattern. Then, simply count the squares on the pattern and the same on the mesh, and clip the wire! Sort of like industrial cross-stitch.
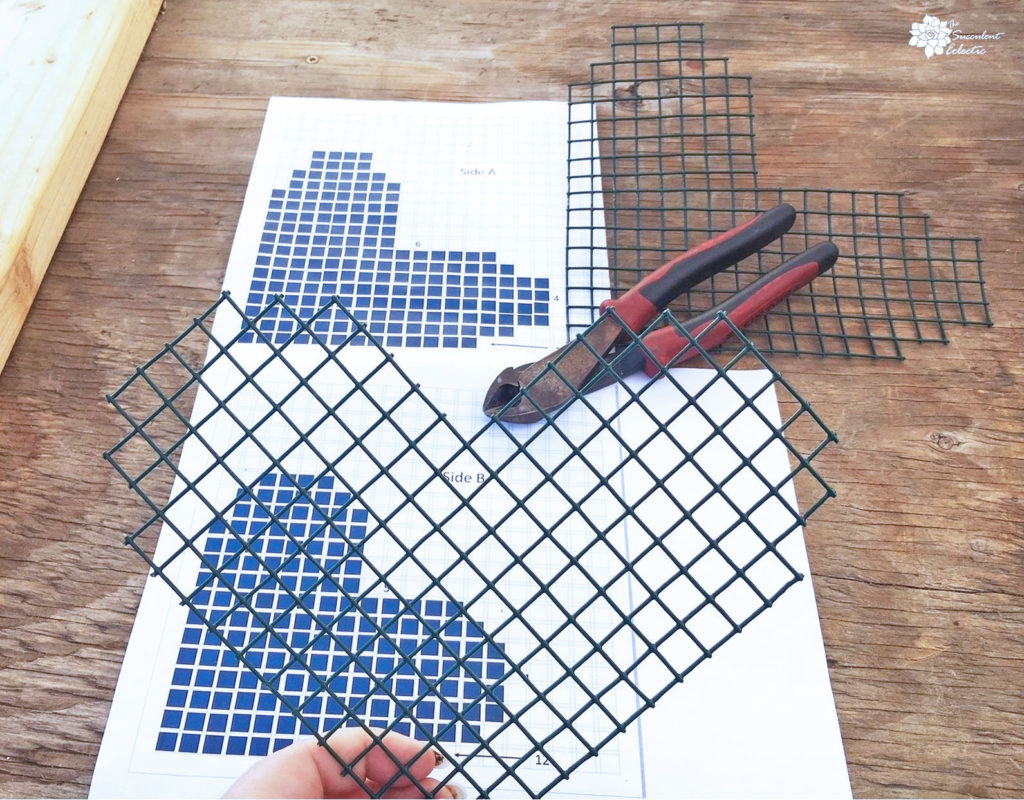
Bend Wire Hearts to Shape
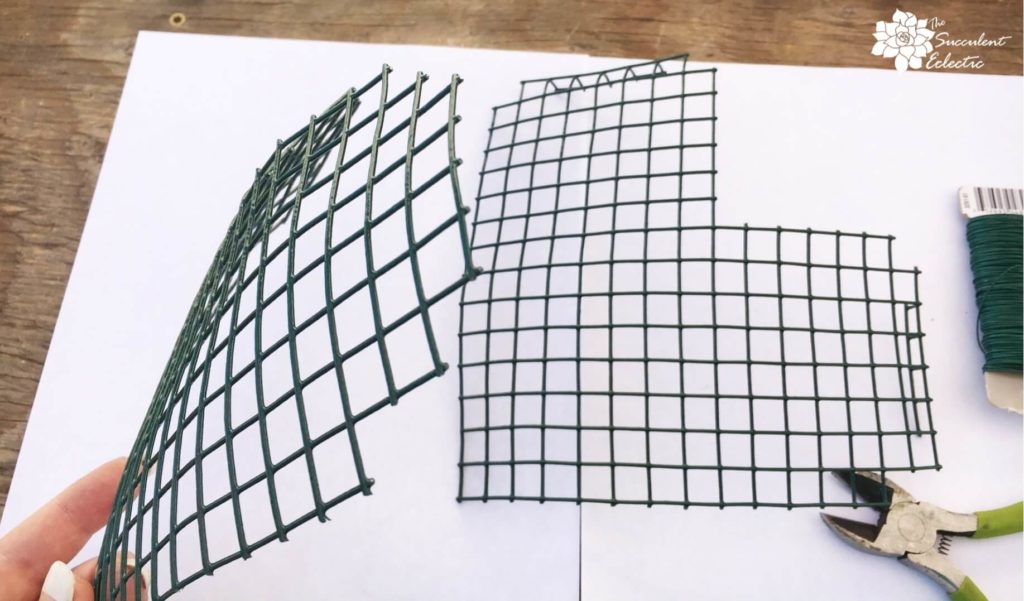
I wanted the heart to be 3D, so I left extra squares to enable the final heart to round outwards from its center. Using your hands, bend each wire heart to curve outwards before lacing the two together. Side A of the grid pattern is a bit larger than side B to allow for a more rounded front side. You can use two sides A or two sides B, depending upon the shape you want for your heart. I used side A for the front and side B for the back.
Wire Together Topiary Heart Form
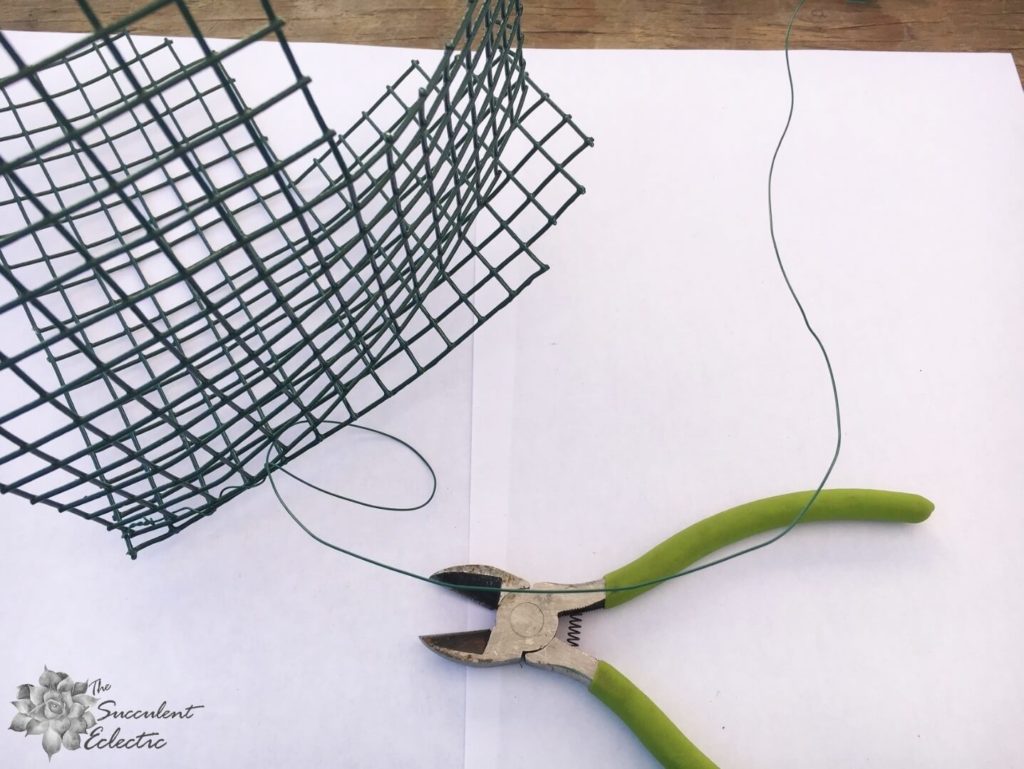
Using the floral wire, lace the two wire hearts together using a whip stitch. First, tightly wind the floral wire to the base of the heart. Then, pull the wire tight at each section. This will be the base of your topiary heart form, and you want it strong, tight, and sturdy. I laced the floral wire at each square. Then, pull it tight.
Continue to lace the wire hearts together up the side and around the top. Stop before you close the center of the top. Leave a good 5 inches opening. This is where you will put the moss through. Look the heart frame over, and bend it to shape as you like. The next step will make the shape pretty permanent.
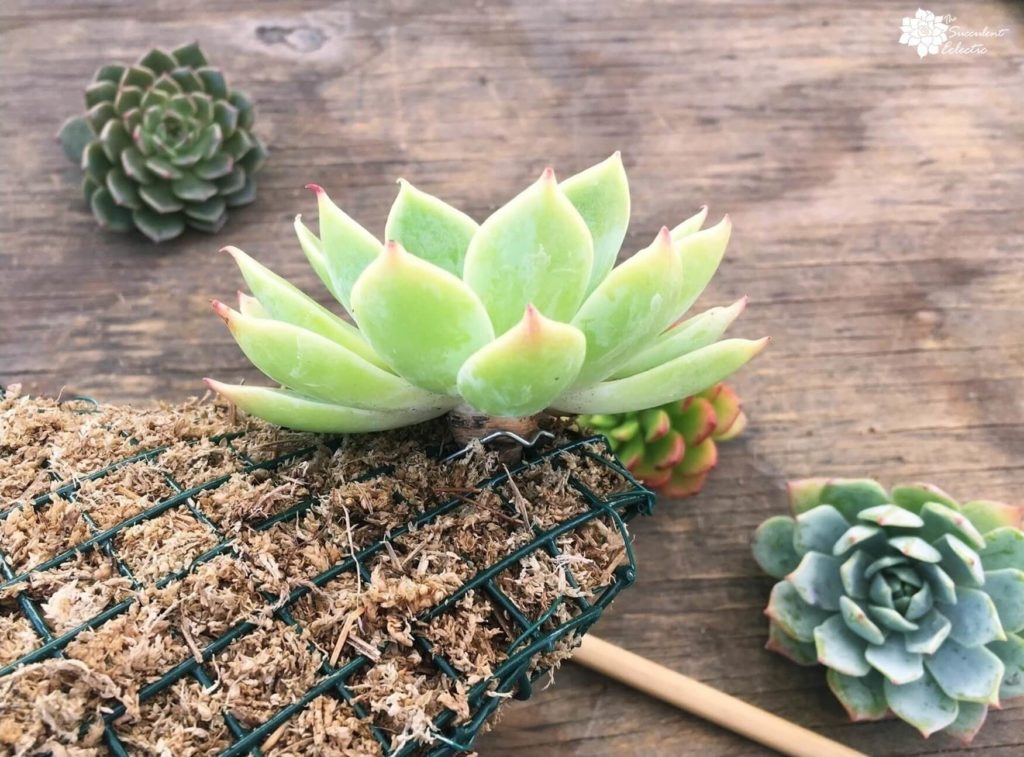
Add Spaghnum Moss to Wire Topiary Frame
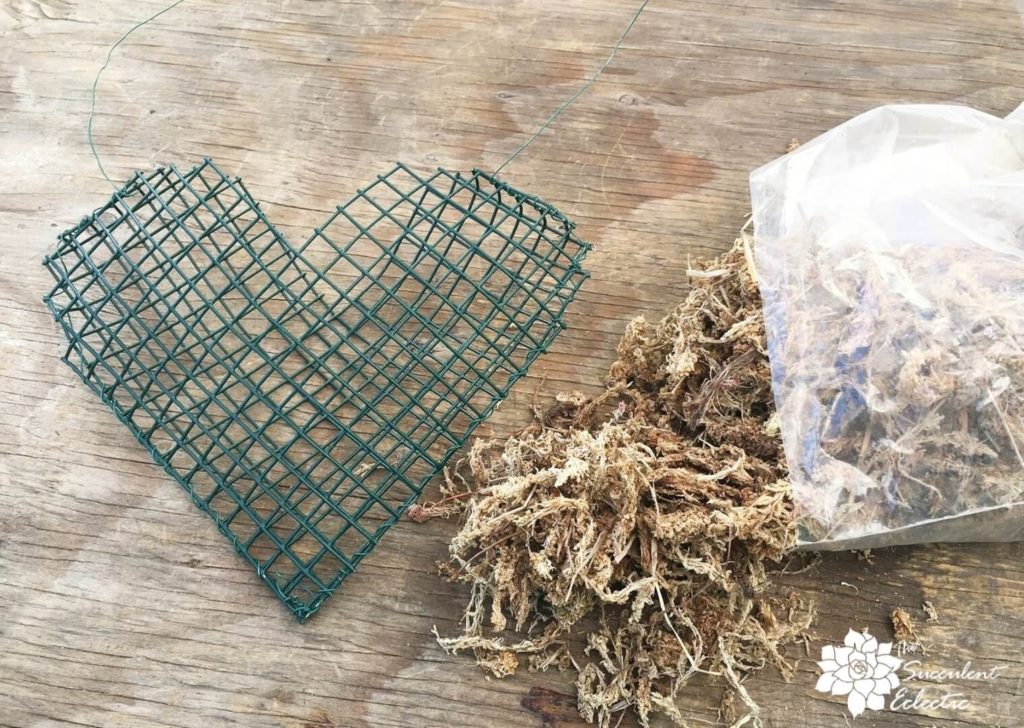
I just love this long fiber sphagnum moss! It is the best quality I have ever worked with! The long strands keep it from shedding a great deal and just produce an excellent final product. It is a wonderful medium for your succulent cuttings to root into. They will happily grow into the moss for years!
Pack the Wire Topiary Heart with Moss
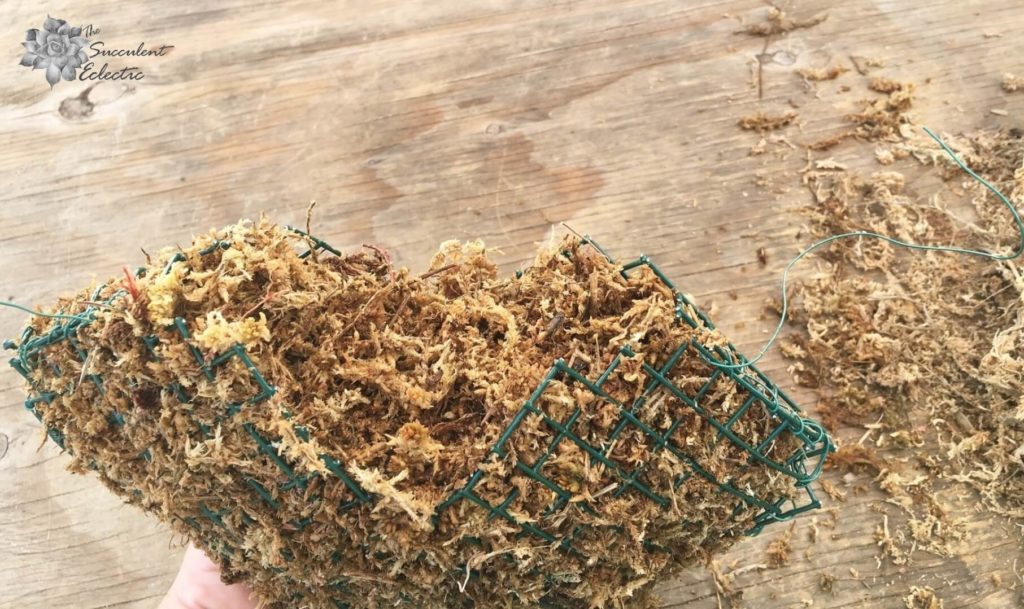
I fully wet this moss before working with it. It makes the moss nicely pliable. Then, pack it tightly into your topiary heart form. Do not skimp on this step. The moss is the medium that your succulent cuttings will root into and eventually grow in, so this is important. Use your chopstick or bamboo to poke the moss all the way into the point and each part of the heart. Force as much moss into the form as you can. It will hold moisture and keep your succulents healthy for months and even years!
When it is fully packed with moss, use the floral wire to close up the heart. I pulled the wire tight across the moss-filled gap and continued to lace each square. The gap remained about 2 inches wide. Once I finished wiring in one direction, I turned the heart 90 degrees and then wired across the row I had just done. This way, I continued the cross pattern of wire to help hold the moss in place and to give the succulent cuttings in this spot a good framework for support.
Finished Topiary Heart Form
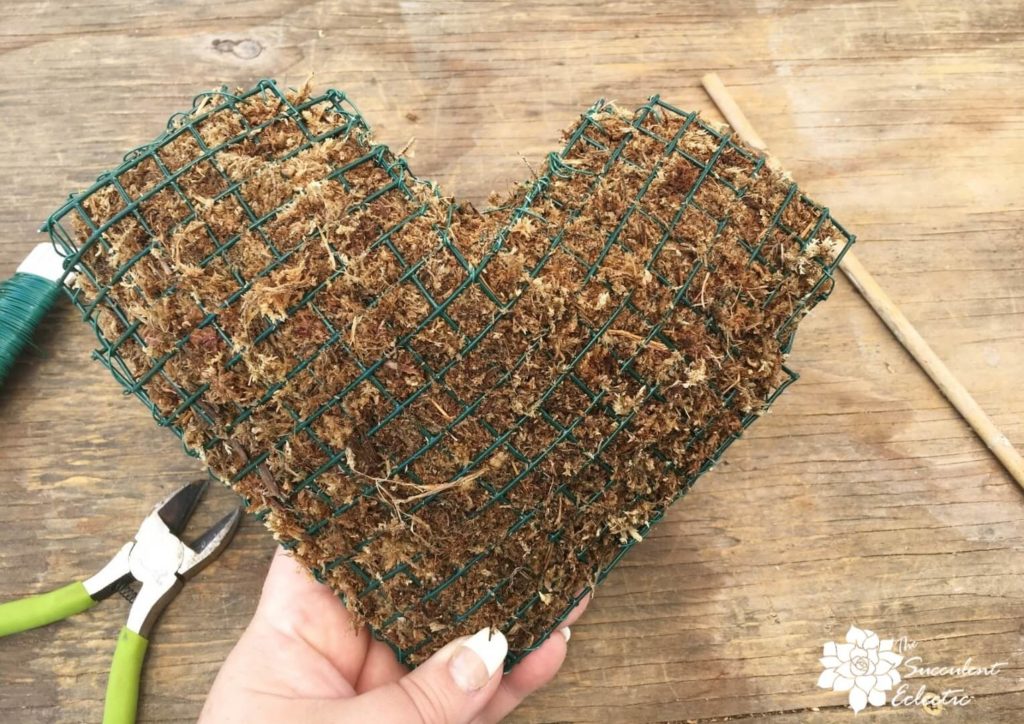
This is my finished topiary heart form. At this stage, it measures 9 inches wide but 7.5 inches tall. Now for the fun part — adding the succulents! 🙂
Succulent Cuttings for Planting the Topiary Heart
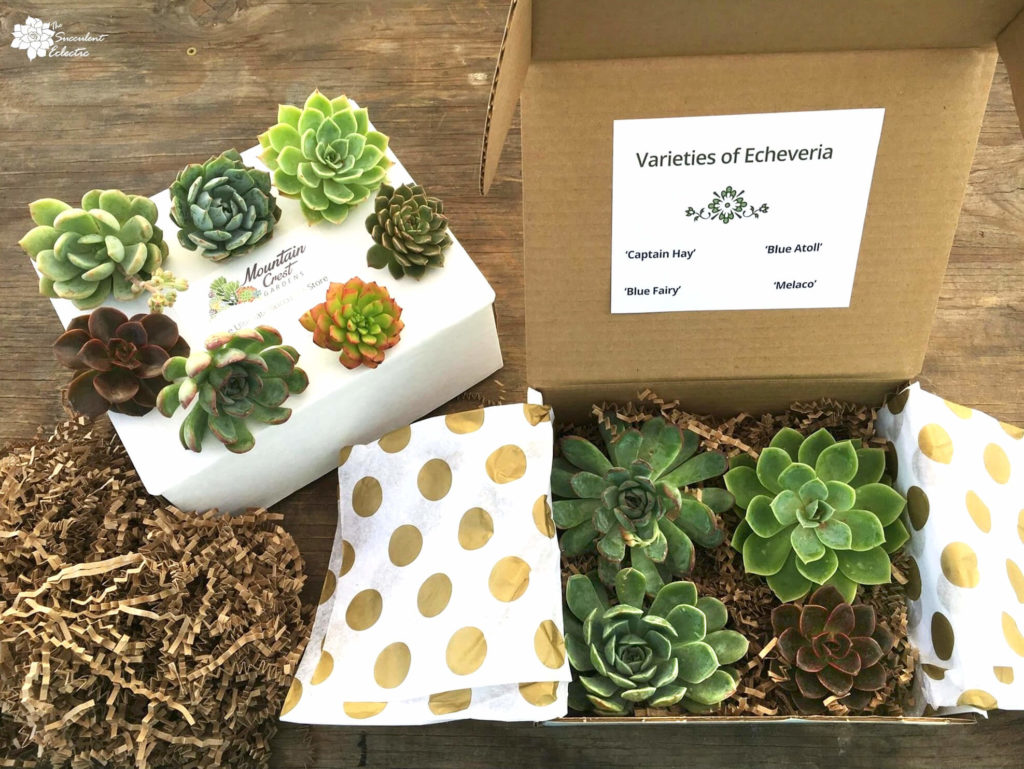
Did I mention that the cuttings from Mountain Crest Gardens were absolutely fabulous? In fact, for Moms who love succulents, a set of the MCG echeveria cuttings would make a lovely gift! On the left is the group of 2.5″ echeveria rosette cuttings I received. On the right is the set of 4″ cuttings. They arrive in gift-ready condition, and the quality is exceptional! All set for crafting or propagatingPropagating (PRAH-puh-gate-ing) a plant is to grow another p...! For a detailed review of how to root succulent cuttings, click here. If you prefer to work with a wide variety of succulent cuttings – they’ve got you covered there, too!
If you are taking your own cuttings, be sure to set them aside in a shaded spot for 3 days to callous over before using them in a craft project.
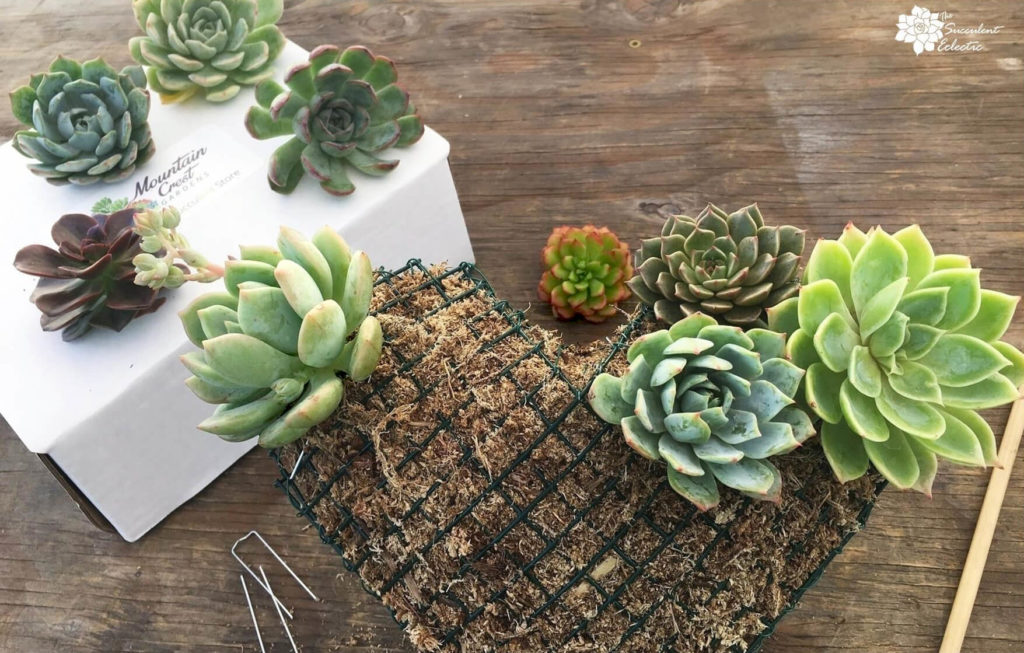
Arrange the Succulents for Your Topiary Form Planting
For this project, I used the 2.5″ rosette cuttings, and filled in with a few smaller cuttings of my own. It was important to me to maintain the shape of the heart even after adding the succulents. So, I set the succulents in place and played with the arrangement before securing them into position. I wanted the arrangement to look balanced but not symmetrical, and I took care not to have the same variety right next to each other. I used the round shape of the echeveria rosettes to emphasize the rounded top of the heart. Then, when you are sure where you want a cutting, prepare the stem.
Prepare the Succulent Cutting for Topiary
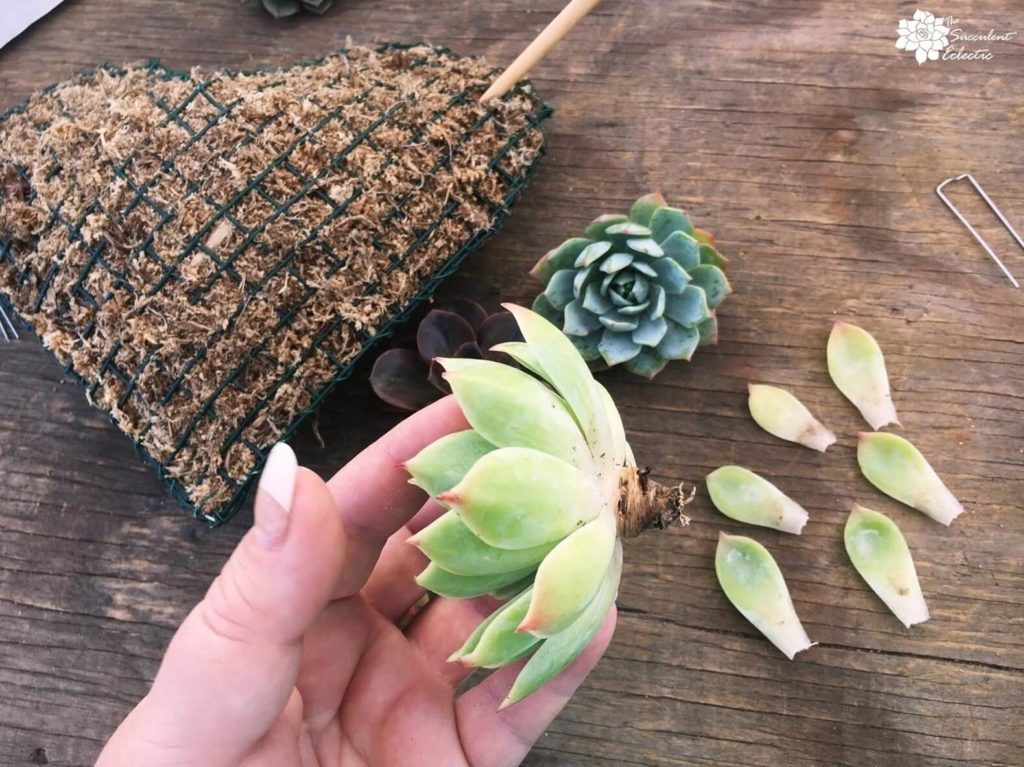
Whether you get your succulent cuttings online or take them from your own collection, you will want a clean stem of about ⅓ – ½”. Remove any lower leaves as necessary to expose sufficient stem. Then, set those leaves aside to propagate into new plants! These cuttings are truly a gift that keeps on giving! 🙂
Secure Succulent Cuttings with Floral Pins
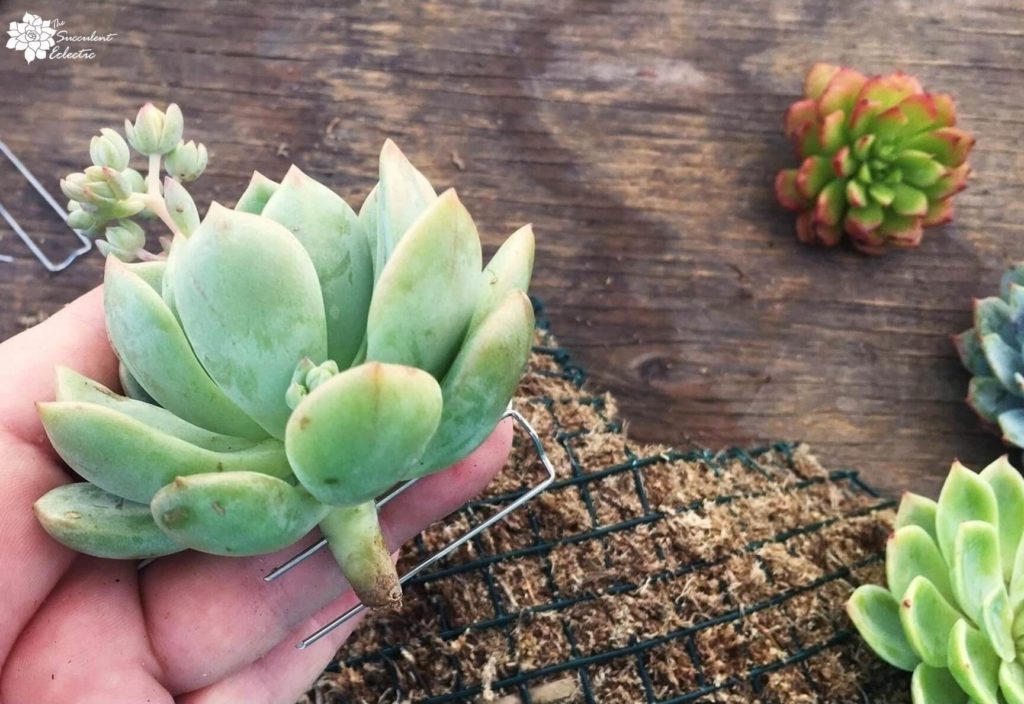
I know you might cringe from piercing the succulent stem with the floral pins. I promise you — it does not harm the cutting at all! Succulents are amazing, aren’t they? This Echeveria cutting will happily root right into the moss of the topiary form and grow there. Make a hole in the moss using your chopstick. Then slip the succulent stem into the moss and secure it in place with your floral pin.
Pin Each Succulent Cutting in Place
I used one floral pin for each succulent, piercing the stem with one side of the pin. Then, push the pin in under the hardware cloth. This secures each cutting firmly into place while keeping its stem in the moss where it will root and grow.
Adding Succulents to Topiary Heart Form
Fit each succulent beside its neighbor so that the moss won’t be seen. I was particularly careful to maintain the shape of the heart. I filled in a few spots with smaller succulents until the entire first side was filled with succulents!
Fill the Topiary Heart with Succulent Cuttings
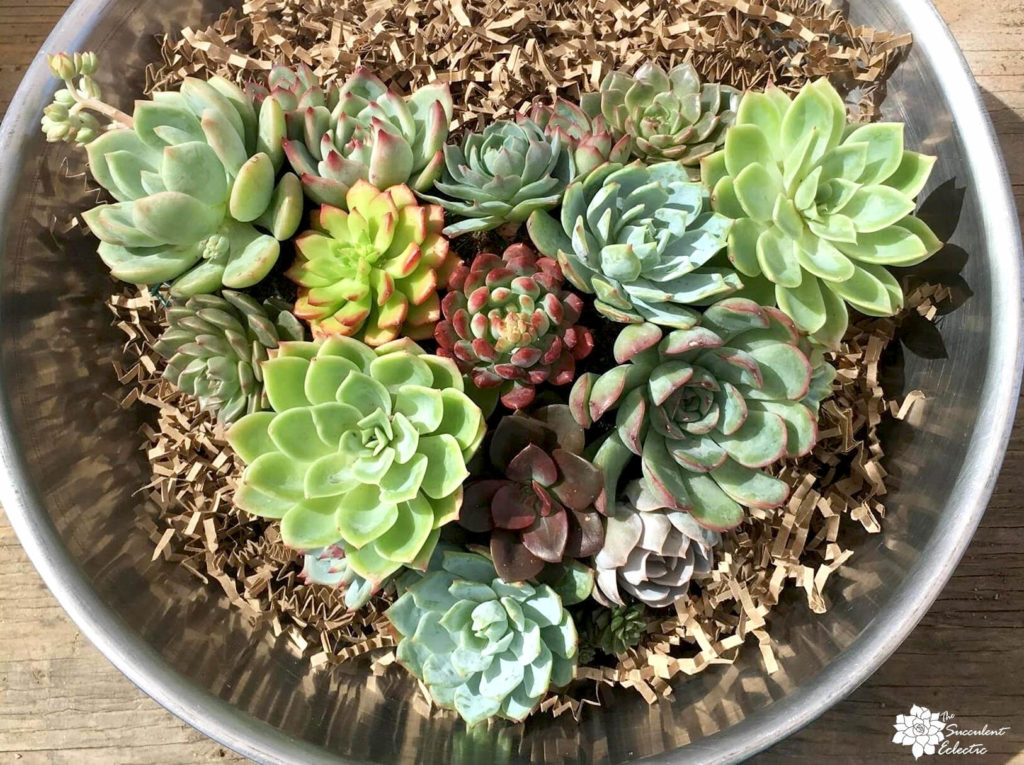
I found the crinkled paper Mountain Crest Gardens used for packaging the cuttings to be very helpful when I needed to fill in the back of the heart. I filled a mixing bowl with the paper and gently laid the heart face down on the springy paper while I worked on the back of the heart. This picture shows the front side just before I turned it over and started on the back.
Add a Chain to Hang the Succulent Topiary Heart
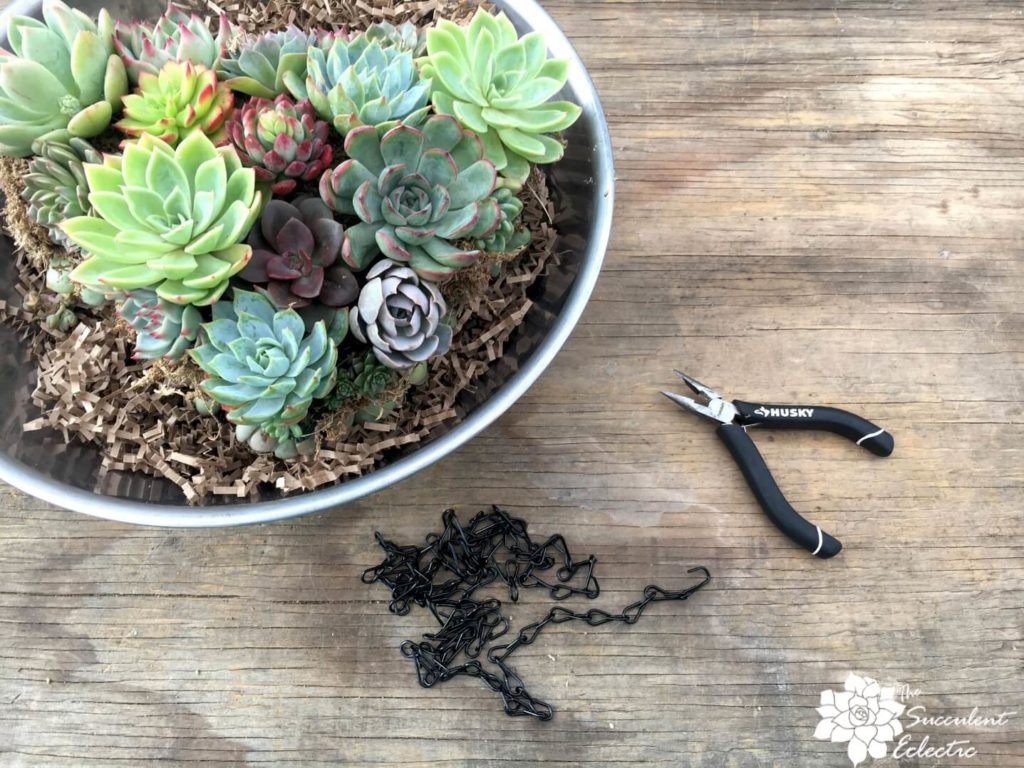
Once I finished filling both sides of the topiary heart with succulents, it was time to hang it! The finished heart was heavier than I anticipated – especially when the moss was full of water! So, I attached the decorative chain to the rounded top on each side of the heart, then connected it to an S-hook to hang it from the display hanger. Just open a link to add the chain, then close it again with the pliers.
Finish Adding Succulents to the Topiary Heart

Once the topiary heart could be hung up, I worked on filling in the edges with smaller succulents. Add a few wisps of moss to tuck in between succulents where needed to cover any hardware cloth or pins that show.
And… voilà!
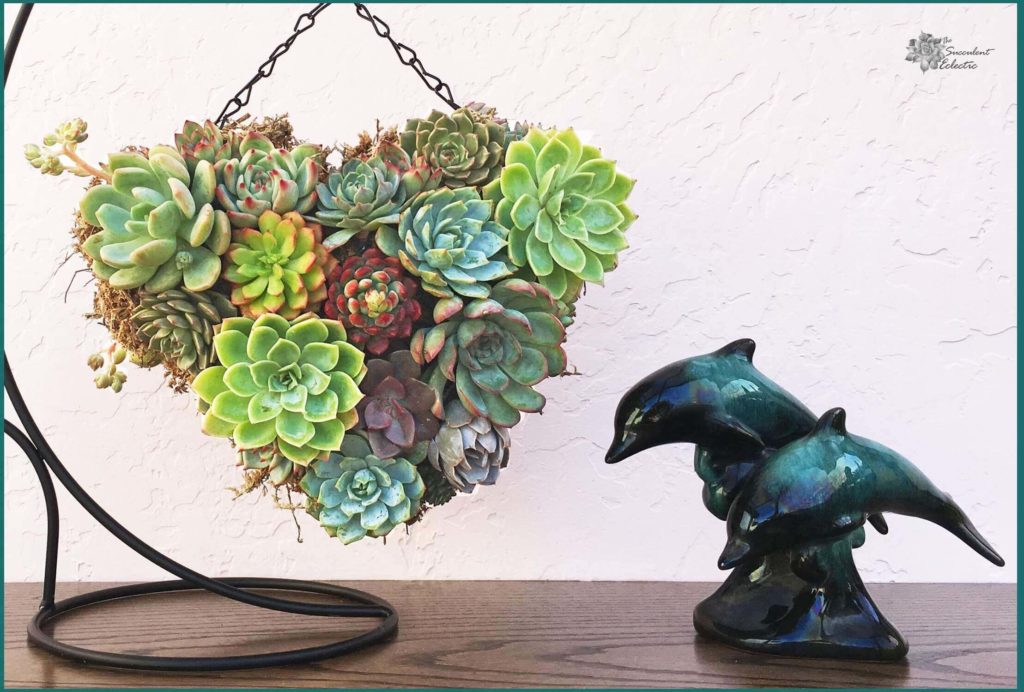
Finished Succulent Topiary Heart
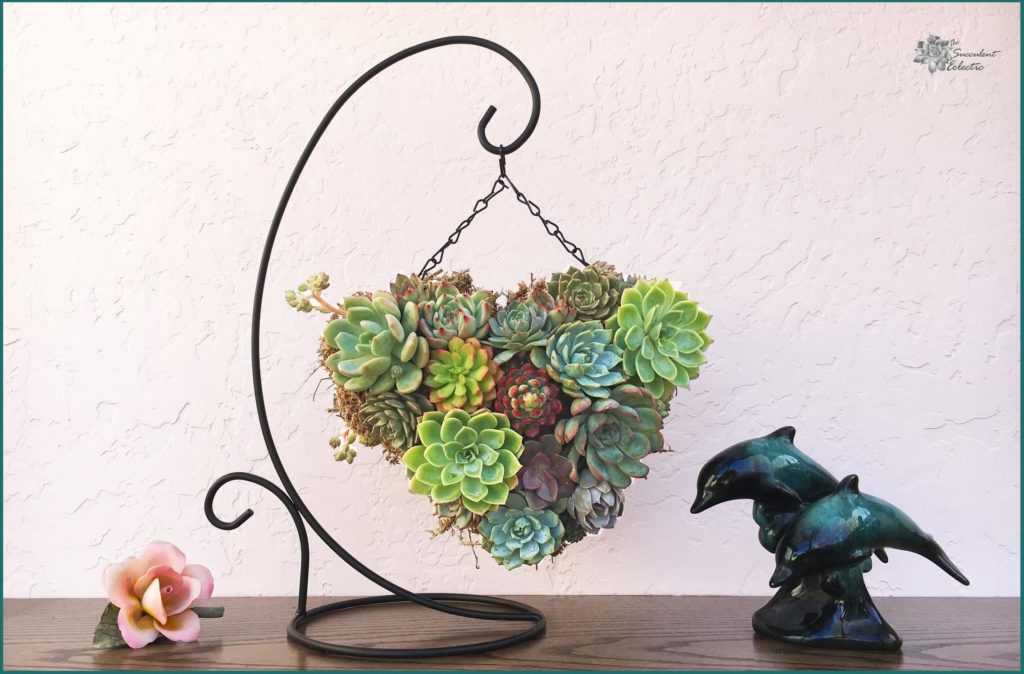
I am so pleased with how it turned out!
I hunted high and low for the right display stand — most were too small. I am so pleased with the final effect. You could also hang it outdoors from the eaves!
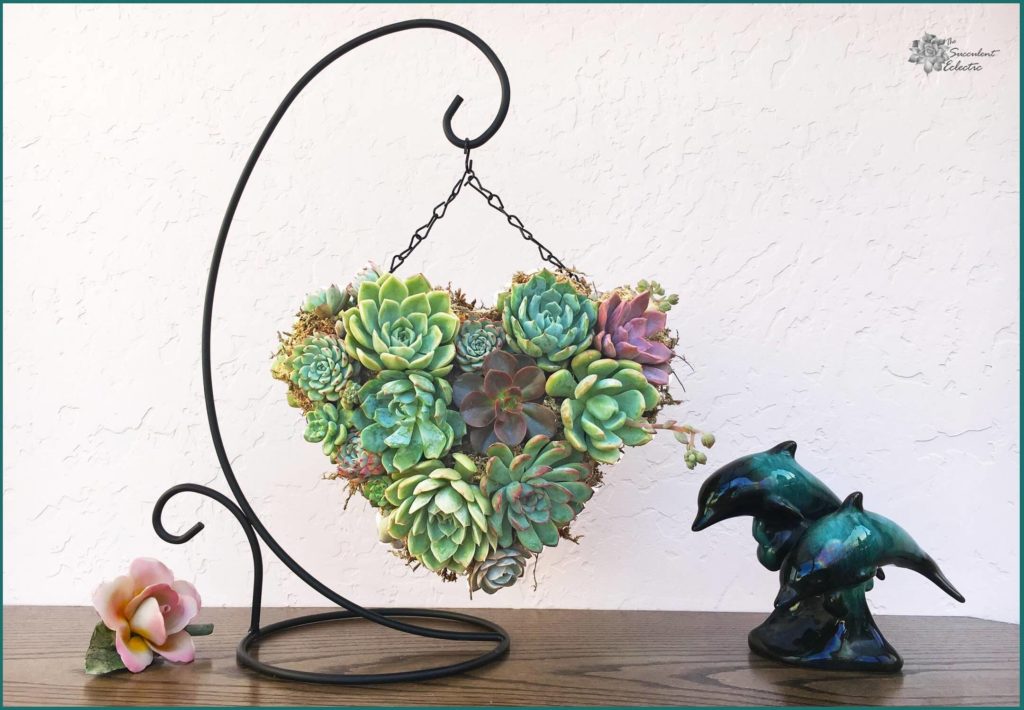
This is the back of the topiary heart. Wouldn’t this make a fabulous gift? And so perfect for Mother’s Day – a living heart! This will last for years! The succulents will root into the moss and eventually grow into it.
On a personal note, I really miss my Mom. It’s been a few years now since she died, and I miss her every day. It was hard to make a Mother’s Day DIY because I miss her so much. But for you, my readers, I was able to do it. This one’s for you, Mom! And thanks for helping me to do this.
How to Water Succulent Topiary Heart

The sphagnum moss you stuffed the topiary heart with makes a terrific growing medium for your succulent cuttings to root into and grow in. Use a syringe or squeeze bottle (I love this squeeze bottle!) to water the moss at least once a week until the cuttings are well rooted. Water from the top, inserting the water between the cuttings.
Mother’s Day DIY Succulent Topiary Heart
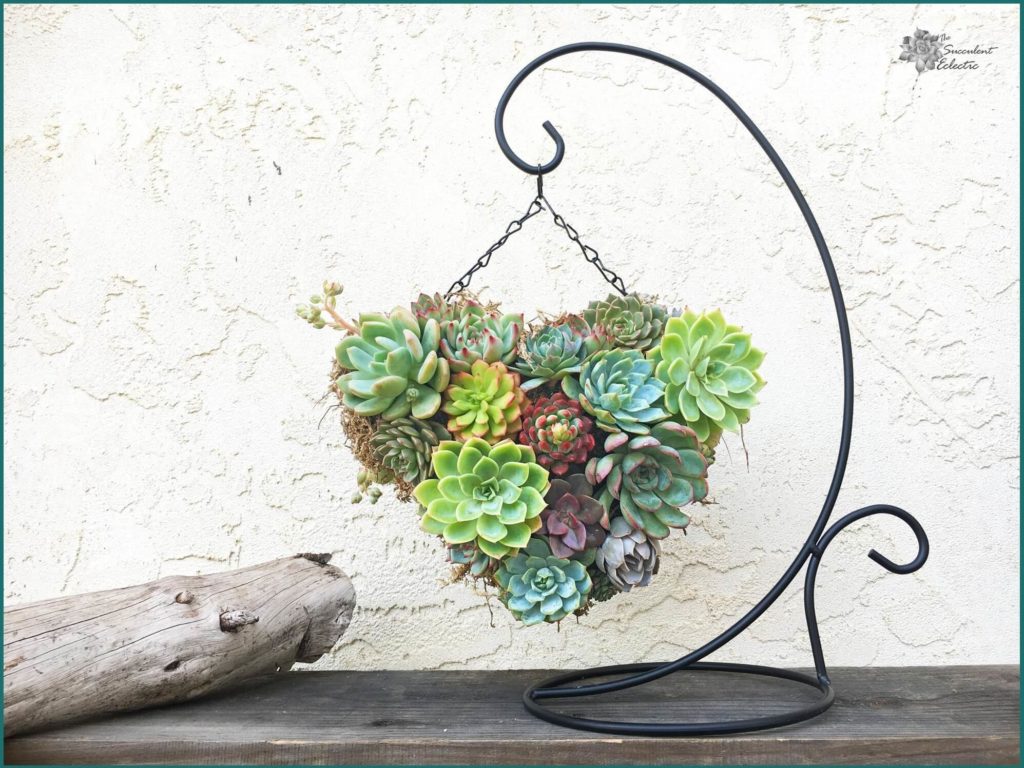
Enjoy the succulent topiary heart indoors or out. If you have it outside, take care to protect it from frost, and keep it out of direct sun until it is well rooted.
My sincere thanks to Mountain Crest Gardens for the beautiful succulent cuttings to make this Mother’s Day DIY succulent topiary heart! I would love to know if you plan to make your own succulent topiary! Please take a moment to leave a comment and let me know! If you have any questions — I am happy to help!
Have a Happy Mother’s Day!!!

P.S. Please subscribe and receive my FREE course, 7 Steps to Succulent Success. Enjoy!
P.P.S. Why not join my Facebook Group for succulent lovers? We talk about succulent care, propagation, succulent identification, and design. It’s a warm and welcoming group that would love to meet you!