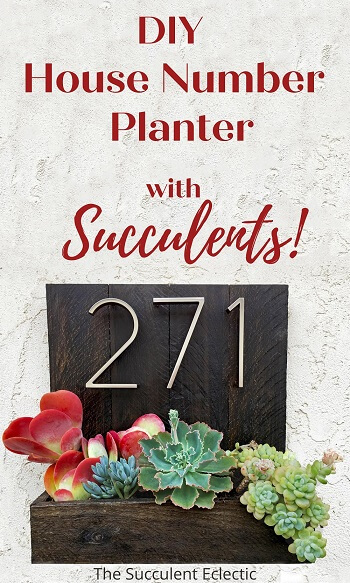
This Father’s Day, give Dad something he would actually enjoy! (Insider tip – he doesn’t really want soap on a rope!) A handsome pallet wood planter that holds your succulents and displays the house number is perfect! It is functional and attractive. And did I mention – it holds succulents? 🙂 I think this is a terrific gift, whether you make it and give it, or work together with Dad to make it – that could be part of the gift! Let me show you step-by-step how to make this Father’s Day DIY house number planter!
DIY Succulent Planter for Dad!
In this Post We'll Cover:
- DIY Succulent Planter for Dad!
- Gather Supplies for Pallet Wood House Number Planter
- Lay Out Pallet Wood Planter Pieces
- Determine the Bottom for the Pallet Wood Planter
- Glue the Pallett Wood Planter Together
- Clamp Pallet Wood Planter Together
- Glue the Back of the House Number Planter
- Staining Pallet Wood Planter
- Prepare to Attach the House Number Planter
- Secure the Planter to the House Number Back
- Floating Address Numbers, or Flush Mount?
- Attaching Floating House Numbers to Pallet Wood Planter
- Finish Assembling the House Number Planter
- Plant Succulents in Your House Number Planter!
- Finished House Number Planter with Floating Numbers
{Please note, some links in this post may be affiliate links to sites that pay me a small commission if you click on the link and make a purchase. This commission is at absolutely no cost to you. I only recommend products and companies that I have worked with and truly love! ~Kat}
Gather Supplies for Pallet Wood House Number Planter
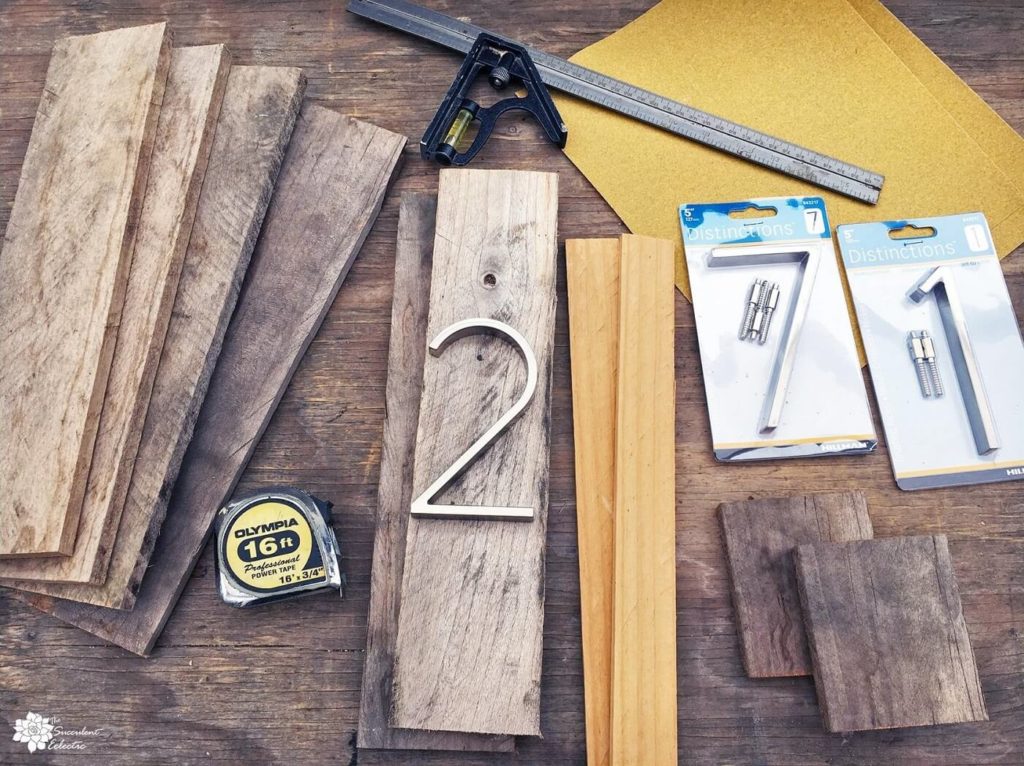
Doing this project, really brought back so many memories of working with my Dad… Building shelves, going to the lumber yard, sanding and staining… So much. He would have really loved this – especially if we had worked on it together. Thanks, Dad, for – everything! Sigh… I really miss him.
OK – To make this house number planter for your, Dad, you will need:
1 pallet, disassembled, cut into:
4 pieces 15″ long
2 pieces ~14″ long (measure as below)
2 pieces 4″ long
1 piece ~13″ long (measure as below)
2 pieces of lath ~14″ long (measure as below)
Measuring tape or combination square
Bar clamps or cool strap clamp
6 3/4″ screws
Wood stain
UV resistant, outdoor clear polyurethane
Foam brush
Soft rag
Lay Out Pallet Wood Planter Pieces
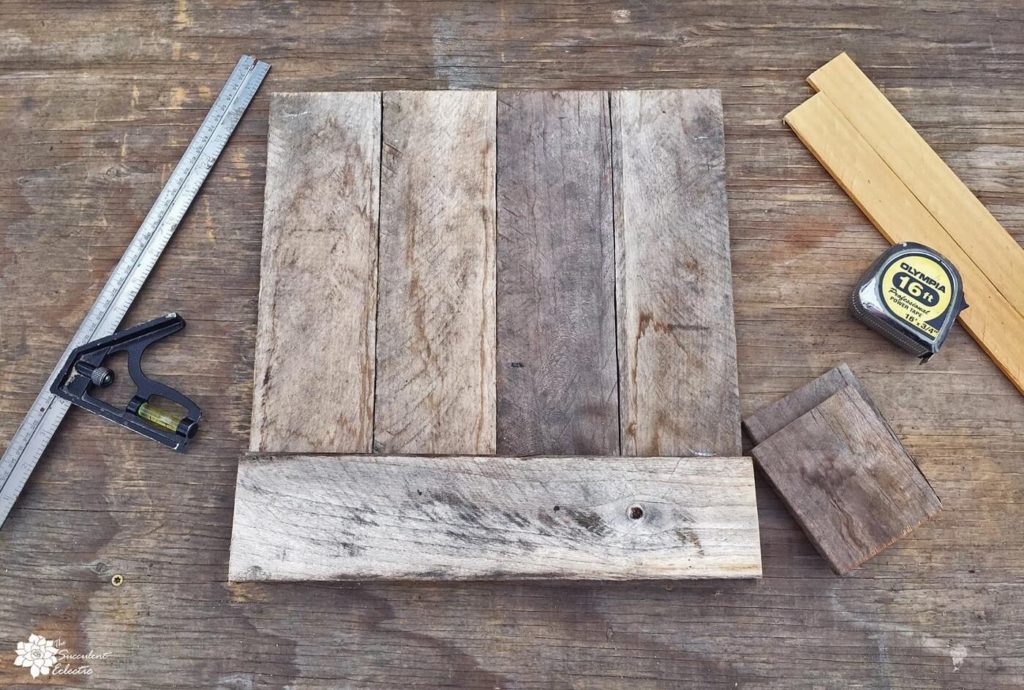
If you are using pallet wood for this project, just accept that the wood available to you will vary in size and color. That is part of what makes upcycling pallet wood such a fun project! The width of the slats will vary from one pallet to the next, and often within a pallet. So we need to measure based on what is available. When you cut it between the nails, then the longest pieces you can get will be about 15 inches long. I used 4 for the back of my house number planter. If your house number is 4 digits, they will fit on 4 boards. But, if you prefer more space for the numbers, or if your house number is longer – just add extra boards! 🙂
Lay out your boards until you have 4 pieces that are pretty straight, and close to one another in color. The total width of the 4 upright pieces is how long to make the long sides of the planter. Mine came to nearly 14 inches. Using a combination square, I was able to measure 2 pieces to the exact length. Then 2 pieces 4 inches long will be the sides of the planter.
Determine the Bottom for the Pallet Wood Planter
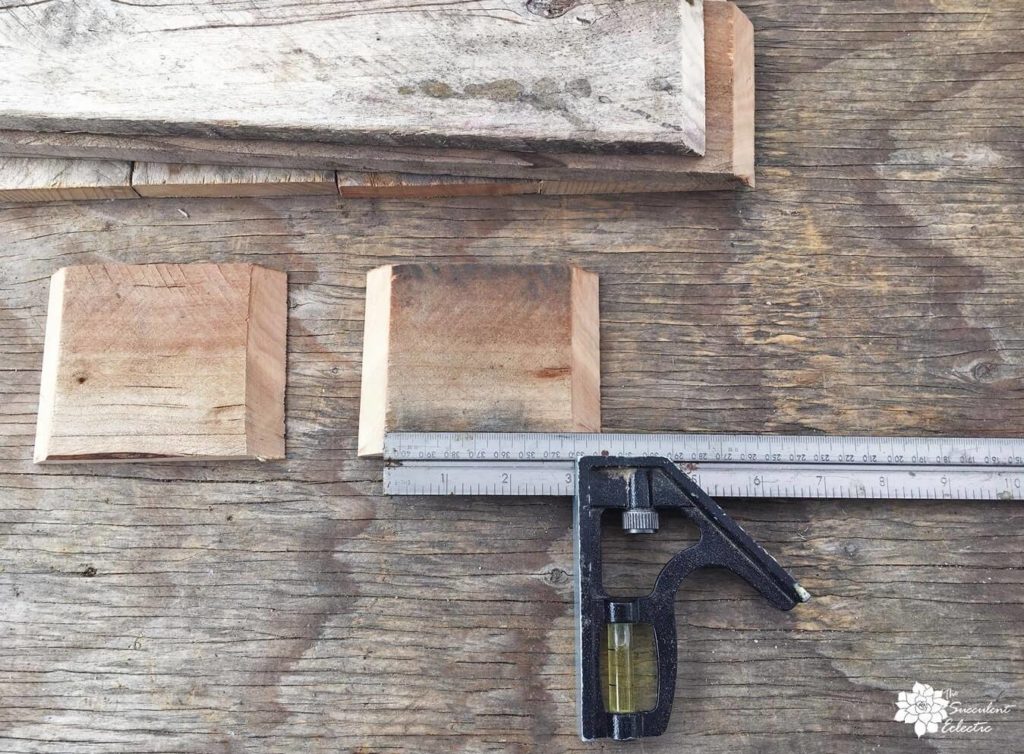
Assemble the planter part first. Then we’ll work on the upright back. I beveled the pieces of wood for my pallet wood planter using a sliding compound miter saw that I love, but a simple miter box will work, too. If you want to skip the mitering, butt joints will work too. Subtract an inch from your side pieces if you choose to use butt joints, making them 3 inches long, and set them inside the long pieces. The bottom will be 3 inches wide, whether mitered from 4″, or using 3″ butt joints. Measure the length of your planter, and subtract the width of the side pieces. Mine came to ~13.25″.
Glue the Pallett Wood Planter Together
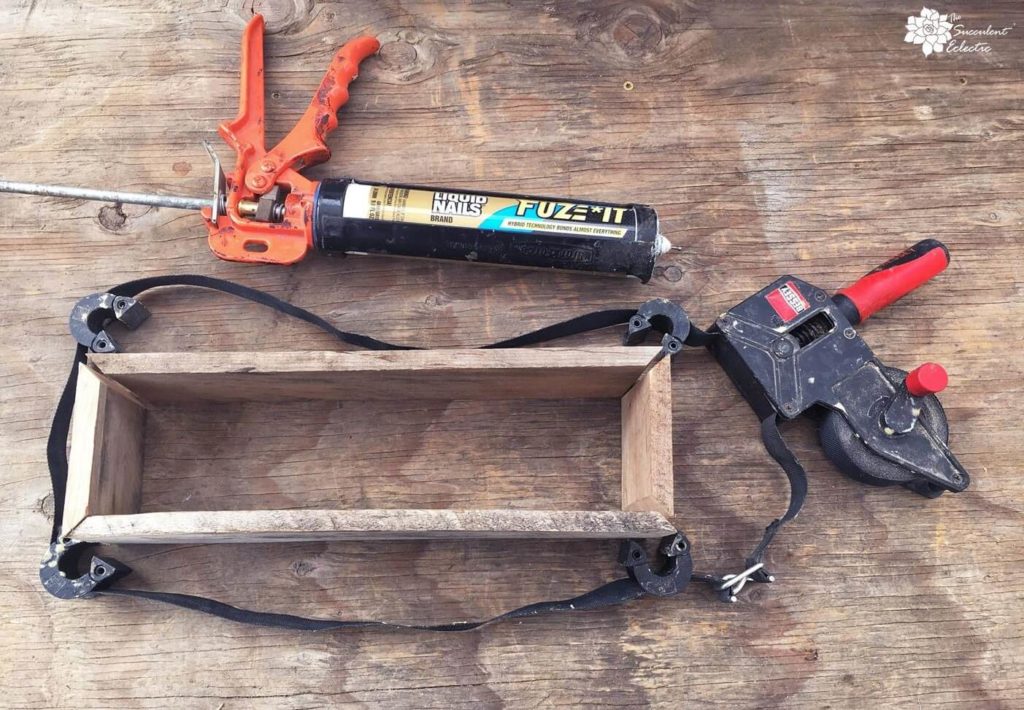
If you want to skip making the planter, this Bessey strap clamp is an awesome gift for Dad – or anyone who likes to do woodworking! It enables you to securely clamp multi-sided projects together all at once, and works fabulously for oddball shapes, side numbers and sizes.
But you don’t want to skip making this cool house number planter! So use wood glue, or (my new favorite) Fuze It (in a tube, or for a caulk gun) to glue the sides and bottom of the planter together. Be sure to use a formula that is waterproof and resistant to the elements. Your planter will need to stand up to soil, water and weather for years to come!
Clamp Pallet Wood Planter Together
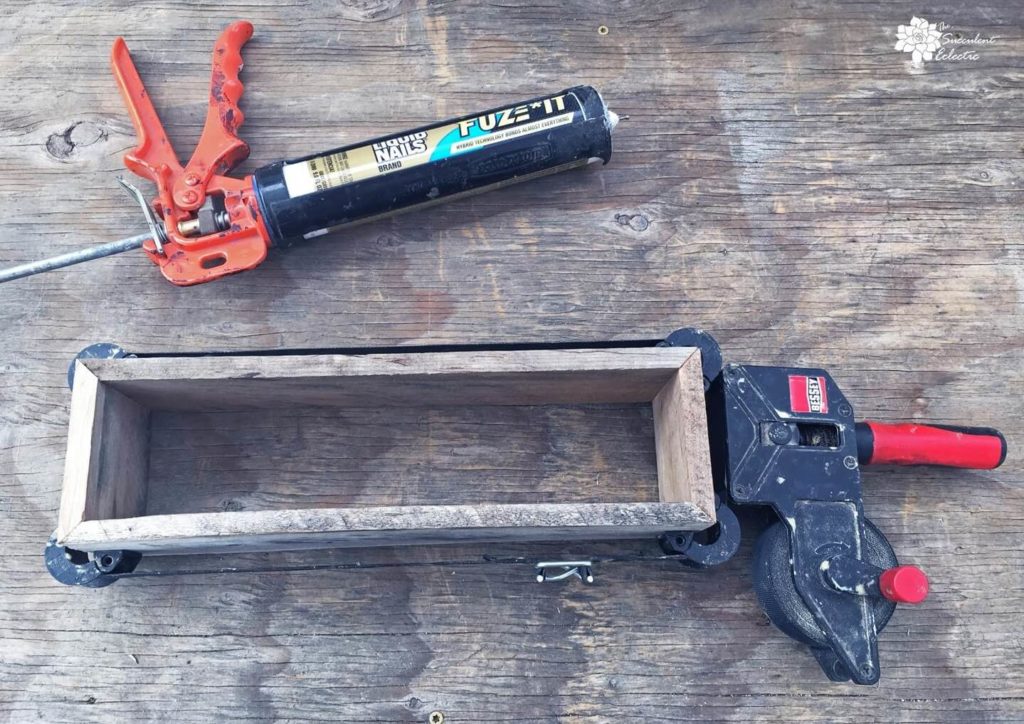
Apply wood glue or Fuze It to the joints for the sides and bottom of your planter. Securely clamp your pallet wood planter together. Bar clamps will work well if you don’t have a spiffy strap clamp. You can also nail or screw the sides into place. Allow a few hours for the glue to fully set.
Glue the Back of the House Number Planter
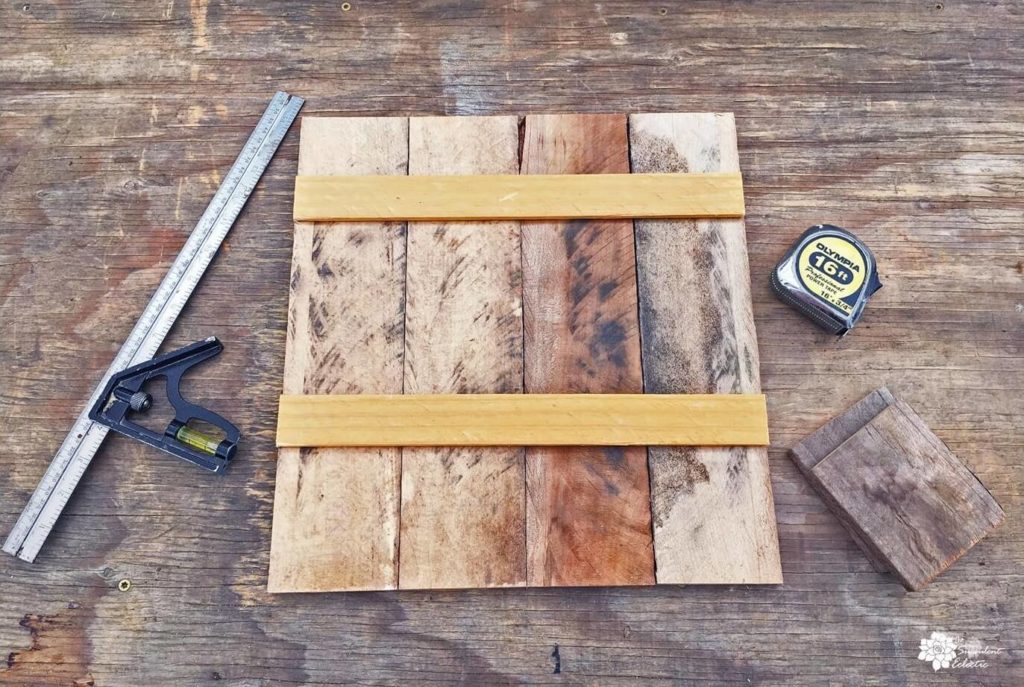
While the glue on the planter part is setting up, assemble and glue the back that will have the house numbers attached. Your 2 pieces of lath should be attached across the backside of the pieces of wood that will form the upright back of your house address planter. Gluing these pieces together like this will help to keep them in a straight line over the years of weathering to come. Be sure to measure the height of the planter you have in the clamps from the previous step. You want the bottom strip of lath to be above the planter. You will be screwing this back piece to the planter in a few steps.
Staining Pallet Wood Planter
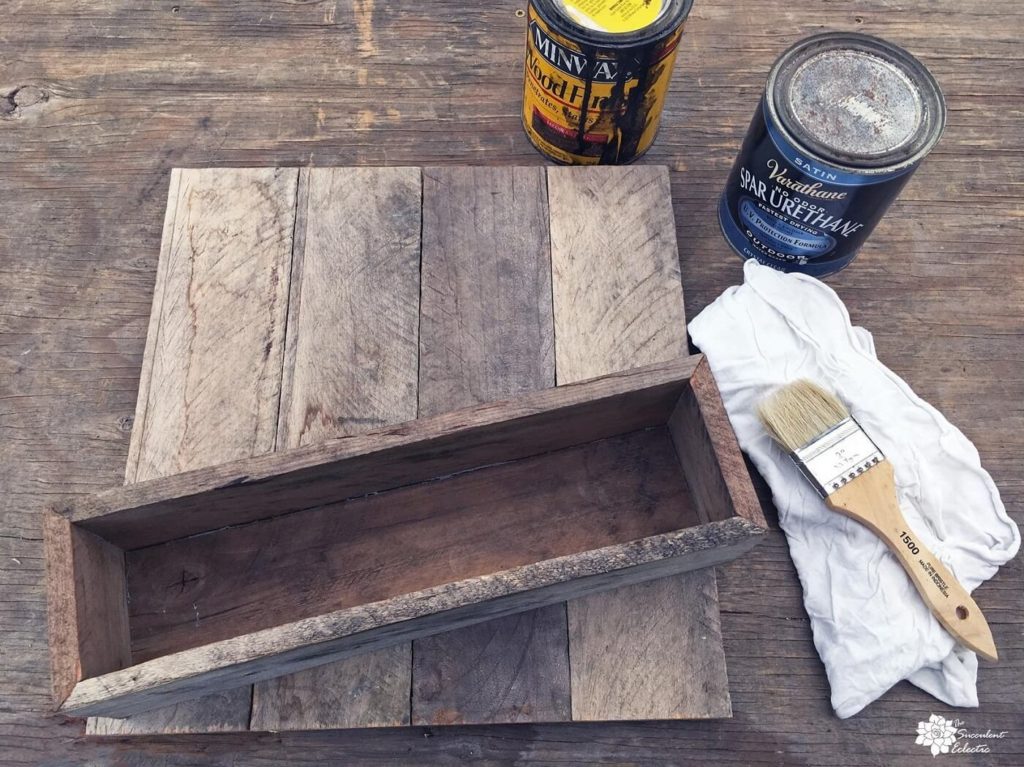
To stain or not to stain? Usually, when I am working with reclaimed wood, I prefer the natural look of it. See how the character of the wood in the image above really speaks of years of standing up to the elements? I love that look! But for this project, I selected the light colored, brush nickel house numbers, so I needed a dark planter for the contrast to have those numbers really show up well. The company does offer this same style of house numbers in black and in aged bronze. If you select a color like that, you can skip the stain and leave the pallet wood it’s natural color. I used leftover Minwax Jacobean wood stain for my house number planter. Use a paintbrush or foam brush to apply the stain, and wipe it off thoroughly with a clean, soft rag.
Whether you stain your planter or leave it the natural color, be sure to add a clear coat of varathane to protect it from the elements from now on. Use a paintbrush or foam brush to apply the clear coat. Follow the instructions on the can for multiple coats for lasting protection. I gave mine 4 coats.
Prepare to Attach the House Number Planter
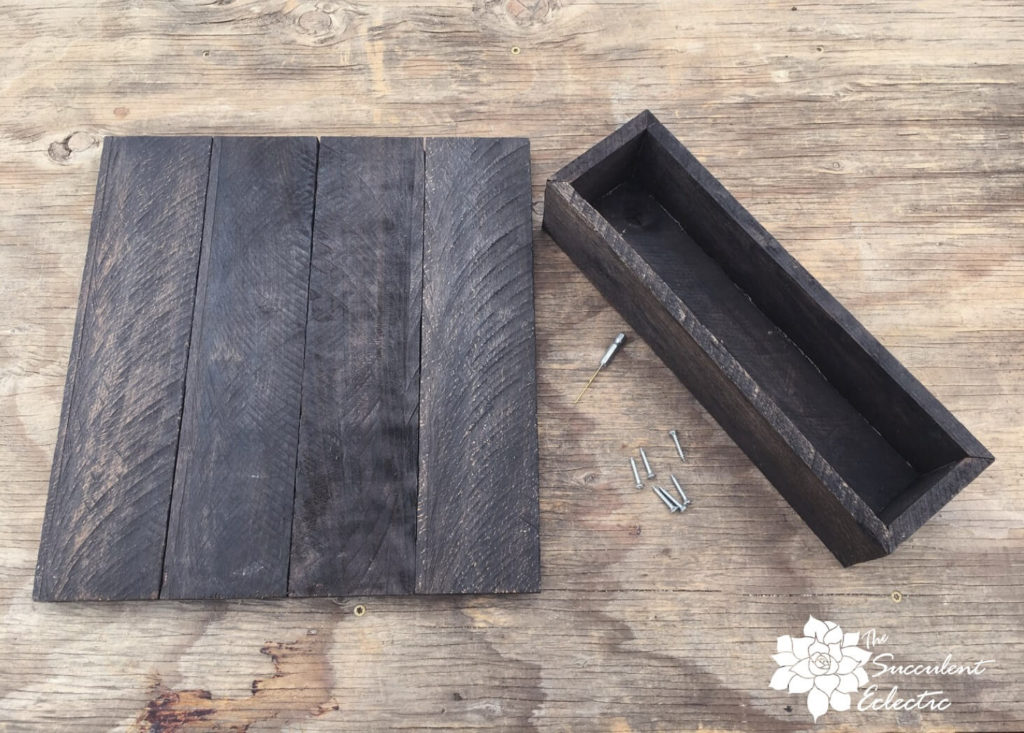
Do not attach the planter to the back just yet. But make the preparations now. I attached the bottom planter to the upright back using 6 3/4″ screws. I drilled a small pilot hole for each.
Secure the Planter to the House Number Back
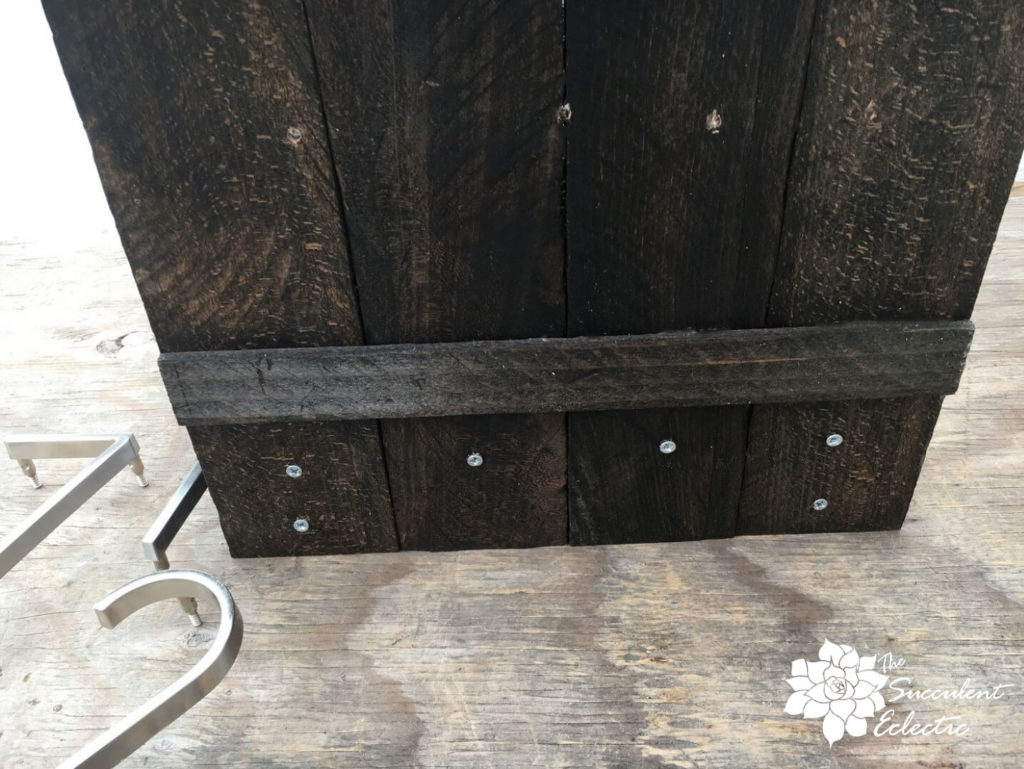
To securely attach the planter to the back, I used 6 screws as shown above. But it is easier to drill the pilot holes now, in preparation, then save attaching the screws till after the numbers have been placed and drilled.
Floating Address Numbers, or Flush Mount?
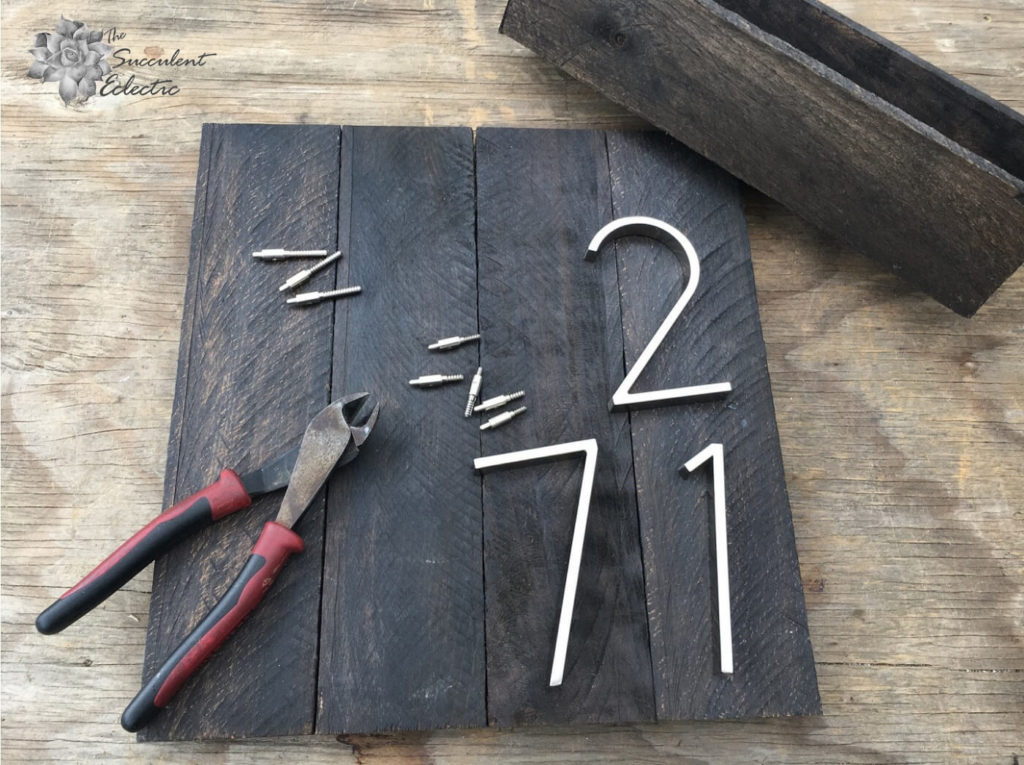
I hunted for just the right numbers for this project. I wanted something simple, modern, attractive and easily read from the street. So guy from Publisher’s Clearing House can find me when he delivers that enormous check! (Or at the least – the pizza guy, right?) I am really pleased with the look of the numbers I selected. I went with the brushed nickel, but they also come in black, aged bronze and polish brass. And of course, there are many (many) other styles to choose from.
It turns out that the numbers I selected can be installed to “float” about a third of an inch above the surface of the wood, or to mount flush to the wood’s surface. Floating the number looks really cool as the shadows cast by the numbers changes throughout the day, becoming an additional design element on a sunny day. Scroll to the bottom for a shot of mine in the afternoon.) I went round and round (and round some more) on this. Which way should I attach my numbers? Why the tizzy? I am not sure. The reviews on the numbers were mixed, with most people who had trouble complaining about the quality of the hardware to float the numbers. So, I was unsure, but eventually decided I should float them so I could tell you how they work. But you will be able to mount them flush with the wood, if you prefer.
Attaching Floating House Numbers to Pallet Wood Planter
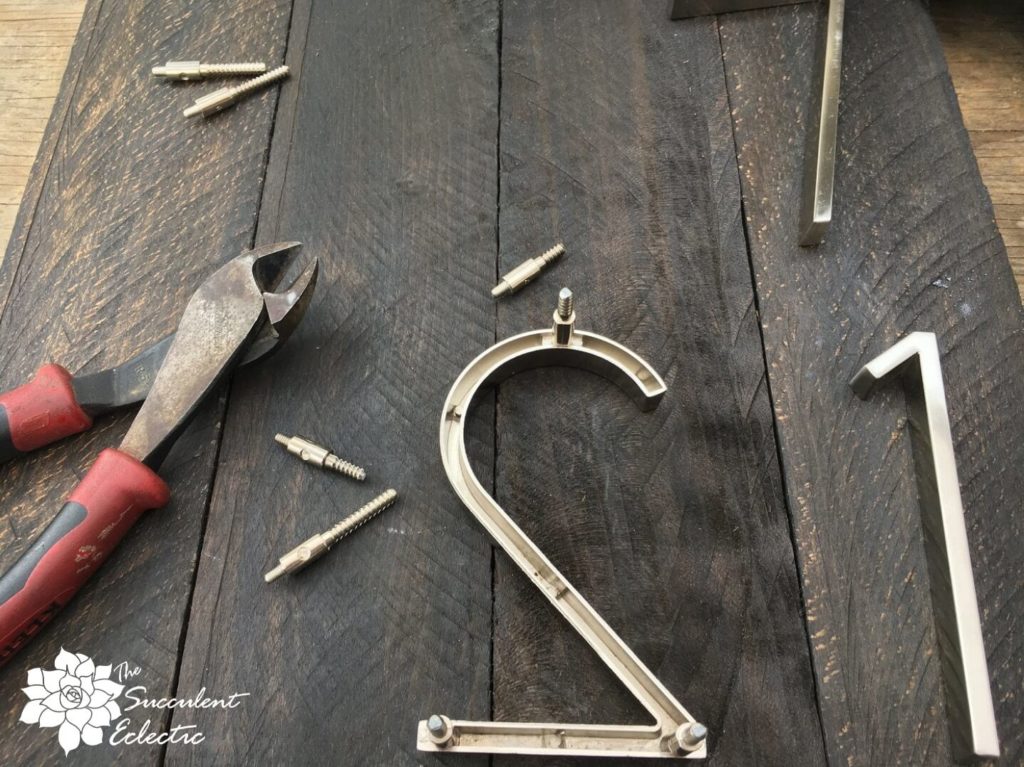
The reviews had convinced me that the hardware for floating the numbers was not very strong and would not take abuse. So I was very careful working with it the whole time, and I had zero trouble. Take a look at the odd mounts in the image above. There is a smooth shank, with a small, screw-threaded portion on one side, and a longer, ridged (NOT screw threaded) portion on the other side. The smooth shank supports the numbers above the surface of the wood. The threaded part screws – gently – into the numbers. The ridged portion will be pushed, not forced, into the hole you drill into the wood. I treated them gently and had zero trouble with them.
But they were longer than my pallet wood was thick! So I cut them down using wire cutters. I don’t know if they are made of metal or a heavy plastic, but this shows why they won’t tolerate bending and forcing. Cutting them required a bit of hand strength, but they cut down cleanly. My husband’s large wire clippers made this much easier than using my small, craft wire clippers.
Finish Assembling the House Number Planter
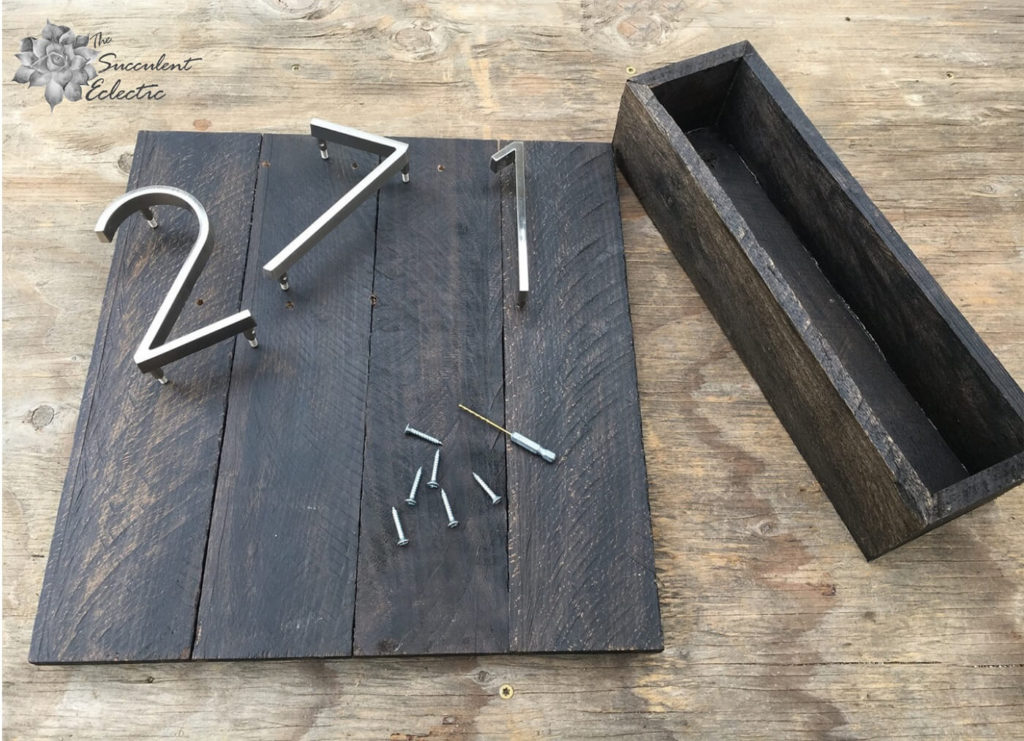
Use the templates provided in the number packages, as well as a straight edge to get the numbers placed exactly how you want them. Drill the holes per the instructions. I used a 3/16 drill bit for the numbers. They fit snugly but do not force them into the wood. Make sure the holes line up for the numbers to fit into easily, without forcing. If they don’t, open the holes a bit more with the drill bit. Use a small bit of silicone caulk in each hole, then insert the mount for the numbers. Easy peasy! Once the numbers are in place, attach the bottom planter to the upright back with the screws from a previous step.
Plant Succulents in Your House Number Planter!
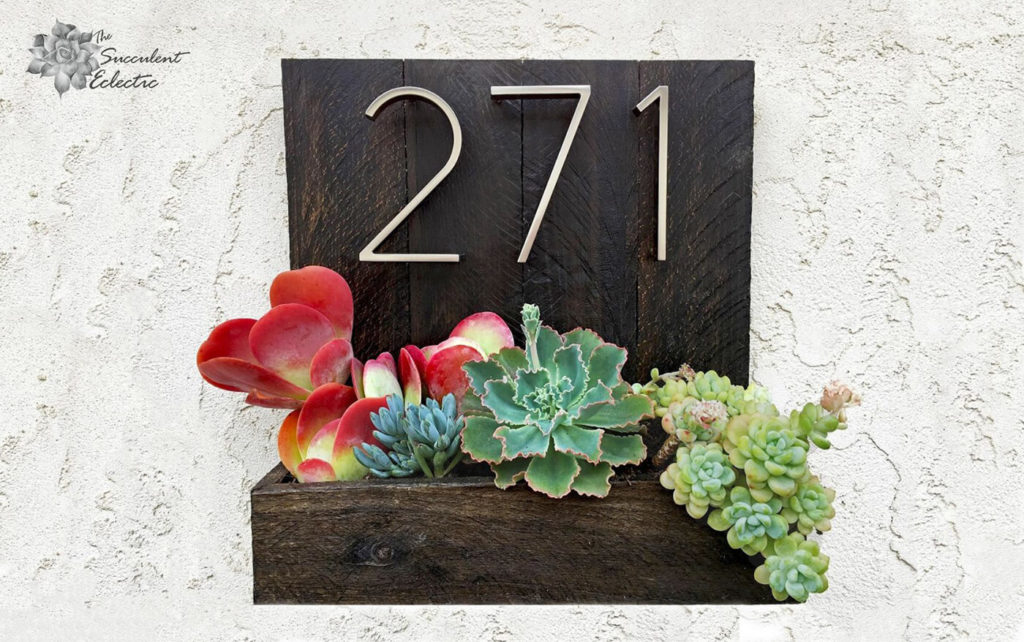
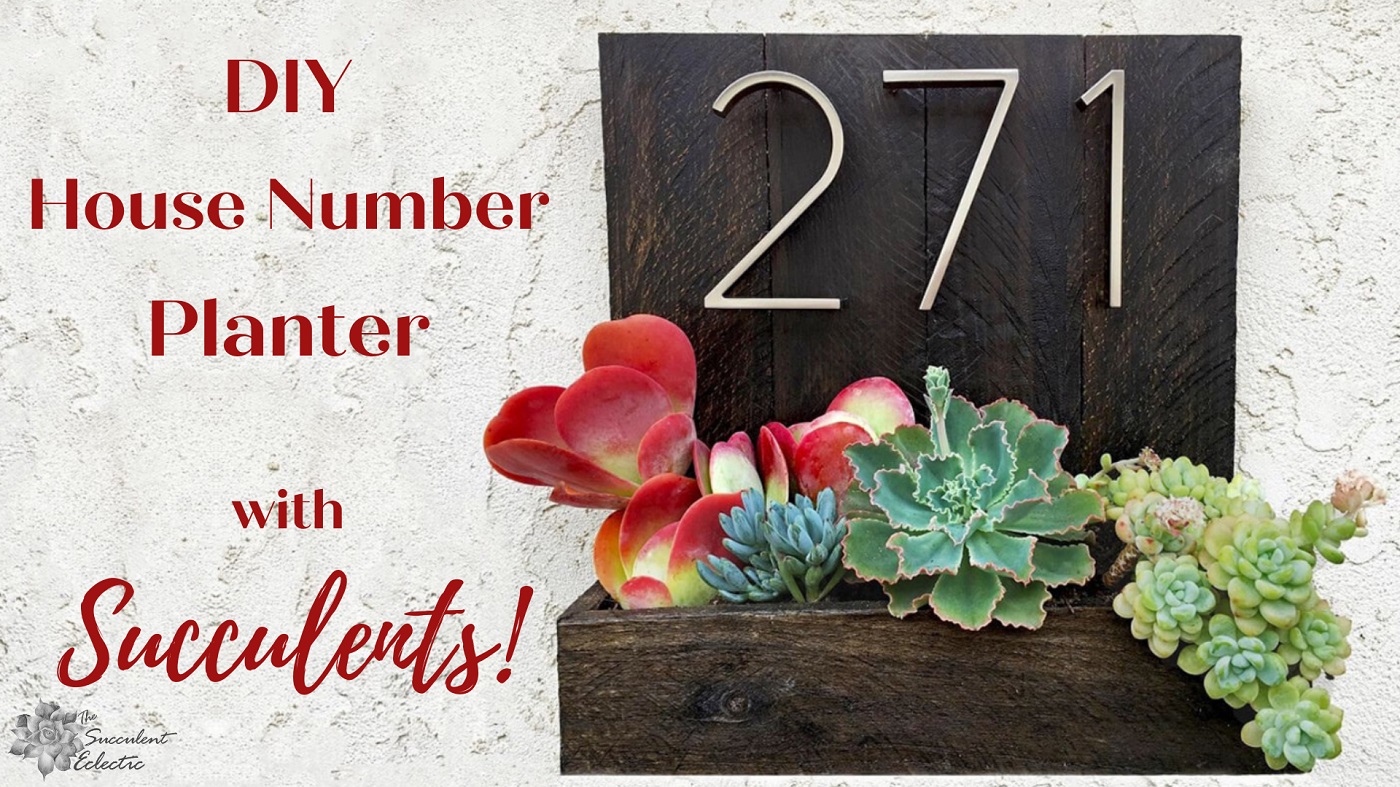
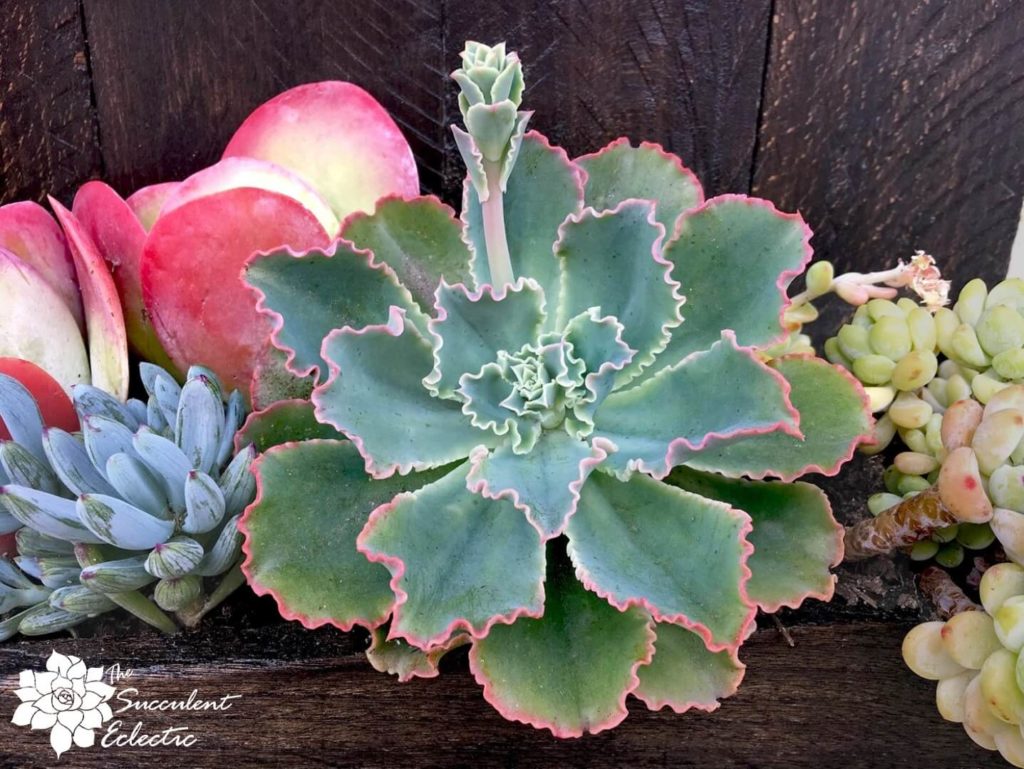
Now for the most important step of all – plant your succulents! 🙂 From left to right, I used a Kalanchoe luciae flapjacks for the height and vivid stress coloring. Then, Senecio serpens blue chalk sticks. I love the way it brings out the blue tones from the Echeveria Giant Blue, whose ruffled edges really pick up the cherry tones from the flapjacks. Then, the cascading Sedum clavatum (one of my all-time faves) echoes the green and the blue tones of the echeveria.
Finished House Number Planter with Floating Numbers
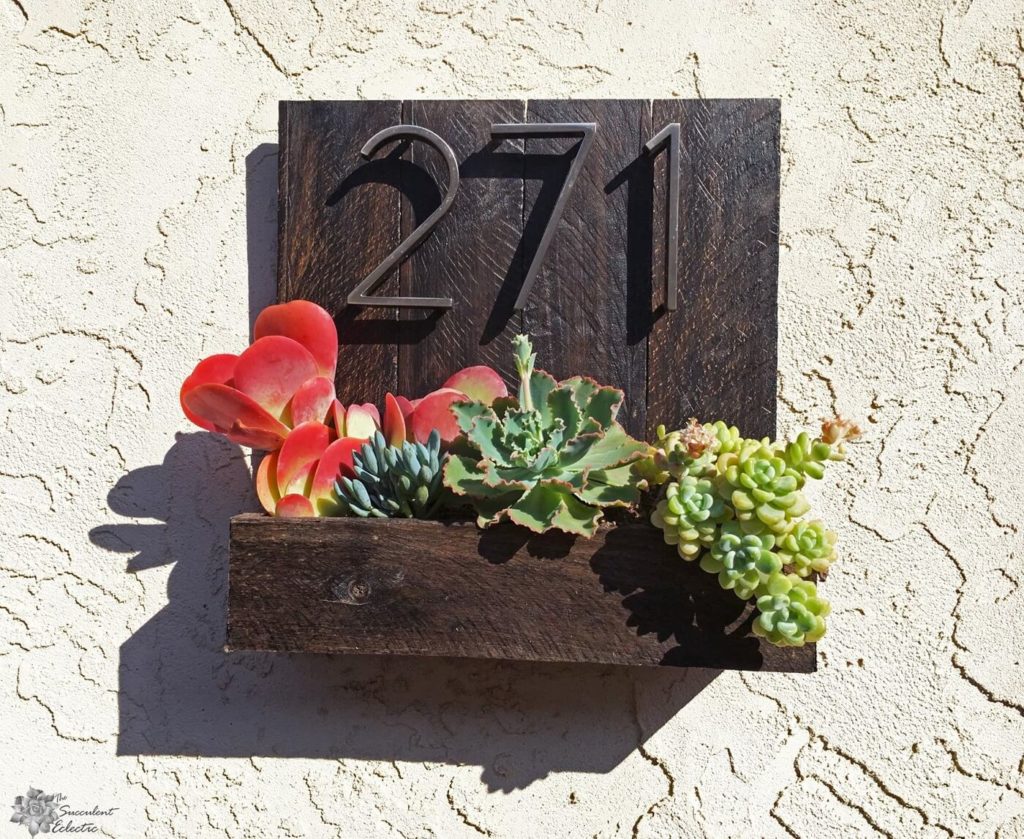
Here, you can see my house number planter filled with succulents, with the shadows cast by the floating numbers.
So – what do you think? Does this make a good Father’s Day DIY? Whether you make it yourself, or with Dad, I think this pallet wood planter for succulents is a winner. Will you make one? I would love to know! Please take a moment to leave a comment and let me know. Or ask any questions. I am happy to help!
This one’s for you, Dad!!

P.S. Please sign up for my FREE course, 7 Steps to Succulent Success! Thank you!
P.P.S. Why not join my Facebook Group for succulent-lovers? We talk succulent care, propagation, succulent identification and design. It’s a warm and welcoming group that would love to meet you!
