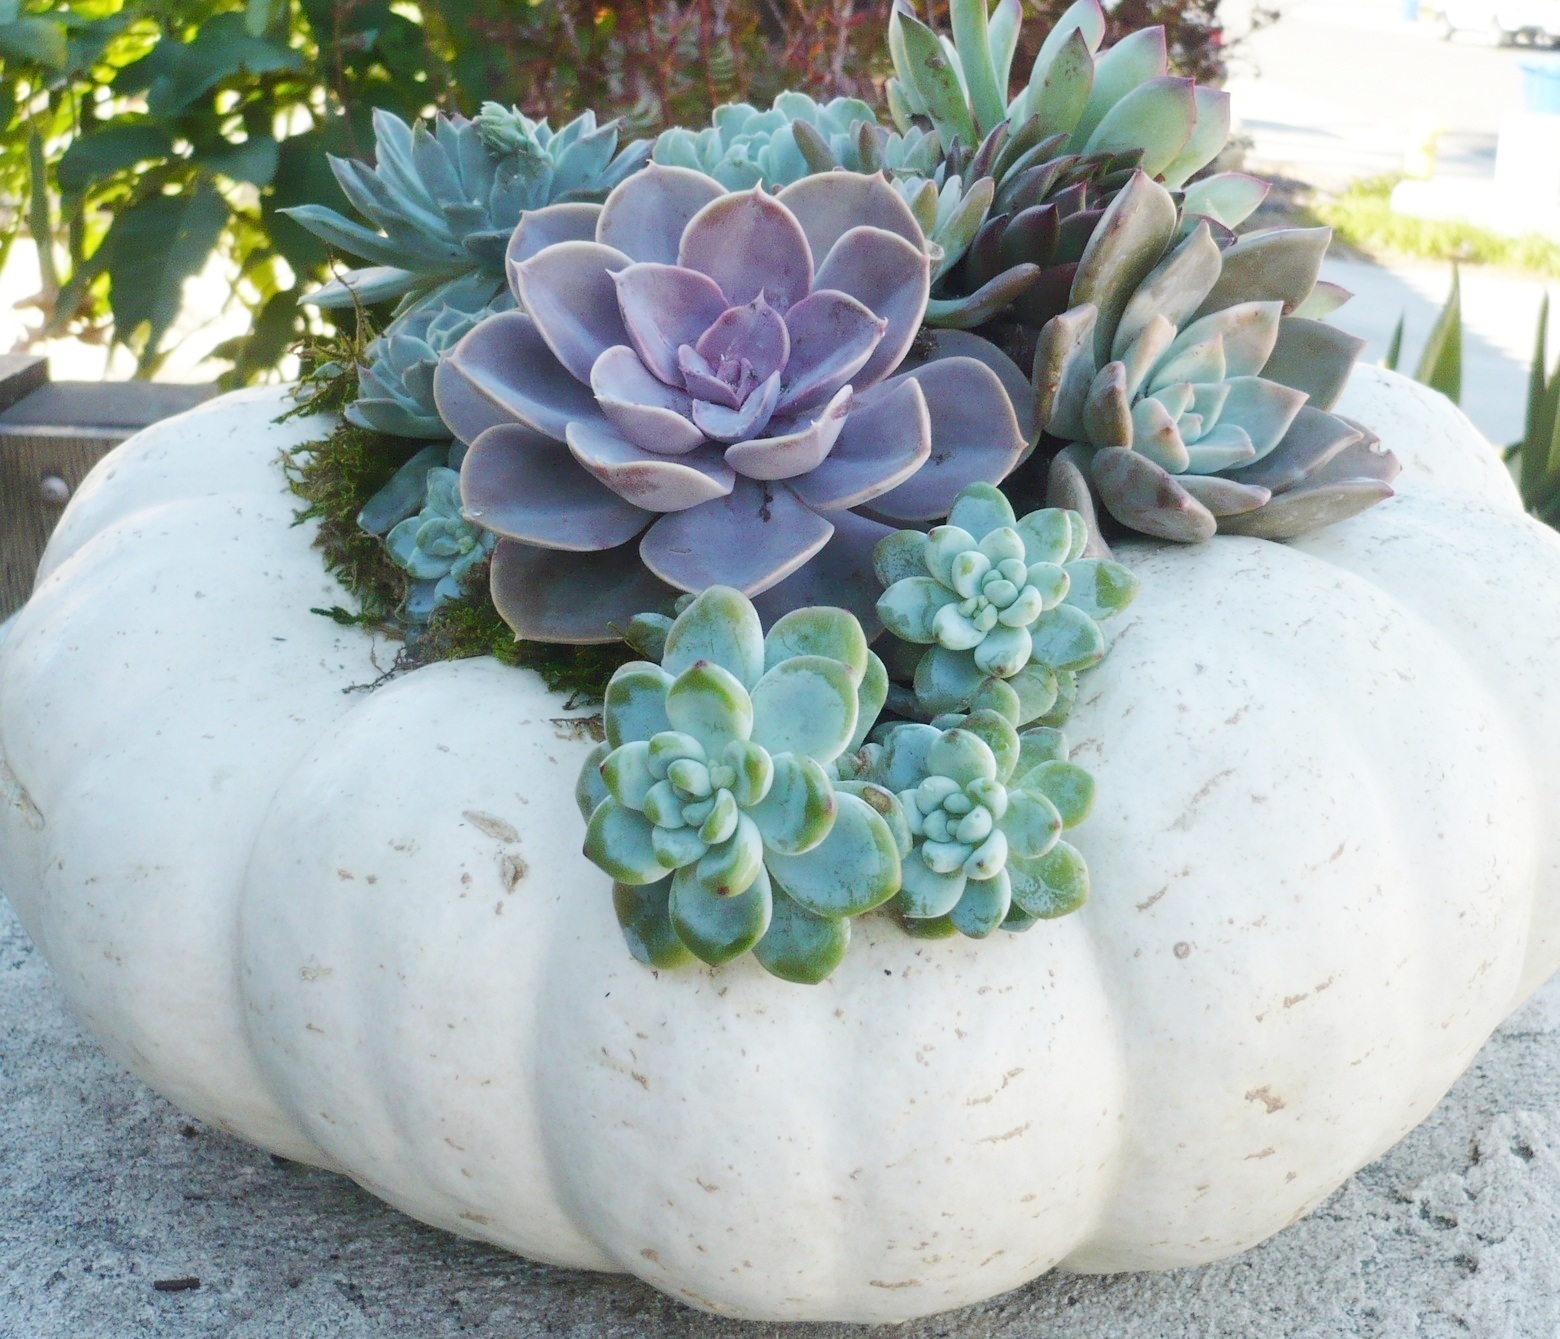
Some people are die-hard succulent fanatics, while others simply adore all things pumpkin. Fall is the fabulous time of year when these two groups get together to have a blast! Yes, you guessed it, Charlie Brown! It is the time of the Great Succulent Pumpkin! Read on for my no-carve, no-glue, super long-lasting succulent pumpkin.
{Please note, some links in this post may be affiliate links to sites that pay me a small commission if you click on the link and make a purchase. This commission is at absolutely no cost to you. I only recommend products and companies that I have worked with and truly love! ~Kat}
How to Make a Living Succulent Pumpkin
In this Post We'll Cover:
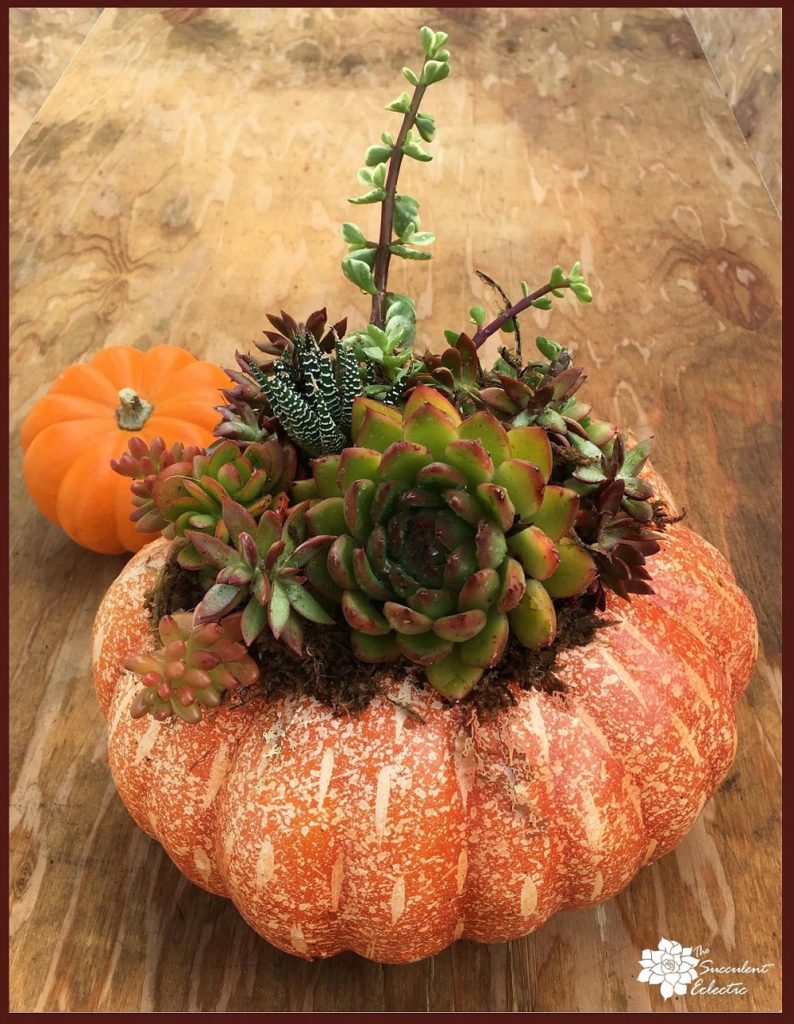
When I first made a succulent pumpkin a few years ago, I actually thought I had invented it! Now, of course, I know that many people who love succulents also thought they would look great on a pumpkin, and Pinterest and Instagram are full of the fabulous photos that result. Turns out, there are a few different ways to go about making your own succulent pumpkin, so I wanted to show you mine.
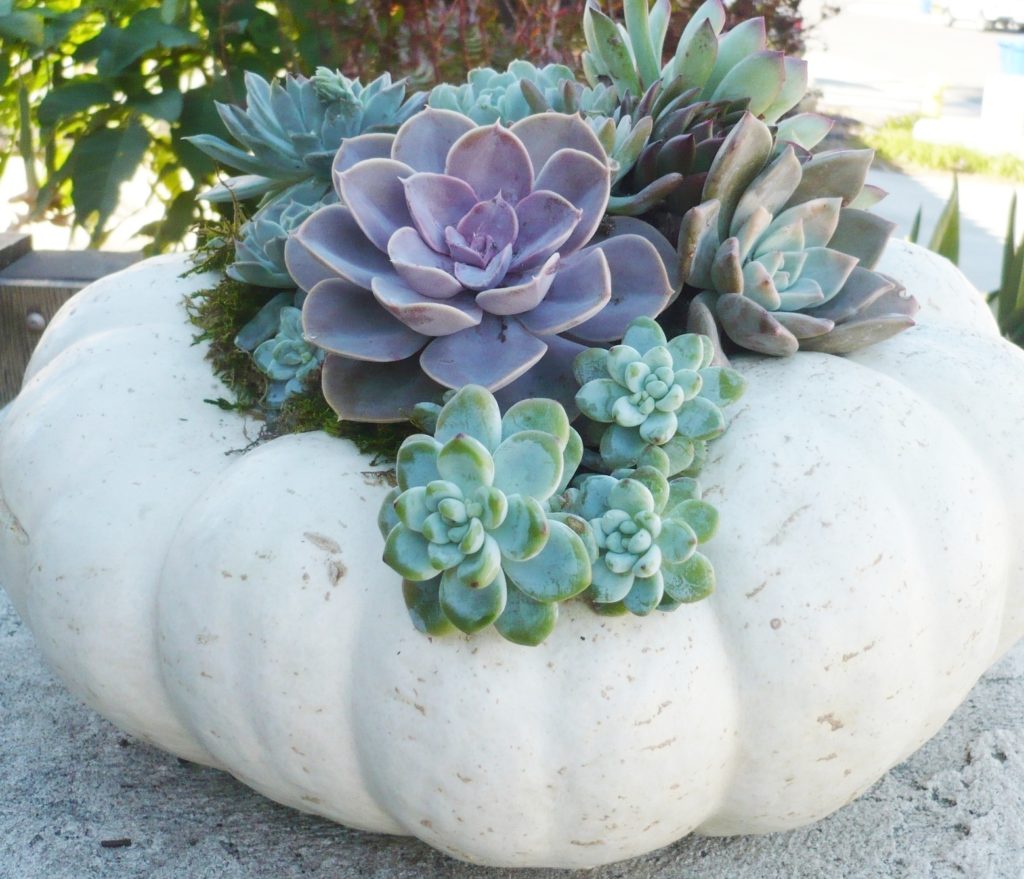
There are many articles about this project. Some use hot glue to affix succulent plants and/or cuttings into moss. While it is well documented that succulents shrug off the heat and the glue, happily rooting through the glue into the moss, and ready-to-be transplanted when the pumpkin is spent; many people cringe at the thought of using hot glue on living plants. In the interest of full disclosure, I cringe a bit too, at the thought. But I promise you, it truly does not harm the plants. The results are both beautiful and long-lasting, and can last for two months!
Others carve the pumpkin, much as you would start a jack o’lantern, and set a pot of mixed succulents into the center to achieve a similar look without the glue. The pumpkin does not last so long this way, cut pumpkins last about 5-10 days, but the look is so festive and perfect for the season, and the succulent pot can easily be moved to another location to brighten another container.
I opt for a different approach, one that lasts the very longest and shouldn’t bother the squeamish among us! 🙂 I plant succulent cuttings in fast draining soil on top of the pumpkin, for the very longest lasting arrangement.
How to Make a Succulent Pumpkin
You Will Need:
- 1 Pumpkin, wider than tall, with a concave top, like a Cinderella or fairytale variety
- Succulent soil
- Succulent cuttings and plants in mixed colors and textures
- Natural moss, (I used sphagnum moss)
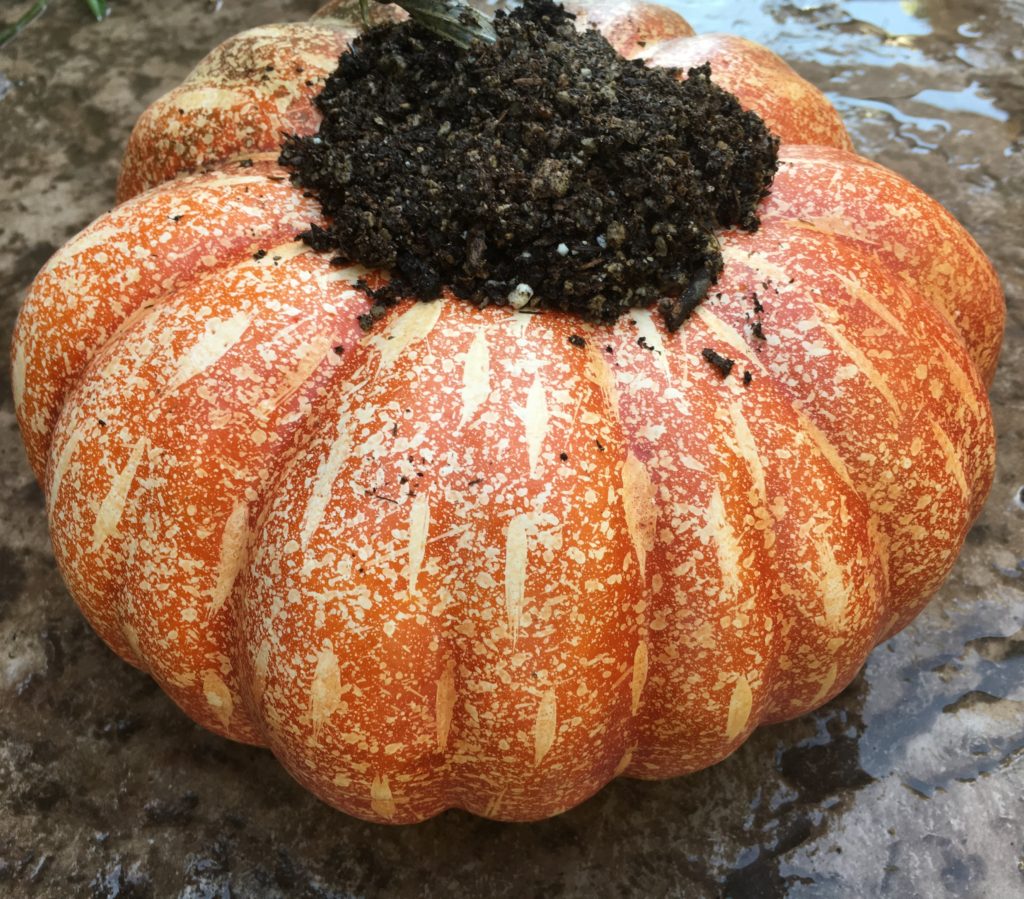
Select a pumpkin whose color and form you like. Because I want my succulent pumpkin to be great for Halloween and Thanksgiving, I opted for this variety with its beautifully mottled skin in a wonderful mix of orange and creamy yellow. When choosing your pumpkin look carefully to be certain your choice is free of any cuts or bruises, as these will limit the time the pumpkin remains in great condition. Choose one wider than it is tall, with a concave top to give you the most growing space for your succulents.
Use fast draining succulent soil (often listed as cactus and palm soil). Take a handful of soil, thoroughly wet it, and squeeze the excess water out. Add the wet succulent soil to the top of your pumpkin, patting it down into place. Continue to add wet soil to fill in the concavity, and lighting mound it. I liked the stem on my pumpkin, so I left it in place and molded the soil around it. The stem can also be useful for stabilizing some of the cuttings using floral pins or fishing line if need be.
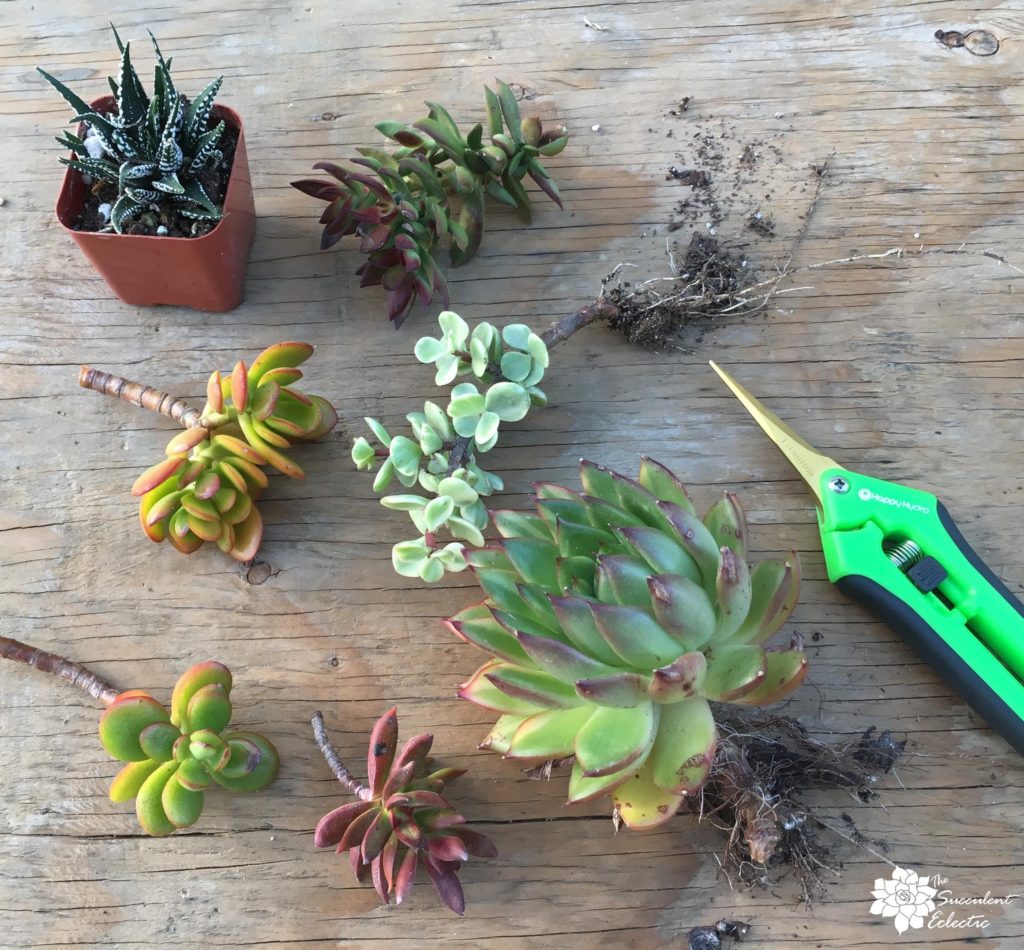
When selecting the succulents I wanted to use, I chose several with burgundy accents in very different shapes and textures to continue my fall coloring theme, including sedum, crassula, jade, haworthia and portulacaria. For this project, I like to leave an extra long stem on the succulent cuttings. They should be given two days after being cut to heal over before being “planted”, so they are in best condition to root. Plants should have most of the soil and feeder roots trimmed away, leaving a few strong roots intact.
Planting Your Succulent Pumpkin
I like to place my largest, most important succulent first. It is the “star” of the arrangement. I took the large echeveria agavoides (lower right side in the photo above) and placed it off center, angling toward the viewer. That is now the “front” of the arrangement. Be sure to fully cover the stem and roots with the soil, and firmly pat it into place. In time, the plants will root into the soil. To keep the arrangement balanced and looking good from all directions, place your next succulent exactly opposite the first. Then place the next cuttings equally between the first two. Continue to fill in with your plants and cuttings all the way around the pumpkin, always ensuring the roots and stems are well covered by the soil. Vary the angle of your placement to create a gentle mounding shape to the final look. Allow for some height as well as a trailing element. Because I like a natural look to my plantings, I am careful to avoid too much symmetry in the look of the arrangement.
The succulents in the arrangement are pretty loose at first. You are holding the cuttings and plants into place with very little soil; until they root in, the arrangement is a bit fragile. You can use floral pins to secure them into place. I don’t push pins into the pumpkin itself, only into the stem, because any piercing of the pumpkin’s skin will hasten its eventual decay.
Finishing Touches
Once all of the cuttings and plants are in place and you are happy with the arrangement, it is time to add moss for a finished appearance. Soak the moss in water. Squeeze it out and pull a small tuft apart from the rest. Tuck this into your arrangement to cover any soil, and add a few whisps between the succulents and the pumpkin. The moss acts as a finishing touch and helps to keep the roots hydrated as they begin to develop.
Caring for Your Succulent Pumpkin
One of the reasons this succulent pumpkin lasts so long is that we use cuttings and root-trimmed plants. The time it takes them to fully develop roots gives you even more time to enjoy the arrangement! Provide bright light indoors, and bright indirect light outdoors. You must protect the pumpkin from freezing, and water the succulents about once each week with just 1/4 – 1/2 cup of water. Let the soil dry a good bit between watering, but to hold its shape, the soil should never get bone dry.
Here is a simple trick to getting your pumpkin to last weeks longer using cardboard. Simply set your pumpkin on a corrugated cardboard coaster! Trace a circle around the pumpkin, cut it out. Trim as needed to make sure you can place the pumpkin on it without the cardboard showing. Whether you display the pumpkin indoors or out, be sure to provide this cardboard disk. It prevents the moisture rich pumpkin from resting directly on a non-porous surface, where the build-up of excess moisture can lead to rot. Instead, the cardboard soaks up that little bit of moisture, extending the freshness of the pumpkin by several more weeks or even months!
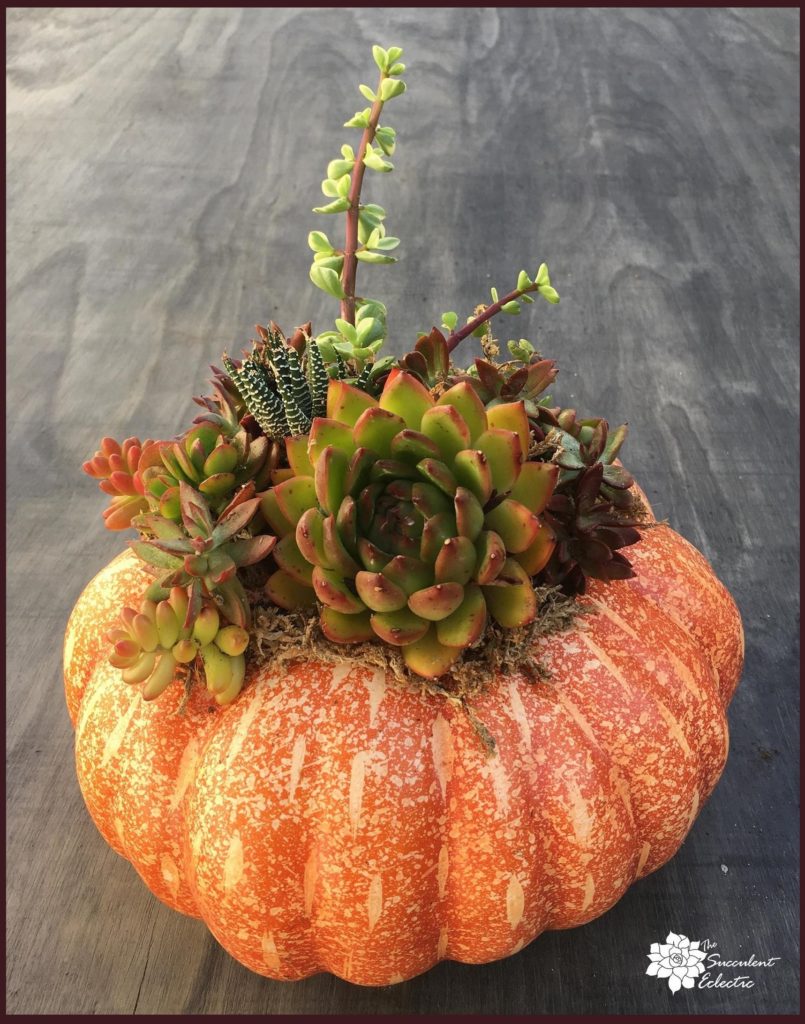
There you have it! My recipe for a succulent pumpkin that needs no glue or carving! What do you think? Will you be planting your own succulent pumpkin this fall? Please take a moment to leave a comment and let me know!
‘Til next time!

P.S. Please subscribe to The Succulent Eclectic. Thanks so much!
P.P.S. Why not join my Facebook Group for succulent lovers? We talk about succulent care, propagation, succulent identification, and design. It’s a warm and welcoming group that would love to meet you!

