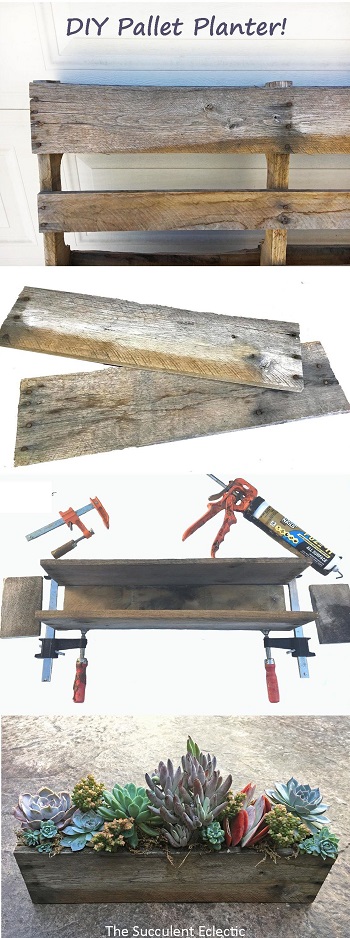
It is time for another succulent planter DIY, and I have been itching to do one with pallet wood! Pallets are so fun to use for a variety of reasons. First, ya gotta love that they are free! But I also really love those that are old and weathered. Weathered wood has such character, taking on a rich patina from uncounted years in the sun and rain. Together with the rusted nails, weathered pallet wood has such rugged appeal! And there is something magical about the combination of reclaimed wood and succulents. So — let me show you how I made this pallet planter box for succulents.
Pallet Wood Succulent Planter DIY!
In this Post We'll Cover:
{Please note, some links in this post may be affiliate links to sites that pay me a small commission if you click on the link and make a purchase. This commission is at absolutely no cost to you. I only recommend products and companies that I have worked with and truly love! ~Kat}
DIY Pallet Planter Box
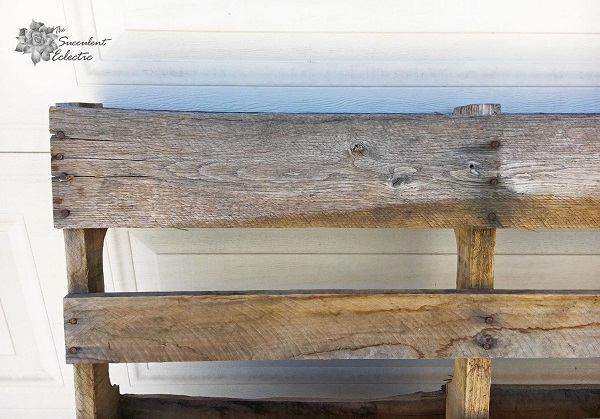
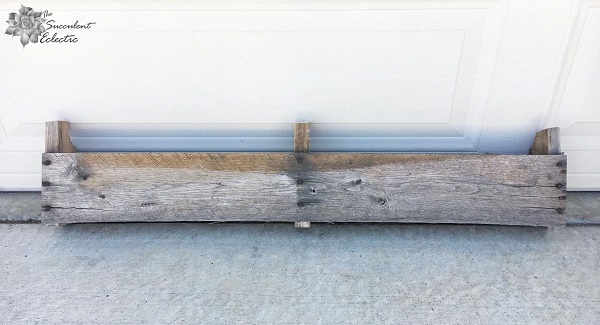
For this succulent planter DIY, look for a pallet that is well weathered, with beautiful grain. Bonus points for rusted nails! Also look for a pallet where the wood slats are intact front and back. See how the top corner of this pallet is practically a planter box already? It just needs to be cut off and have a bottom added.
So, in addition to your pallet, you will need:
Saw, hand or powered. A reciprocating saw is ideal for taking pallets apart.
Claw hammer
1.25″ Finishing nails
Flat blade screwdriver
Sandpaper
Inexpensive foam or paint brush
Fuze It (or any heavy duty waterproof glue)
4 bar clamps, 6-inch or larger
Natural moss, optional — I just love this one!
Cutting Through the Pallet Wood
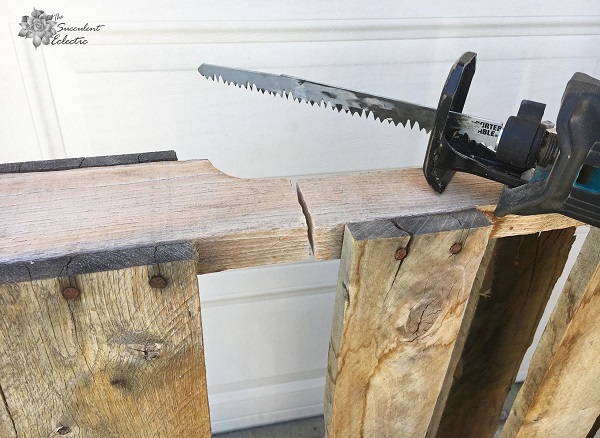
I was really pleased with the look of the wood on both sides on this planter. I (originally) planned to use it pretty much intact and to just add a bottom. So, I turned it on its side and cut through the upright 2x4s using Jerry’s Makita cordless reciprocating saw. This is such a great tool! It lives in the back of our Jeep, so we can use it when we find fallen tree branches, perfect for the tree branch planters here. But its true value for pallet projects really shines in the steps below.
Pallet Wood Section for the Planter
Once you cut through the 3 2×4 uprights, this is what you are left with. At this point, you could make a long planter with two sections. And I think the 2x4s extending above the sides might make a cool design detail. I decided to cut my pallet planter box down to just half this length and to cut down the 2x4s flush with the sides of the planter. Because I used the widest slats from the pallet and planned to use the 2x4s as the end pieces, my planter was both tall and narrow. As it happens, the depth of the planter is perfect for setting on a window sill! You could cut it down further at this point to suit your taste or your space.
I wanted to keep the pallet’s rusted nails for my pallet planter, so I cut through the wide slat just past the 2×4 upright. I was so anxious to keep the cut close to this upright, that I actually cut into it, and left a nasty gouge. So, I abandoned the idea of keeping the 2x4s and used smaller slats from the pallet for the planter’s ends. But then what about my wonderfully rusted nails?
Disassembling the Pallet

A reciprocating saw with a blade for nail-embedded wood is the perfect tool for taking apart a pallet! Using your flat-bladed screwdriver, pry the wood pieces apart just enough to allow the saw blade to slip between them.
A reciprocating saw is often referred to as a Sawzall, like tissue and Kleenex. If you are in the market for one, the Makita’s has a wonderful balance and easy action with a strong motor. Just be sure to get the battery pack when you get the tool!
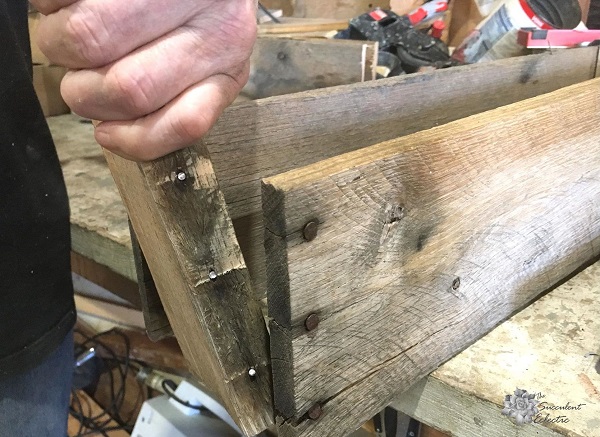
The Sawzall with the appropriate nail embedded wood blade slices right through those nails, maintaining the character that I love so much. Sometimes a nail may fall out. Just set it aside to glue back into place.
Saw Blades for Pallet Disassembly
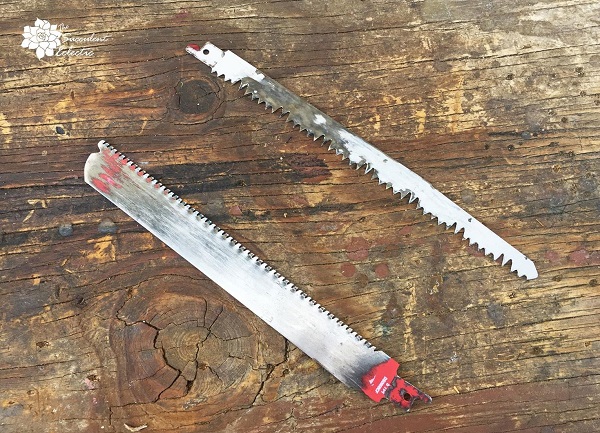
Again, it is so important to use the proper blades for taking apart your pallet. The saw blade on the upper right is a wood cutting blade for the reciprocating saw. The one on the lower left cuts through a combination of nails and pallet wood, and you can see the difference in the teeth.
Pallet Wood for Succulent Planter DIY
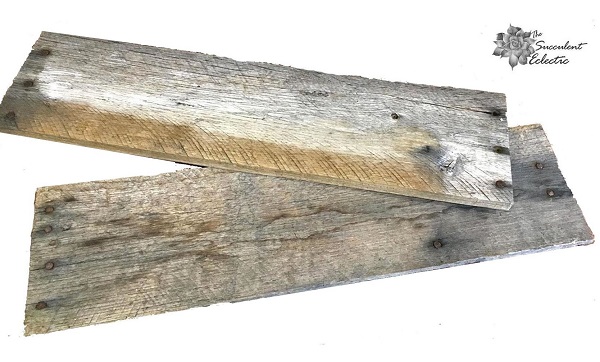
I love the rustic look of this wood! Now is the time to lightly sand off any spots that need it. I don’t sand mine smooth, because I want that very rustic look. But you should clear off any splinters waiting to happen.
Because I had originally planned to use the 2x4s as the end pieces, I decided to keep the same dimensions. So smaller slats from the same planter were used for the ends and the bottom. The bottom’s length came to the length of the wide side, minus twice the width of the end pieces. I cut the end pieces to make a butt joint with the sides and the bottom of the pallet planter box.
Building Your Pallet Planter Box
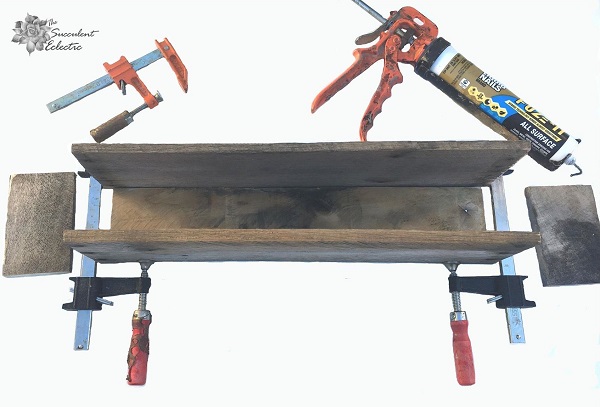
We use a lot of the Fuze It around here, so that’s why I have it in the tube that needs a caulking gun. You can also get it in smaller tubes that don’t require this tool. You can just squeeze them by hand. This is great stuff that cleans up easily, but it has great gripping power and cures highly water resistant.
Remember that we are using pallet wood here, so expect it to be warped. The bar clamps help to make them join well enough for the glue to make a strong bond.
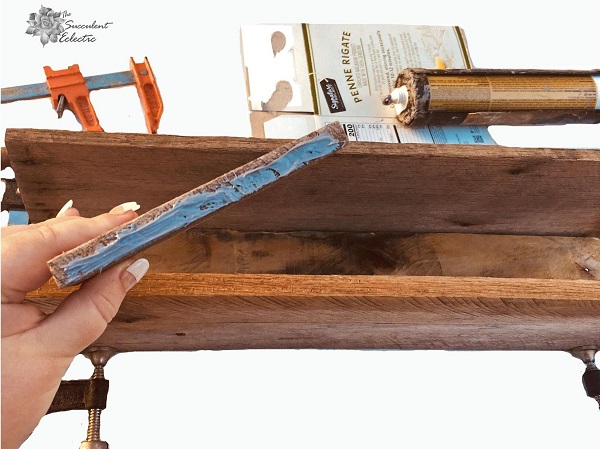
Apply the Fuze It by hand or with a stick. No need to skimp on this step. I glued the 4 sides together, then clamped them tight. Then, I flipped the box over, and slid the bottom into place with glue on all four sides. Use the hammer to tap the bottom into place if need be. Then turn it right side up again. Clean up any excess glue before it dries and cures.
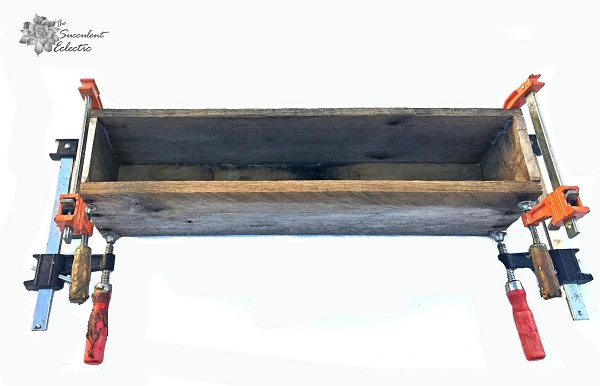
Really tighten the clamps down well, then set this aside for a good six hours to fully cure.
Water Seal Your Pallet Planter Box
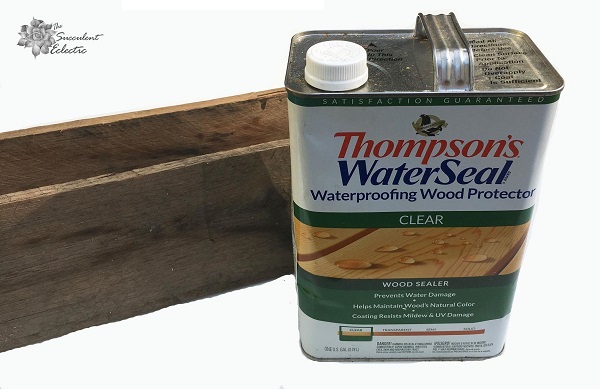
Remember that a weathered pallet is very dry, thirsty wood. Before you fill it with soil and plants, it is important to seal the wood. Because I wanted to enjoy the weathered wood, I did not stain or paint it, though either option will work if you prefer. I just used clear Thompson’s Water Seal. (There are many tints available, so select carefully). Use a cheap foam brush or paintbrush and apply a thorough coat of the water seal inside and out for your planter. Set the planter aside to fully dry for about two hours. Then apply a second coat.
Do not skip this step!
The water seal prevents the wood from soaking up water when you water your plants, or it rains. if the wood soaks up water, it will cause it to swell against the glue and nails, likely pulling your planter apart. If you prefer to block the water with paint or a varathane, that will work too. Just be sure to treat it!
Nailing the Pallet Planter
I’m sorry — I didn’t get a shot of this step. Remember that the rusted nails are just for show. Now use the finishing nails every four inches along each seam of your pallet planter box. I used my husband’s nail gun with brad nails so the nail heads would not be so visible. But they need to be there for the longevity of your planter.
Planting Your Pallet Planter Box
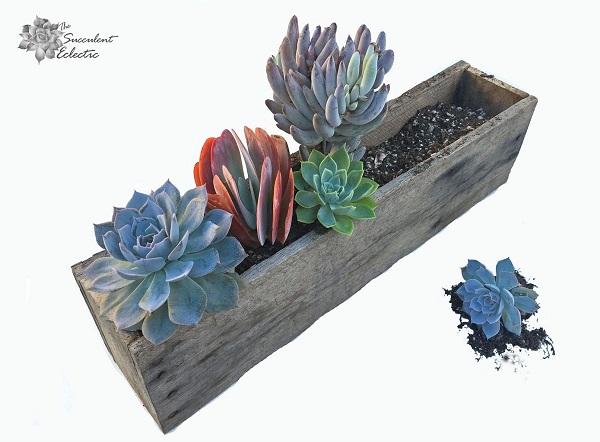
Now for the fun part! Filling your pallet planter box with fast-draining succulent soil and succulents. I went with a mix of colors, sizes and textures for this planter. And I wound up using a lot of plants! Just be sure all of the varieties you choose will grow well in the conditions where you will set your planter. Succulents are very tolerant of having their roots crowded. And with the restricted growing room, they slow their growth rate, which keeps a tightly planted arrangement looking great for a longer period of time. So once I planted my largest plants, I went back in and filled in the spaces with smaller plants.
Once all of your succulents are planted, water them in well. Then, go back and tuck in just a whisper of the sphagnum moss in any small openings for a finished look. I soak my moss in water for a few seconds to loosen up the strands before I tuck it into place.
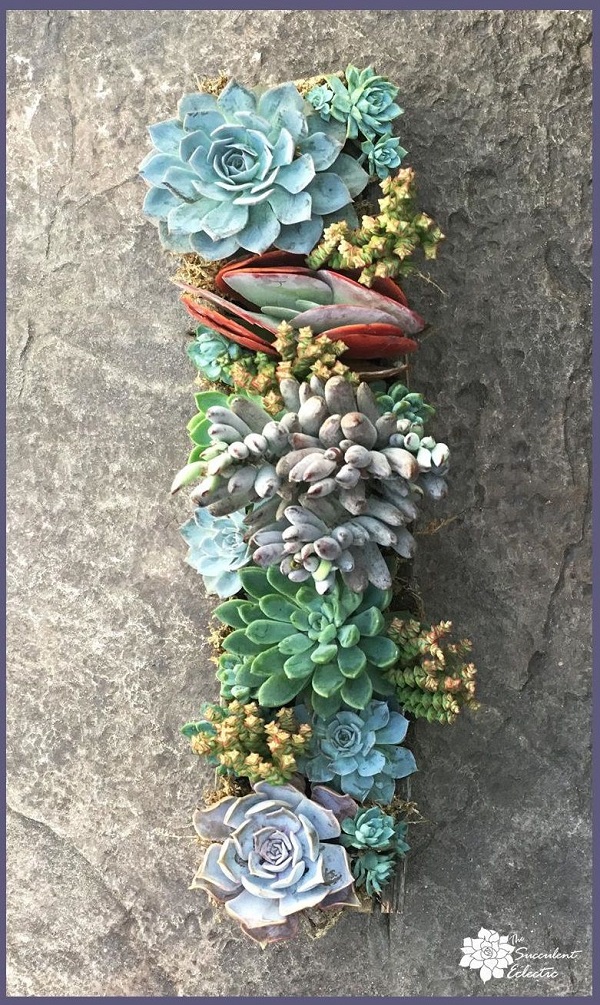
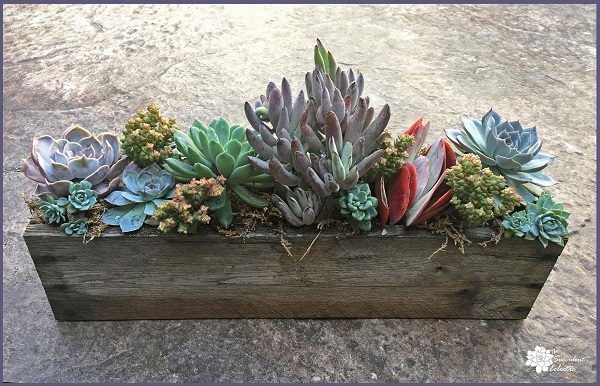
Pallet Planter Box Filled With Succulents
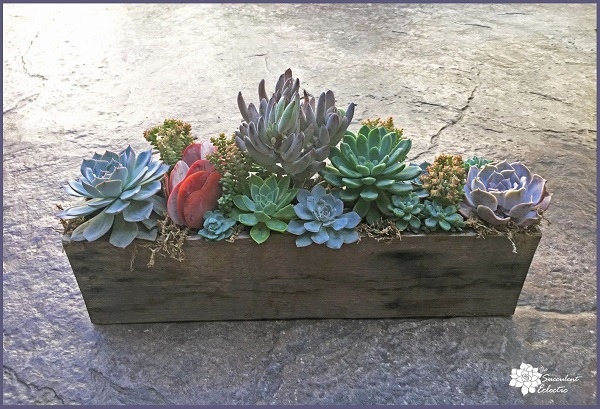
And there you have it! I am so pleased with how this turned out.
Watering Pallet Planter Box with Succulents
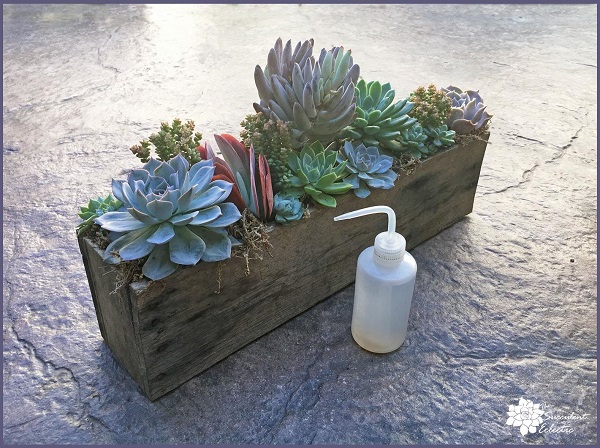
I frequently get asked about how to water succulents when they are planted so close together. This squeeze bottle is a great tool! The narrow tip gets the water exactly where I want it, right to the soil and the roots, rather than having water caught in the crowns of the succulents, where it can cause rot. Then, it is just a matter of watering your succulents only when the soil is dry, just as always.
So what do you think? Do you love pallet wood as much as I do? I would love to know if you plan to make this pallet planter box for your succulents. Please take a moment to leave a comment and let me know. Or if you have any questions — I am happy to help!
Happy gardening!

P.S. For my FREE course, 7 Steps to Succulent Success, please subscribe! Thanks so much!