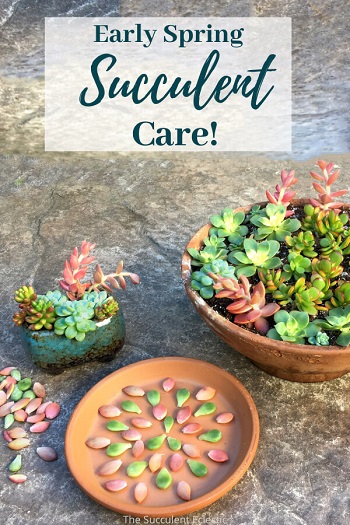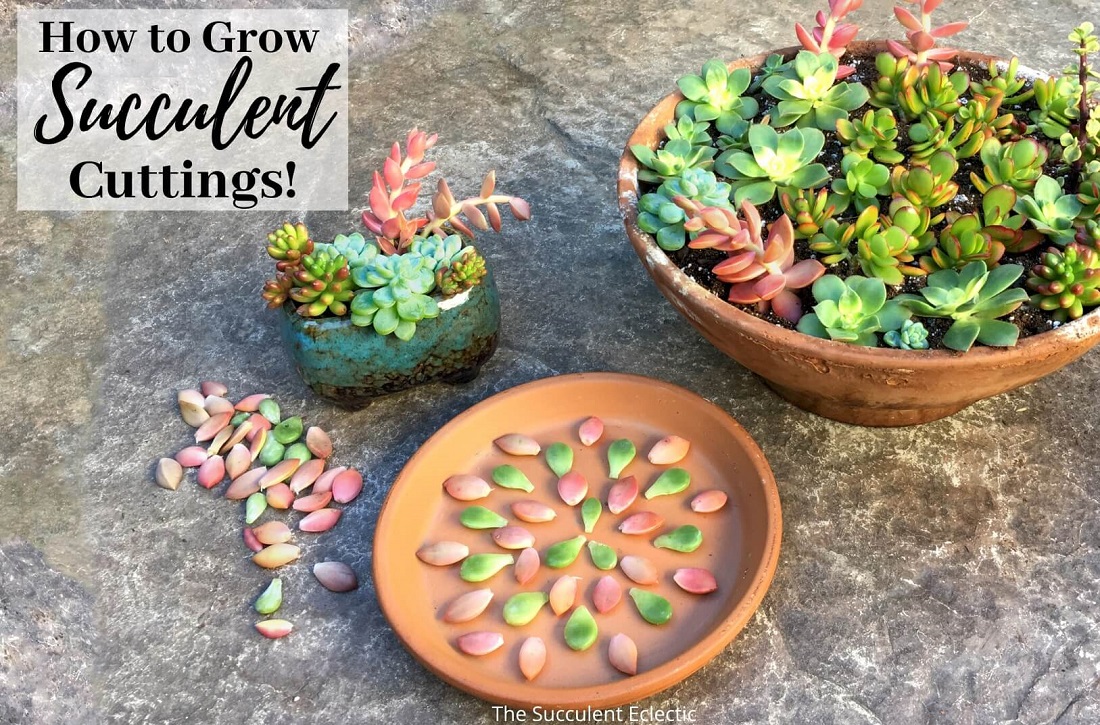
Early spring is here in sunny San Diego, and that means it’s time to get growing succulent cuttings! When your last frost is past, days are lengthening and temps are on the rise, look over your succulents and take stock. Are any damaged by the weather? Overgrown or overstretched? Did you overwinter them indoors and now have etiolated succulents stretching for more light? Early spring — by your climate and weather, not the calendar — is the perfect time to gather broken stems, dropped leaves and start propagatingPropagating (PRAH-puh-gate-ing) a plant is to grow another p.... Read on to learn how to grow succulent cuttings into beautiful new plants!
Although some succulents are dormant in summer and others in winter — all are wide awake and actively growing in spring. That’s why spring is ideal for all methods of propagating succulents. If your climate is still deep in winter weather, you can start this process indoors with your over-wintered succulents. It’s a great way to get a jump on spring! 🙂
How to Plant Succulent Cuttings and Grow Them
In this Post We'll Cover:
{Please note, some links in this post may be affiliate links to sites that pay me a small commission if you click on the link and make a purchase. This commission is at absolutely no cost to you. I only recommend products and companies that I have worked with and truly love! ~Kat}
How to Take Succulent Cuttings
To learn how to grow succulent cuttings, you will need the following:
- Succulent Cuttings
- Sharp scissors or clippers (I love these!)
- Pot with drainage
- Fast-draining Succulent Soil
If you have established succulents growing, you’ll find many succulent cuttings waiting to be cut in your garden. If you’re new to succulents or are unsure about taking cuttings, you can buy succulent cuttings online. This is a great way to learn to propagate succulents, do succulent crafts, or grow your succulent collection in a cost-effective way.
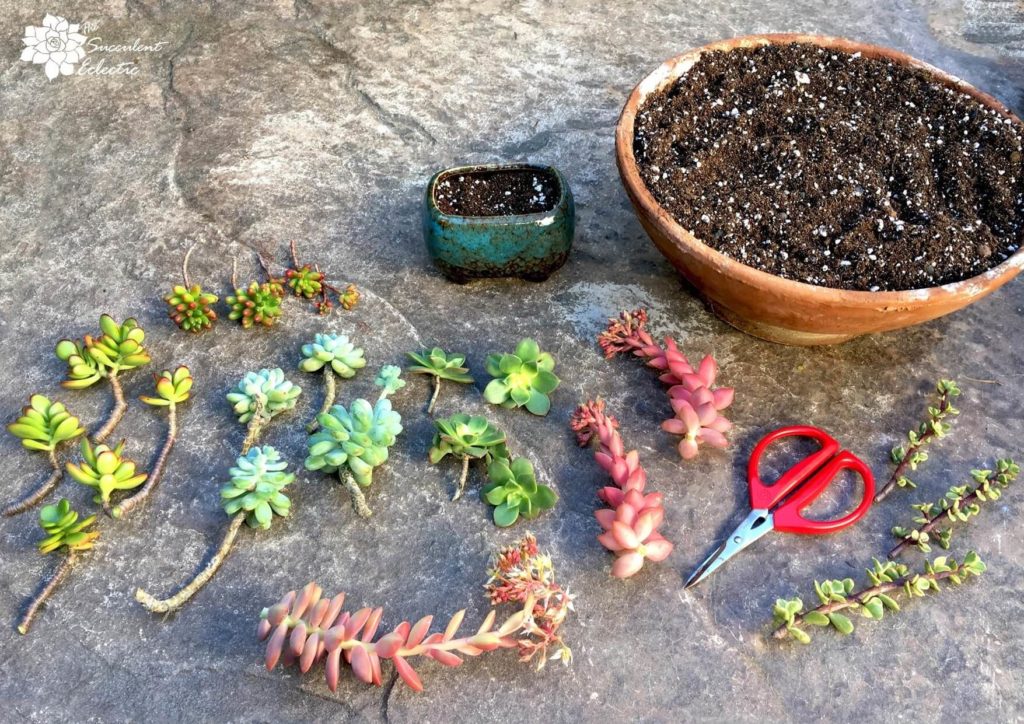
When I review my succulents in the early spring, I carry my trusty Joyce Chen scissors (honestly, the very best succulent snippers I have ever used!) and a canvas bag. I’m looking for overgrown succulents that need pruning or trimming, broken plants, and stretched or weak growth. Gather up everything you cut off or pick up. You’ll either propagate it or compost it. You want the stem of the cutting to be at least 2-4 inches long. When you take a cutting, be sure to use sharp shears and make a good, clean cut. This ensures the plant will heal quickly without giving undue opportunity to insects or bacteria. Wipe the blades carefully between plants for basic hygiene.
On your first pass, as you collect the plant material, don’t worry if the stems are too long, if they still have blooms or if there are too many branches on a stem. That’s for the next step.
Why Growing Succulent Cuttings Works
To really learn how to grow succulent cuttings, you need to understand why it works. Growing succulent cuttings takes advantage of a pretty magical part of the plant called meristemMeristem (MEHR-i-stem) tissue in plants contains undifferent... tissue. Meristem cells are found on the stem of a plant right where the roots or leaves join the stem. What makes it special is that these cells can grow to become roots, leaves, or a branched stem — whatever the plant needs most. Under the soil, meristem cells form roots to absorb moisture and nutrients from the soil. Above ground, they form leaves to collect sunlight and photosynthesize it into nutrition for the plant — or a branch that forms even more leaves.
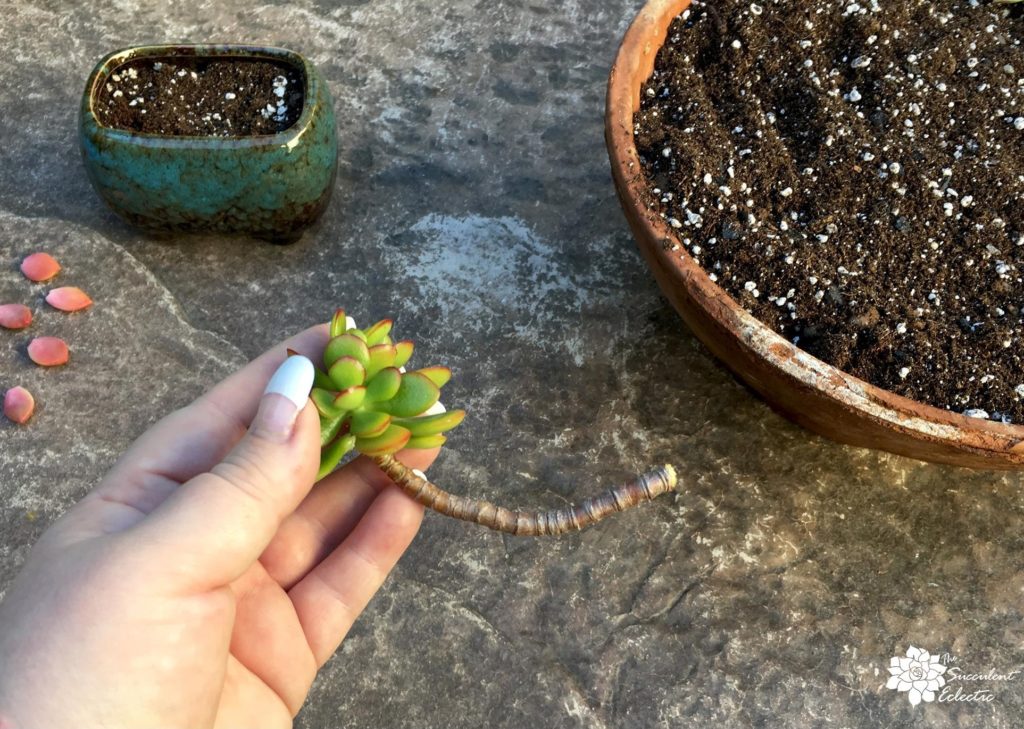
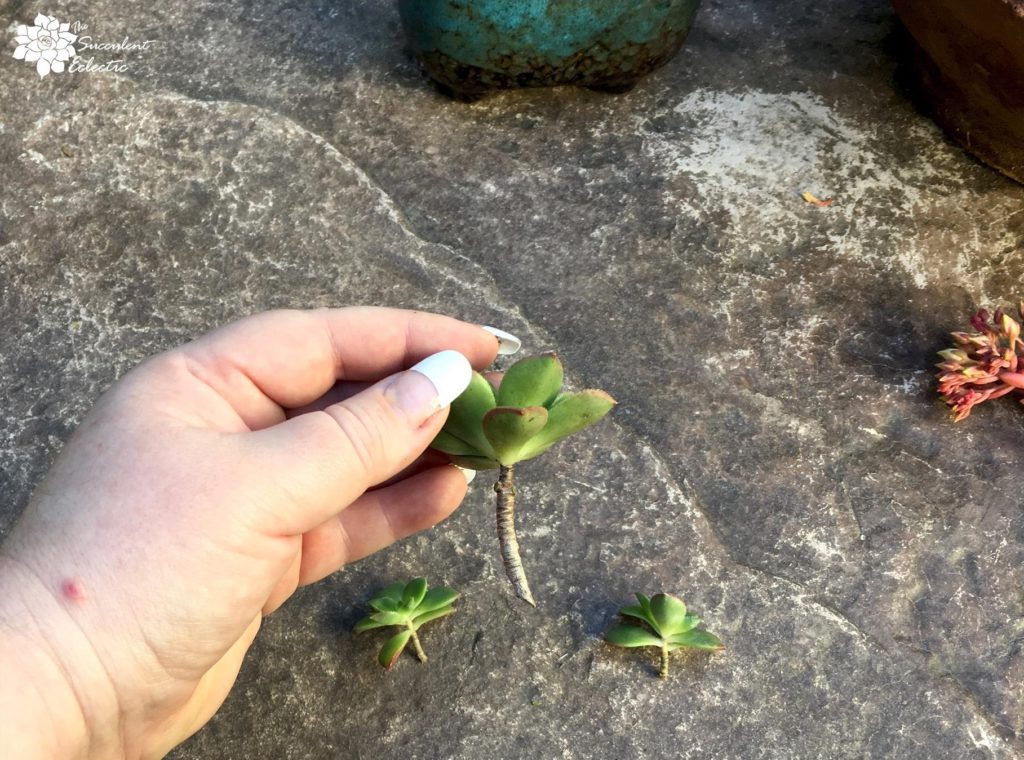
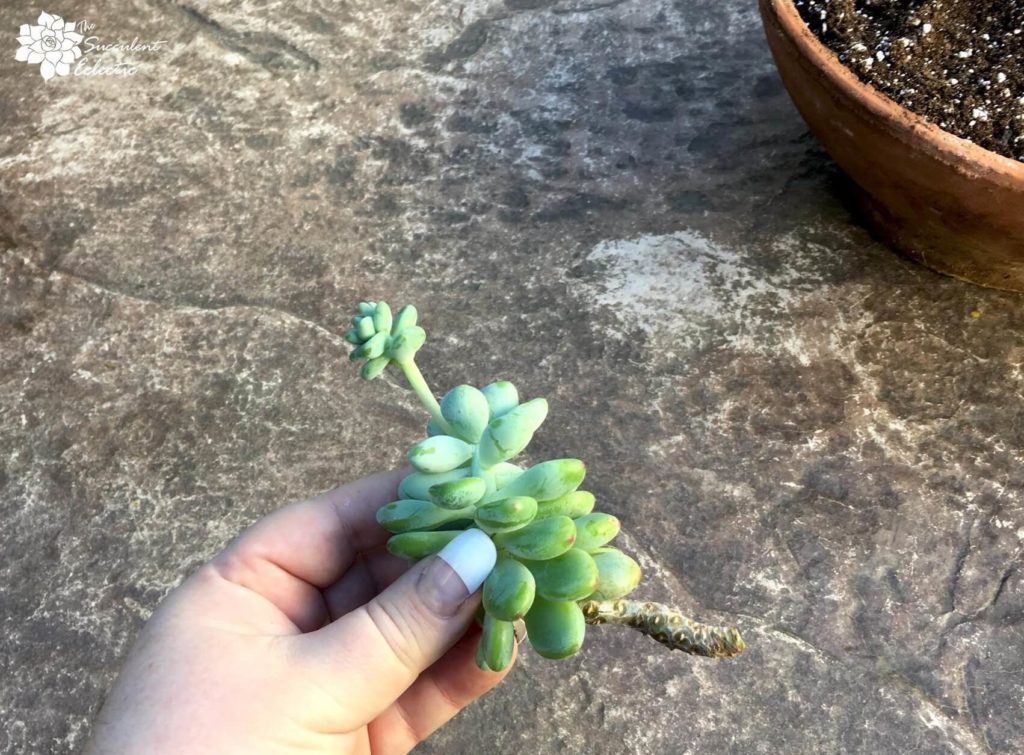
Do you see those rings or thin lines along the stem of this Crassula ovata cutting? Those are called nodes. Nodes are points where meristem cells are concentrated. A node is a point where new roots, leaves, or stems will form. Ideally, every cutting you will propagate should have at least 2-4 nodes available and exposed on the stem.
Preparing Succulent Cuttings
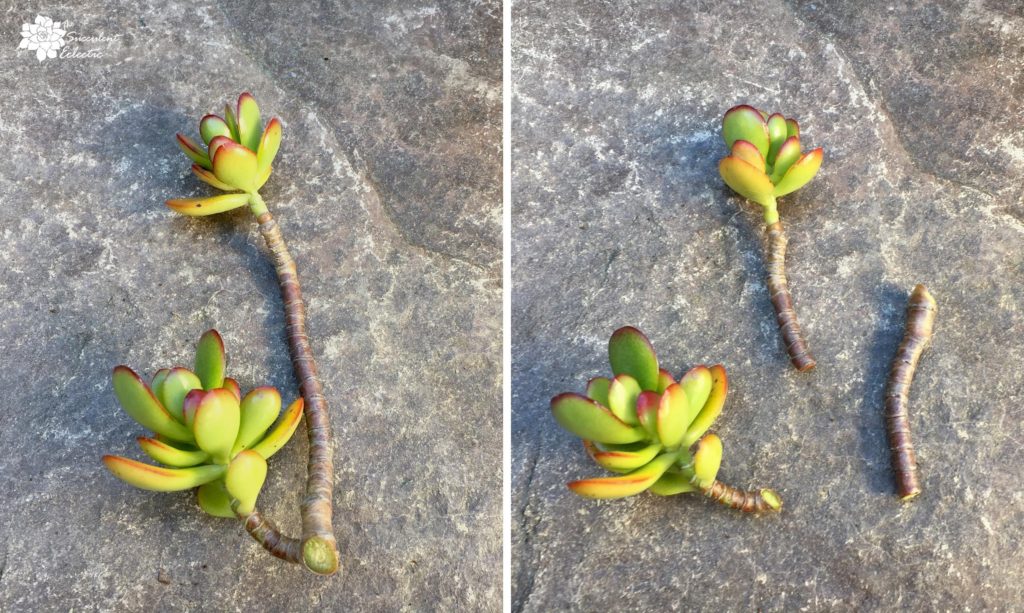
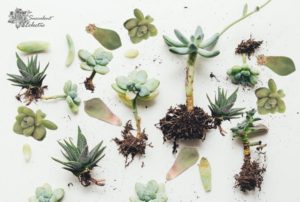
Now that you have collected a number of succulent cuttings, let’s prepare them for propagating. The Crassula ovata cutting on the left has plenty of nodes exposed. There’s no need to remove any leaves. But if we tried to root it as is, we would have a very long, bare stem. Instead, use your sharp shears to cut the two stems apart. While you could root the entire long stem, Crassula do not root so deeply, so it would encourage the plant to spend too much of its resources underground. Instead, I cut it to be about 2.5 inches long.
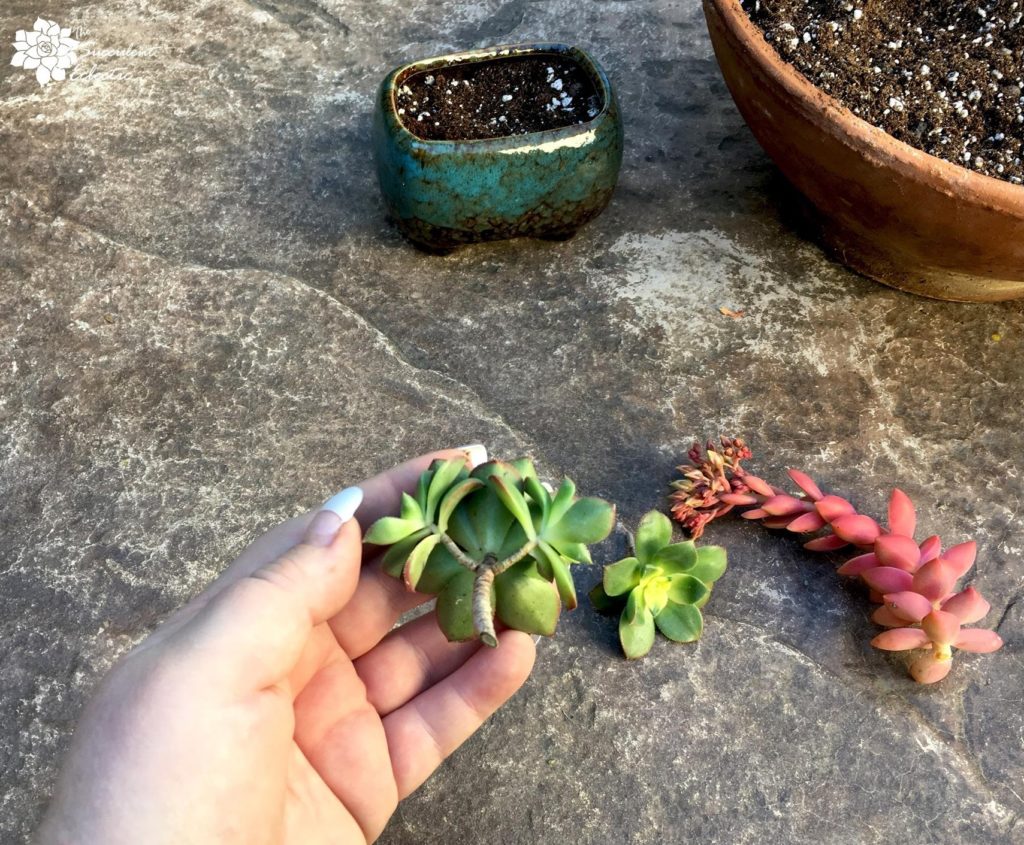
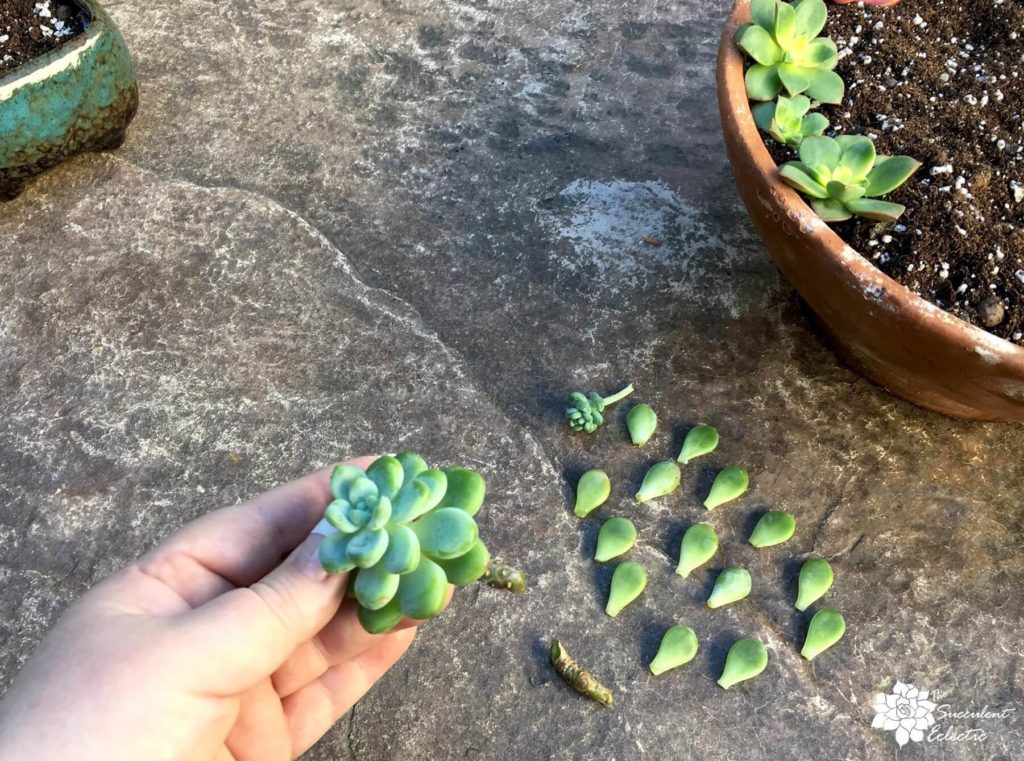
This nicely branched Aeonium ‘Kiwi’ cutting can grow into three new plants.
Now, there are three cuttings, each of which will grow into a new Aeonium ‘Kiwi’ plant. The nodes of Aeonium ‘Kiwi’ look similar, though smaller, to the Crassula ovata nodes.
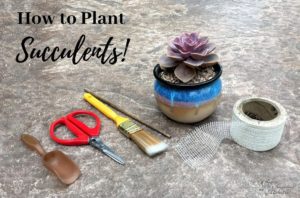
How to Plant Succulent Cuttings
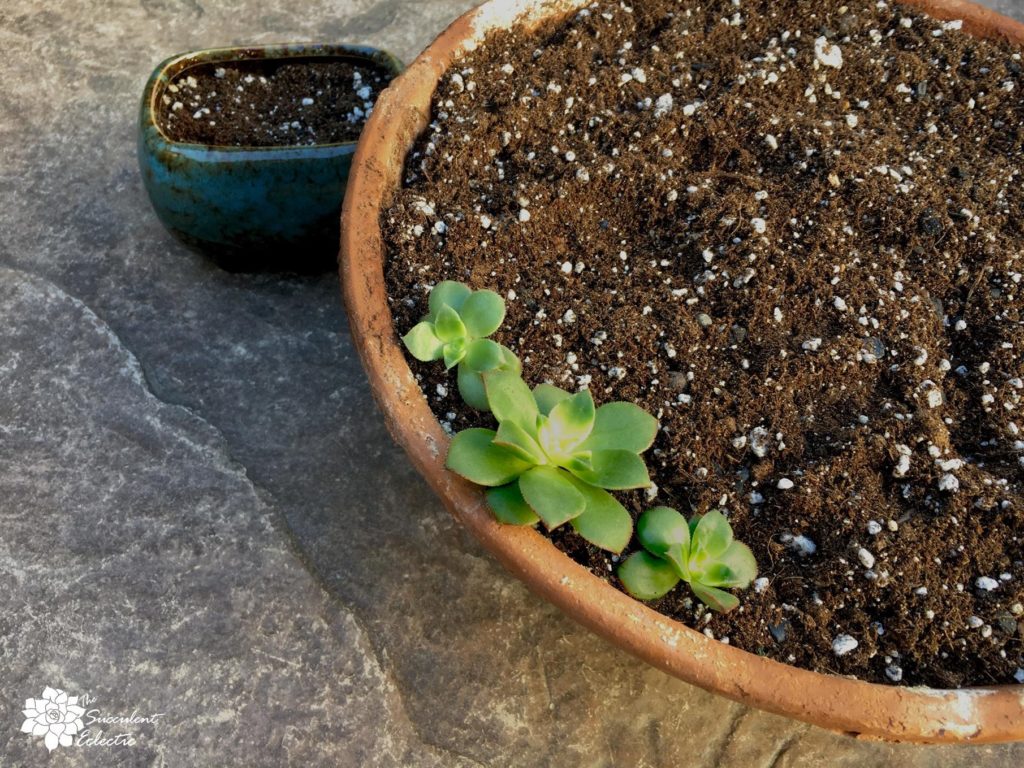
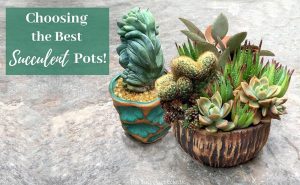
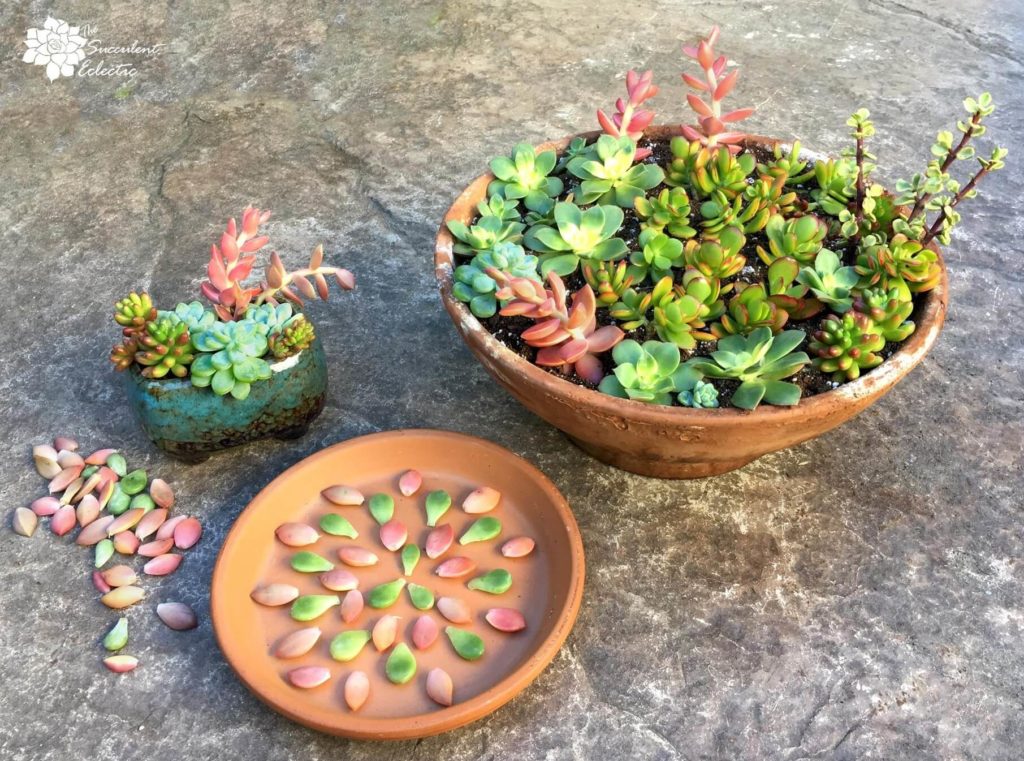
“Planting” succulent cuttings is as simple as sticking the bare stem into DRY succulent soil. Be sure the soil fully covers the 2-4 nodes on the stem. I don’t firm the soil. I like to leave it loose for the baby roots to push through easily. There’s no need to give the cuttings a lot of elbow room. At this stage, you can crowd them if you have a lot of cuttings to work with. And there’s no need to sort them by variety. I’ll put all the cuttings I’ve taken into these two pots. The large one will be random, but I’ll try to plant a pretty succulent arrangement in the smaller pot, using just cuttings.
Do not water yet. We’ll cover when and how to water succulent cuttings later.
Remove Leaves and Flowers from Succulent Cuttings
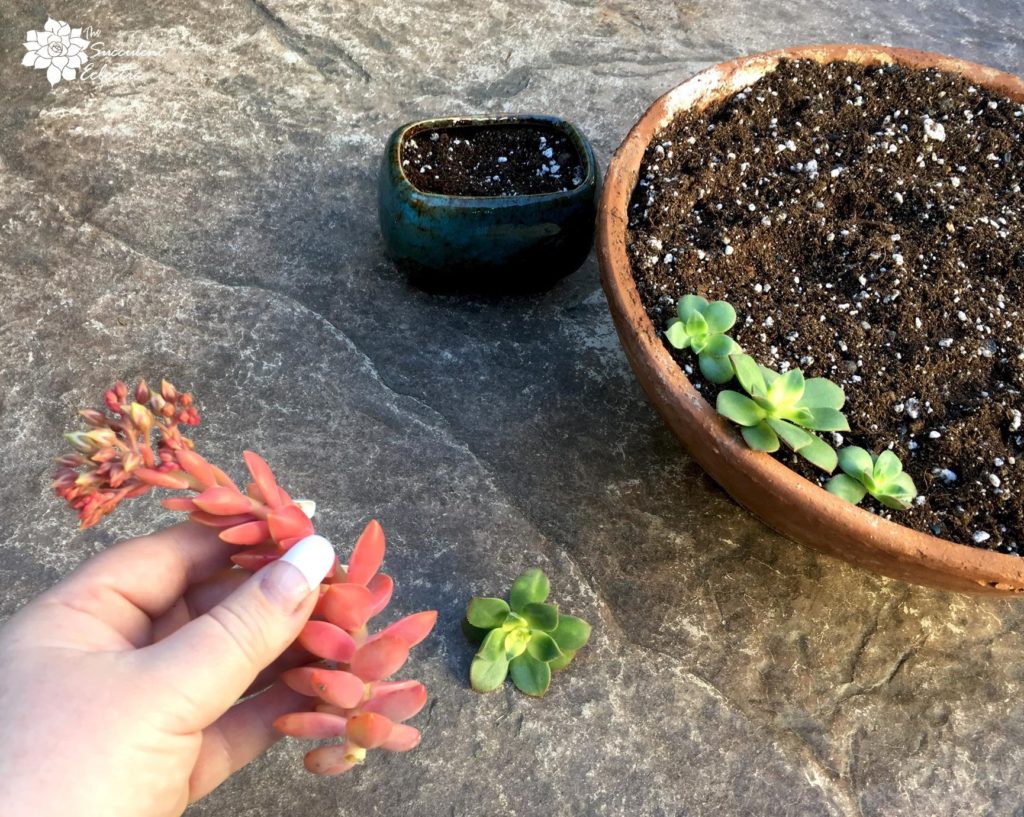
This Graptosedum ‘California Sunset’ succulent cutting still has blooms attached. Isn’t the coloring beautiful? While it likely could root even with the blooms left on, the plant is sending energy to support the blooms and help them to flower. We want to grow succulent cuttings into new plants, so I will remove the blooms. I also need to remove some of the leaves from the bottom of the stem. That will reveal the nodes and get them ready to form roots.
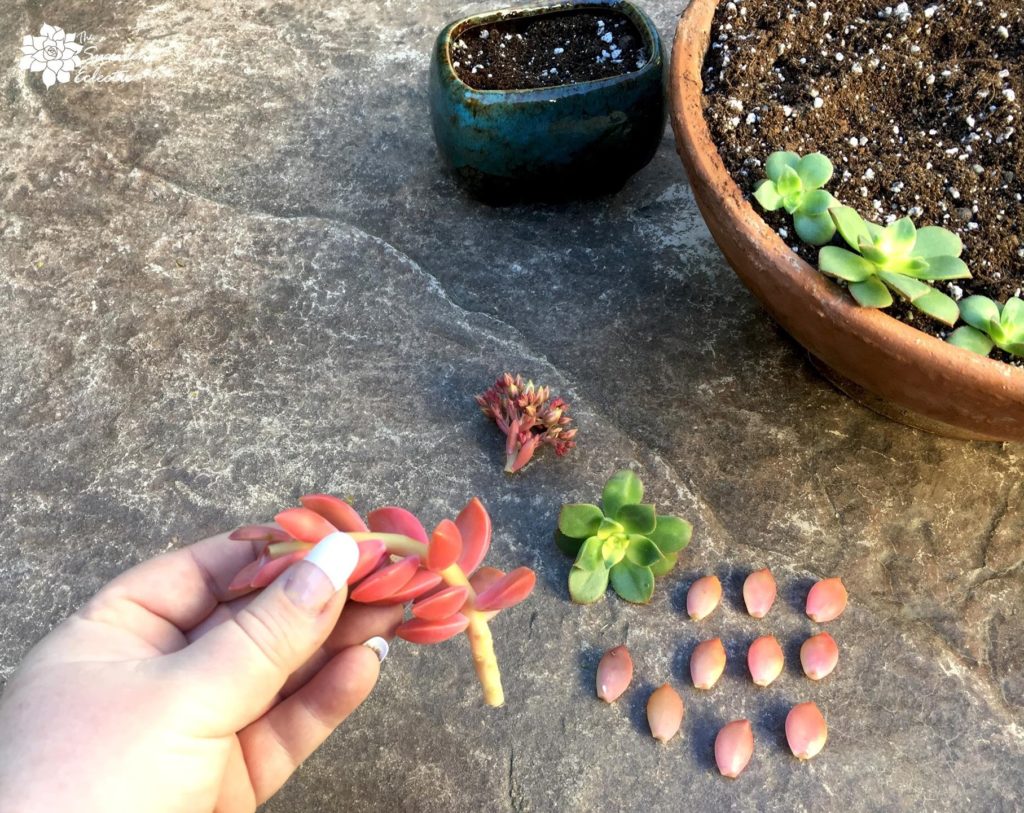
When removing leaves, take care not to just tear them off the stem. Some, like this Graptosedum, easily pop off the stem. Others should be carefully removed using a rocking motion from side to side. Then set the leaves aside for more succulent propagation.
With the flower head and lower leaves removed, this Graptosedum cutting is ready for rooting. See how the nodes here look like individual points rather than the rings on the Crassula above? Go ahead and continue planting the succulent cuttings as described in the step above.
Sedum Clavatum is one of my all-time favorite succulents.
I’ve removed the bloom buds and exposed more of the stem nodes. I’ll plant the succulent cutting and put these leaves aside to propagate.
How to Grow Succulent Cuttings
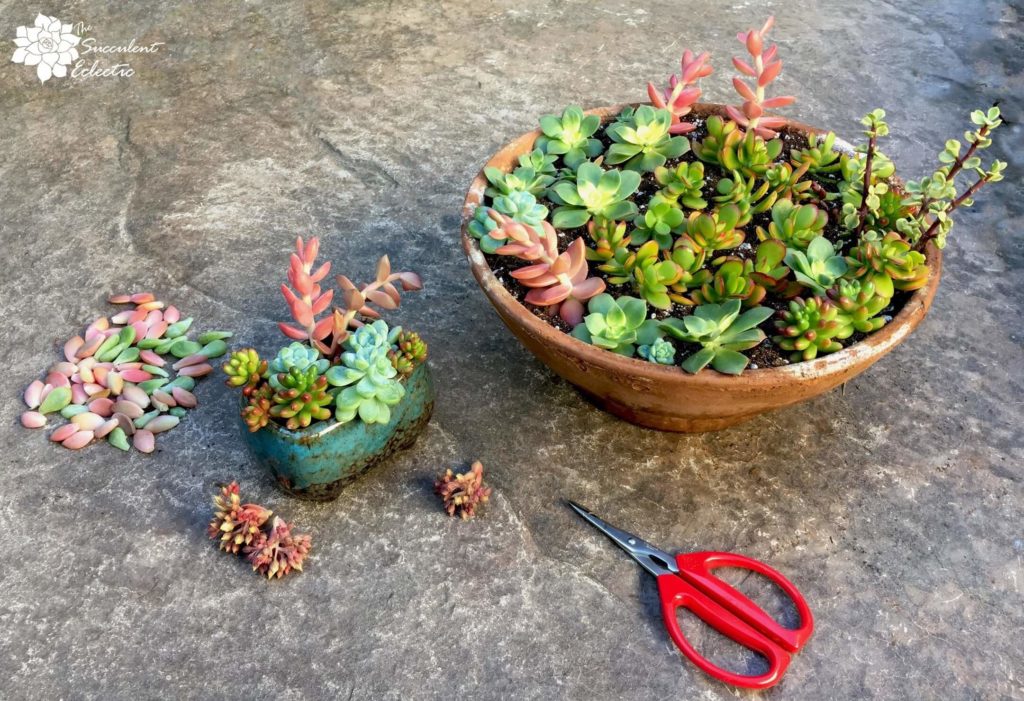
Spring chores in the garden can look so pretty! Here, I have planted the succulent cuttings in dry succulent soil. The blooms will be cast into the compost, and the leaves will be saved for propagating. Set the pot of succulent cuttings out of direct sun. You want them in bright, indirect light, whether indoors or out.
Do not water for 2 weeks. We want the fresh cuts to callus over first. After that time, spray the soil lightly but thoroughly. Then let the soil dry again for 1 week. Spray again, and wait another week. You’ll see the leaves of the cuttings become a bit wrinkled, as they draw down on their stores of moisture. This will stimulate the development of new roots. In time, you’ll see the leaves begin to plump up again as the baby roots take in water. Success!
After about 4 weeks time, try to gently lift a succulent cutting out of the soil. If it resists, it has begun rooting into the surrounding soil matrix. Continue to spray the soil once a week. And start figuring out where you want to transplant all your new little succulent plants!
Growing Succulent Cuttings
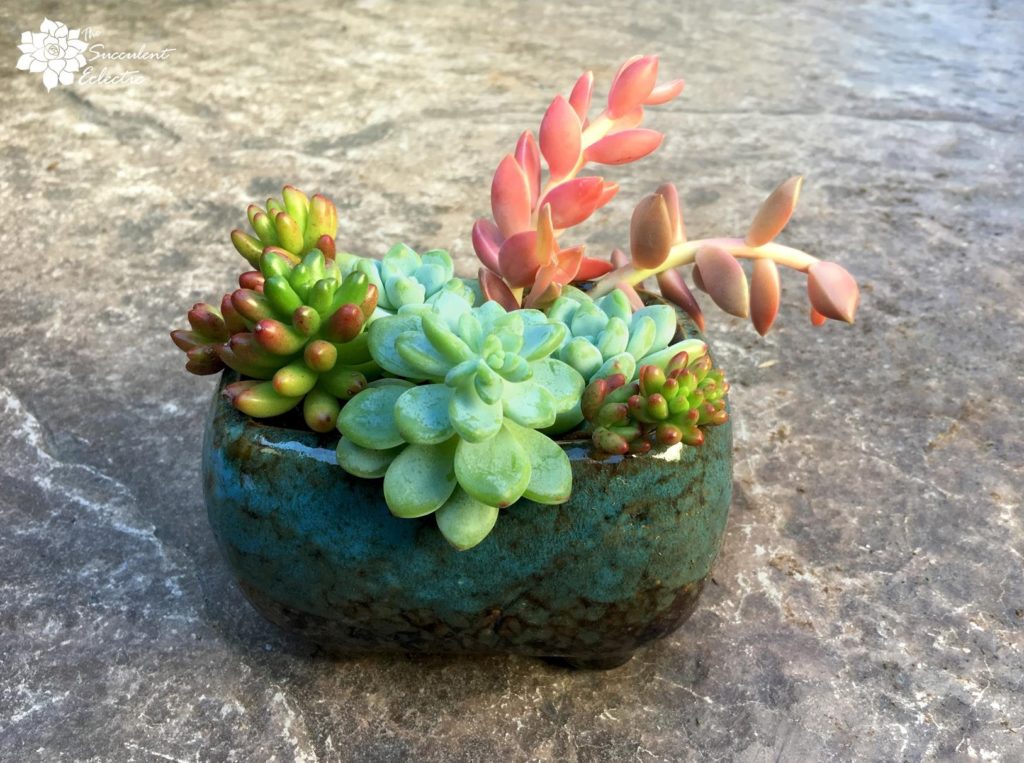
From left to right — Sedum rubrotinctum, Sedum clavatum and Graptosedum ‘California Sunset’. These are fast-growing succulents that could never grow together in this small pot for long. But there’s no reason we can’t make the cuttings pretty while they root!
Propagating Succulents from Leaves
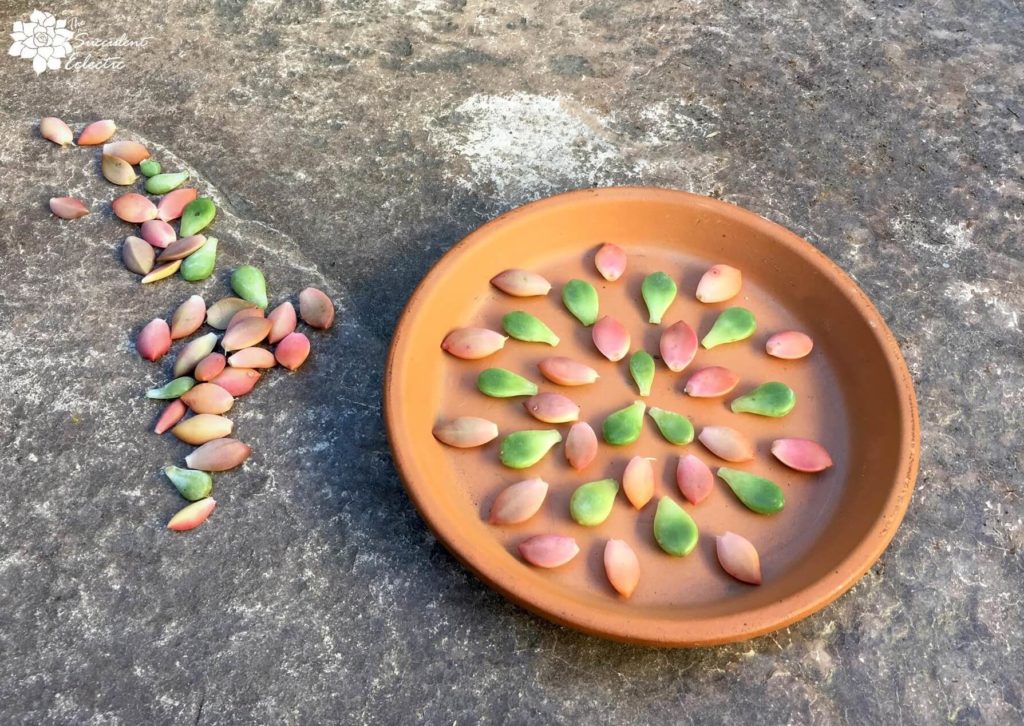
I’m setting aside all of the Sedum clavatum and Graptosedum leaves. In time, each will grow a baby plant from the meristem at the tip of each leaf. This is part of the early-spring care for your succulents. Whenever you take cuttings, set aside those leaves! Read my post for more information on how to propagate succulents from leaves.
Early spring is the perfect time to expand your succulent collection! Now that you know how to grow succulent cuttings — get out there and get started! If you don’t have mature plants to take cuttings from, you can buy succulent cuttings online to grow your collection. Then, in six weeks, check back here again. I’ll update this post to show you the progress these cuttings and leaves have made.
If you have any questions, please leave me a comment! I’ll be happy to get back to you!
Happy Spring Gardening!

P.S. For more information on succulent care, please subscribe! I’ll send you my FREE e-course 7 Steps to Succulent Success. Thank you!
P.P.S. Why not join my Facebook Group for succulent-lovers? We talk succulent care, propagation, succulent identification and design. It’s a warm and welcoming group that would love to meet you!