I have been having so much fun with succulent Christmas ornaments this season! You see why living succulents are perfect for decorating. Their incredible colors, structure and texture make them a perfect choice for natural Christmas decorations. And since the succulents will root even while hanging on your tree, you can pot them up after the holidays and grow them all year long! How cool is that? I also think these would be great on the mantle, so I made them able to stand, too. Let me show you exactly how to make these DIY Christmas balls with succulent cuttings.
Succulent Christmas Ornaments
In this Post We'll Cover:
{Please note, some links in this post may be affiliate links to sites that pay me a small commission if you click on the link and make a purchase. This commission is at absolutely no cost to you. I only recommend products and companies that I have worked with and truly love! ~Kat}
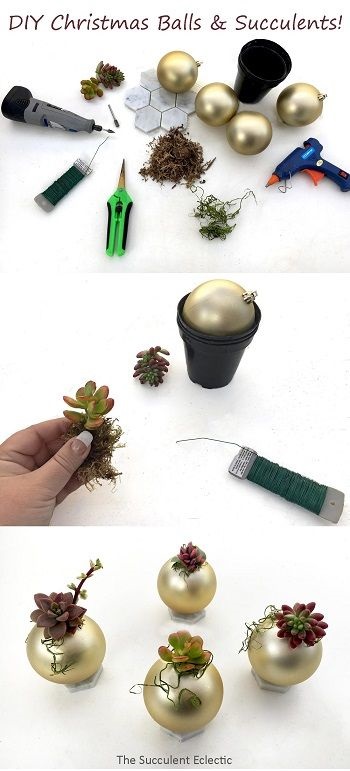
Supplies for DIY Christmas Balls with Succulents

To make these DIY Christmas balls with succulents, you will need the following supplies:
Shatterproof Christmas balls, I used 4″ balls in champagne gold
Carrara marble 2″ hexagon tiles (for optional stands)
Dremel tool grinding bit with pointed end
Decorative moss (this small sample bag is awesome!)
Floral wire (22 gauge is perfect, but any will do)
Empty 4″ succulent pots
How to Make for DIY Christmas Balls
We’re going to take succulent cuttings, wrap them in moss for rooting, and tuck them inside these beautiful Christmas ball ornaments. That will keep the succulent cuttings healthy and happy, so they root while decorating your tree in these DIY Christmas Balls. You will need 4″ shatterproof Christmas balls, and I just love the color on these champagne gold ornaments I found. Look at the luster — they look so rich! And this is a great color to coordinate with any colorful succulents you might have.
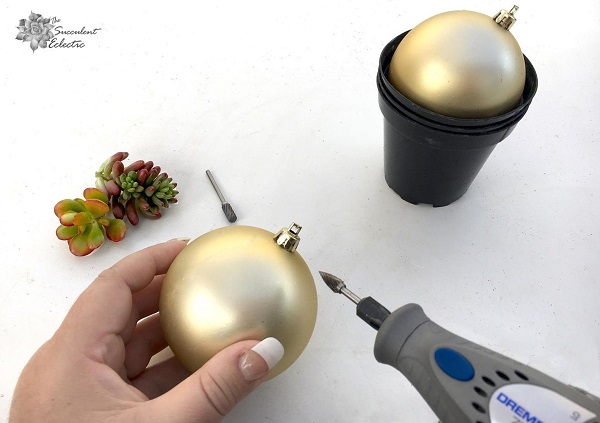
The 3″ or 4″ empty succulent pots are perfect for keeping the ornaments from rolling away while you’re working on them.
Drilling into the DIY Christmas Ball Ornaments
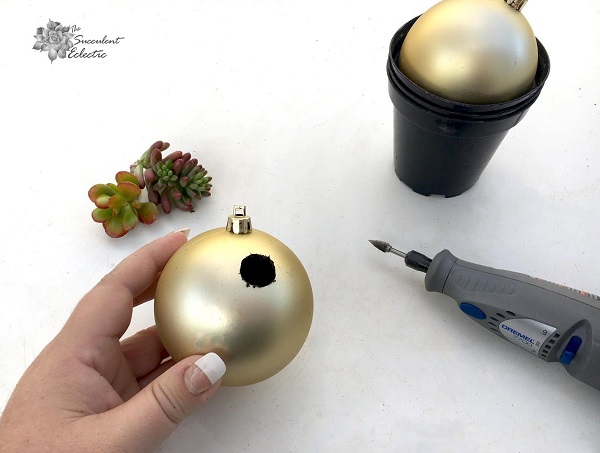
Start your trusty Dremel tool with the pointed grinding bit on high. You will want to press the point of the bit onto the Christmas ball about 3/4 of an inch below the hanger. Don’t press hard, but keep it in one spot. It will try to run around the ball if you don’t hold it firmly. The bit will quickly make a hole in the ornament. Using the grinding side of the bot, enlarge the hole and keep it pretty round. The Dremel tool partly cuts through the ball and partly burns through it. When you are finished, clean the “crumbs” away from the edge of the hole, and tip those that fell into the ball, out. You don’t want to see the hole when you are finished, but you need enough space to get the moss and wire wrapped succulent stem inside. I wound up enlarging this hole a bit further.
Preparing Succulent Cuttings for DIY Christmas Balls
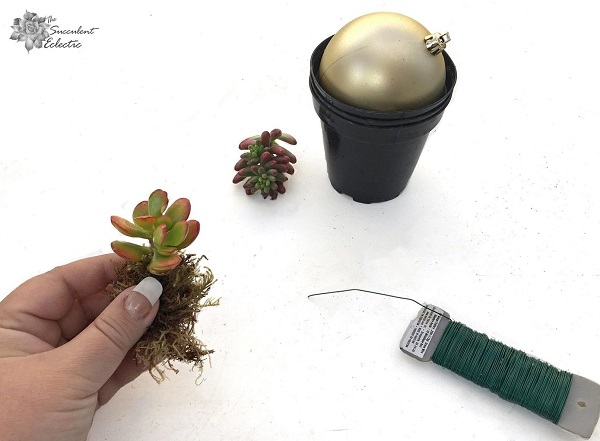
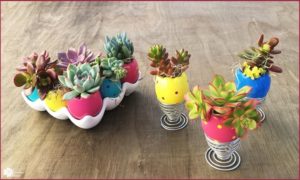
This is where we turn these Christmas balls into succulent Christmas ornaments! Whether you take cuttings from your garden or purchase succulent cuttings online, those with about an inch of stem will be the best for this project. Take a handful of the moss, and soak it in water to make the fibers soft and pliant. I used this sheet moss for it’s finer texture. Then take a generous bit, squeeze out the excess water and wrap the moss around the stem of your succulent cutting. This is the medium your cuttings will root into, so don’t skimp on this step.
Then cut about a 6-inch length of floral wire to wrap snuggly around the moss, securing it to the stem. I started with the stem in the middle of the wire, just under the leaves. Wrap one side down and around in a spiral shape. Then do the same in the opposite direction with the other half of the wire
Adding Succulents to DIY Christmas Balls
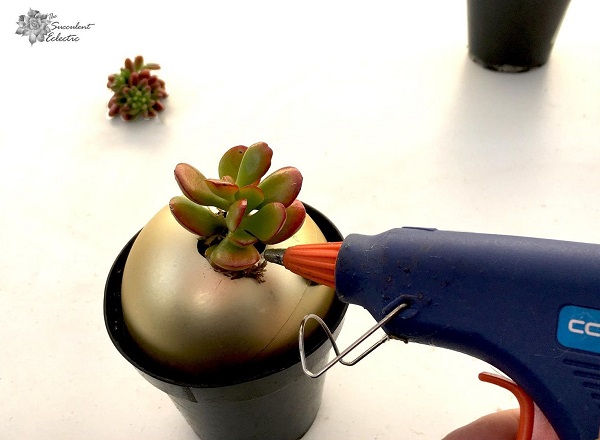
Poke the wire-wrapped moss and stem into the hole you drilled into your Christmas ball. It will stay in well, but you might decide a spot or two of hot glue will help the succulents to stay in the position you like best. Not to worry – the tough layer of skin that keeps a succulent’s moisture in, shrugs off the heat of the hot glue.
Finishing DIY Christmas Balls
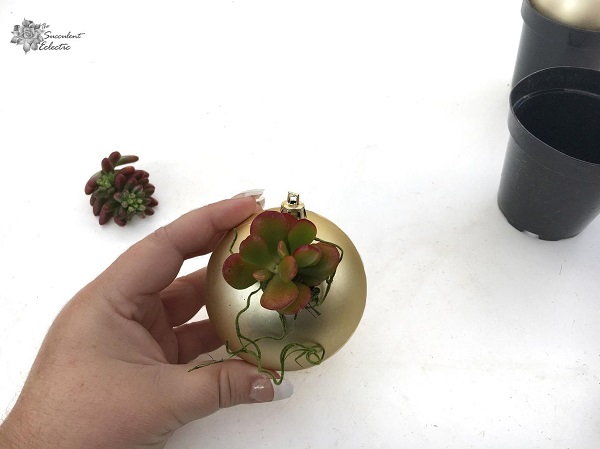
Add just a whisper of the decorative green moss and let it curl around the succulent. Secure it with a small drop of hot glue.
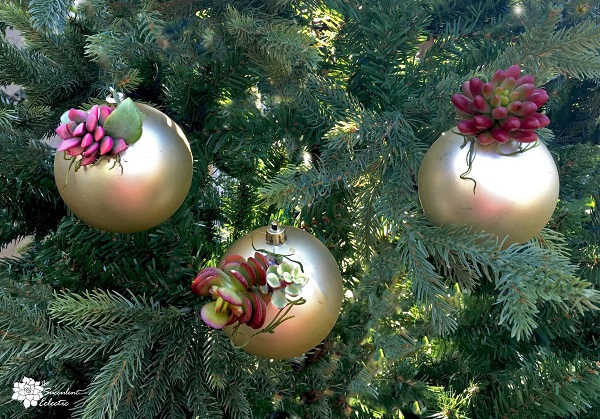
Now it is time to decide whether to hang your DIY Christmas ball, or whether to give it a marble stand. To hang it, a short length of floral wire works great. It melts into invisibility on the tree but has enough stiffness to allow you to position the succulent Christmas ornament exactly the way you want it.
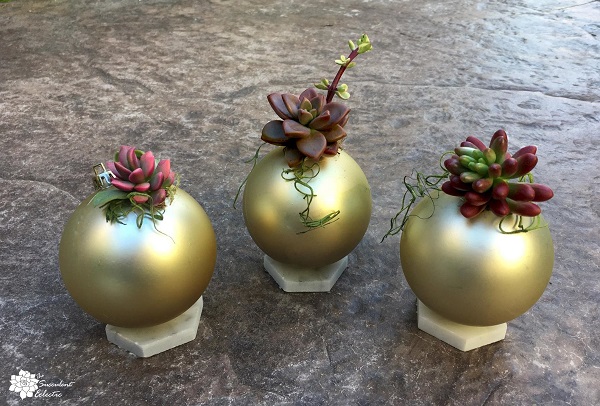
Giving Succulent Christmas Ornaments a Stand
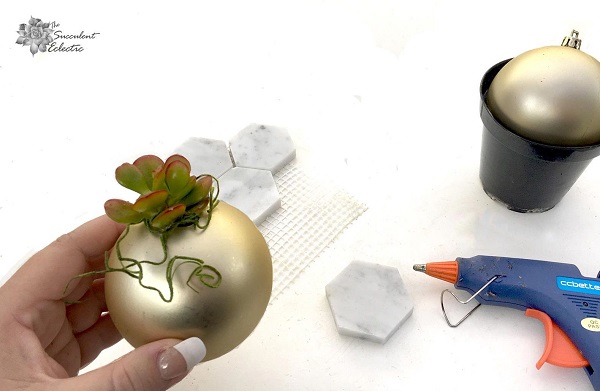
I really like the idea of scattering a few of these DIY Christmas balls on the mantle, perhaps among candles or evergreen sprigs. So I hot glued a few onto these hexagonal Carrara marble tiles. These are small sections of tiles people use for their backsplash. They are sold in such small sections so you can purchase them as an inexpensive sample to see how you would like them in your home. But they make a perfect stand for our succulent Christmas ornaments! The marble tiles are also available in black. Wouldn’t that be a chic look with these gold balls?
The tiles easily pull off their mesh backing. Check the angle you like best, then add a dollop of hot glue and hold the ball into place. Voila:
Choosing Succulents for DIY Christmas Balls
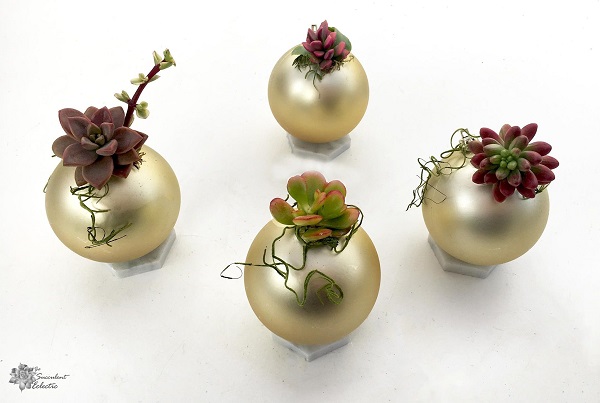
There you have it — succulent Christmas ornaments! 🙂 I knew I wanted to use colorful succulents for these DIY Christmas balls — they need to stand out against both the ball and the tree. So I selected the rosy-salmon Graptosedum Alpenglow accented with a bit of Purtulacaria afra Variegata for the one on the left. In the back is Anacampseros Sunrise, a low growing succulent in bright pink, cream and lime. Center front is a Crassula ovata with stress coloring turning the leaf margins a fetching scarlet. On the right is Sedum rubrotinctum ‘Aurora’.
Caring for Succulent Christmas Ornaments
Caring for your new succulent Christmas ornaments is a snap! Once a week, drip some water in through the hole you made, so it drops onto the moss. I use a squeeze bottle with a narrow tube, but an eye dropper works well, too. You can also spray the succulents heavily with water, which will allow some water to drip inside and onto the moss.
When you are ready to take the tree down, take the succulent cuttings out of the Christmas balls, unwrap the wire and gently remove the moss from the roots. Pot up your plants and they will grow all year long! Pack away the Christmas balls for next year!
I hope you enjoyed these DIY Christmas balls! I’d love it if you would take a moment to leave a comment and let me know what you think! I have done a few DIYs for succulent Christmas ornaments this season. Be sure to check out my wood slice rustic Christmas ornaments, the hanging succulent ornaments and the wine cork succulent planters done as Christmas ornaments.
If you love the idea of succulent Christmas ornaments, but don’t want to make them yourself, check out these decorations from Mountain Crest Gardens! They are fabulous!

For more succulent DIYs and succulent care information, please subscribe! You will receive my FREE e-course 7 Steps to Succulent Success!