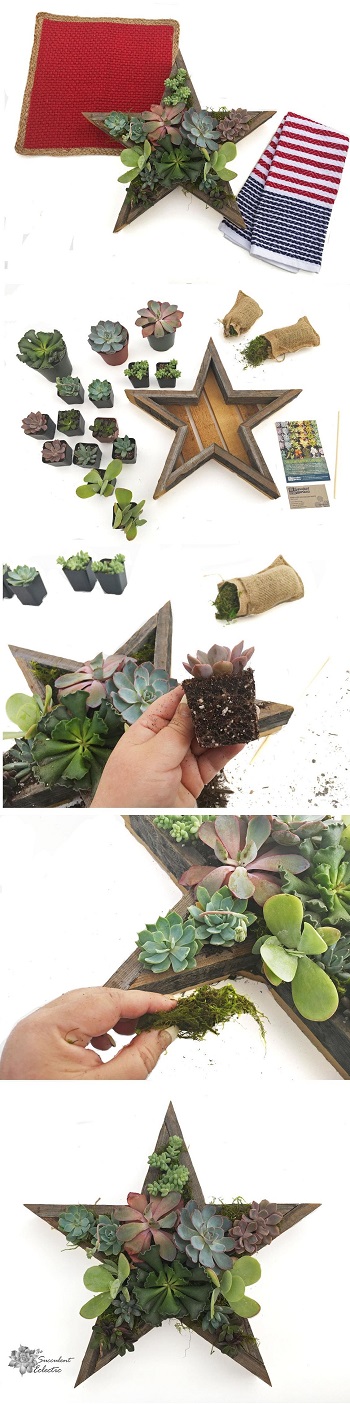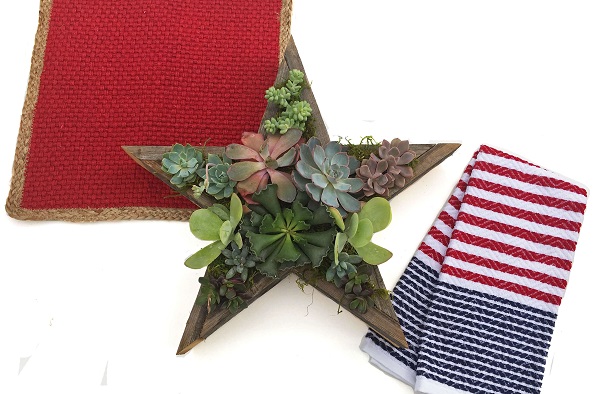
I was so excited to work with Succulent Gardens planting up their Redwood Succulent Star Shaped Planter Kit! The timing was perfect for a 4th of July DIY! Won’t this be perfect for my Independence Day BBQ or for a garden party? This was my first experience with Succulent Gardens, and I was in for a few surprises. As impressive as this planter is, the kit made it super simple to achieve these results in less than 30 minutes! I’ll show you how this reclaimed wood planter kit arrived, and exactly how to plant it, step-by-step.
Succulent Star Planter
In this Post We'll Cover:
{Please note, some links in this post may be affiliate links to sites that pay me a small commission if you click on the link and make a purchase. This commission is at absolutely no cost to you. I only recommend products and companies that I have worked with and truly love! ~Kat}
Star Shaped Planter for Succulents
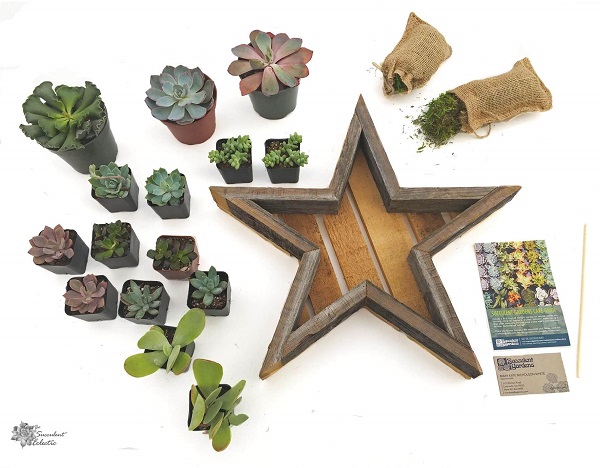
While I call this my 4th of July DIY, I think a star filled with succulents is a beautiful arrangement to enjoy every day of the year! This is the medium, 11″ Redwood Star Planter. I really love how complete it is! I received the handsome planter made of reclaimed redwood, 3 4-inch potted succulents, 12 2-inch potted succulents, 2 burlap bags of green moss, illustrated instructions and a chopstick. So many plants! I was able to make a very full planting – exactly as I always prefer. And they are color-coordinated, with similar requirements for light and water. This takes all of the guess-work out of creating your own succulent planting. The chopstick is an essential tool when planting succulents. The only things I needed that did not come in the box were a bit of succulent soil and a soft bristle paint brush for cleaning the succulents.
This planter is beautifully constructed and very sturdy. I should have taken more photos of it while it was empty. I was so excited to plant it – I forgot! 🙂
Preparing the Star Shaped Planter
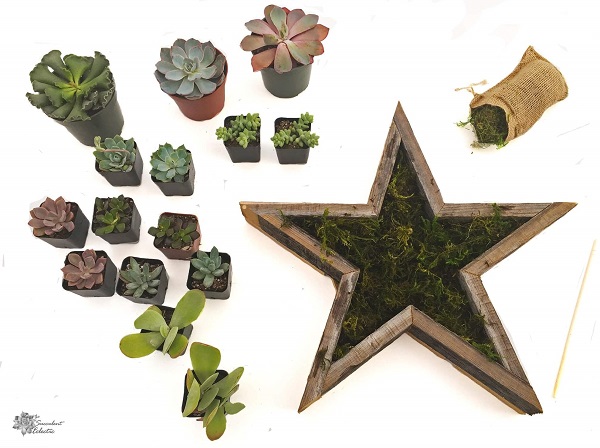
I was surprised to see those wide spaces in the backing for this planter. The instructions from Succulent Gardens said to use the enclosed moss to form a thick layer in the bottom of the planter before adding soil. It doesn’t seem likely that it would hold the soil into place, does it? But the company has an excellent reputation, and I did not see how they could keep their great rep if their instructions were way off – or the planter design was! So, I followed the instructions. Then, I didn’t think I would have enough moss. If it has to hold in the soil, and be used on top of the plants, both as a finish and to hold them into place, I knew I would need a lot. Wow, they packed the burlap bags full of high quality, long-fibered moss!
I used a bit less than one and a half bags of the moss for the layer inside the planter. Pre-soaking the moss makes it flexible and pliable. Then I wrung out the excess water. I gently pulled the moss apart a bit, and put down a thick layer inside the planter, all the way up to the sides and into the points of the star.
Add Soil to Star Shaped Planter for Succulents
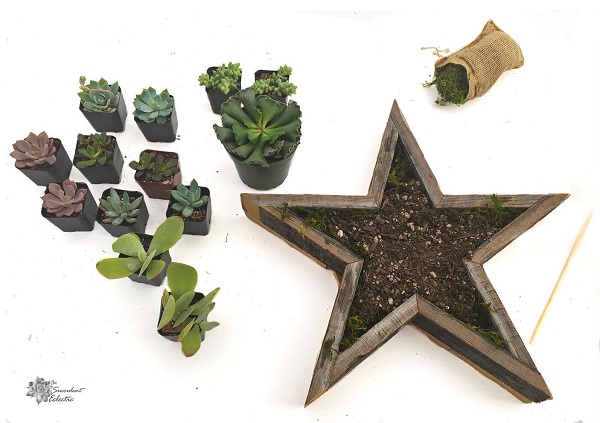
Next, it was time to add succulent soil. With the large gaps in the bottom of the planter, it will clearly have excellent drainage! 🙂 So I skipped amending my pre-packaged succulent soil with pumice, and just added it straight to my planter.
Planting Succulents in Starp Shaped Planter
Now for the fun part – planting the succulents!
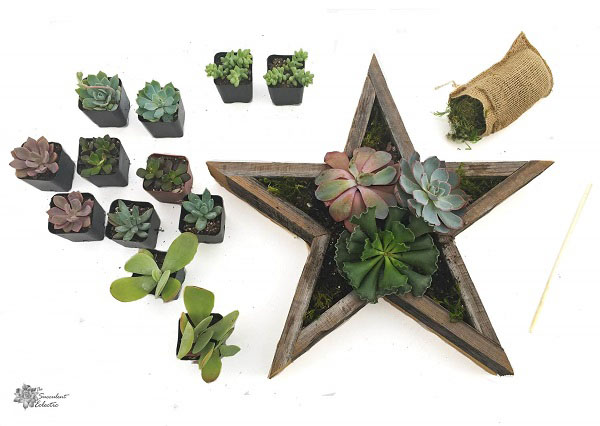
The succulents were chosen by the company. I so appreciate that they provided such a nice mix of plants. They made sure to select those that would all grow well together, in terms of their light and water requirements. And the mix of colors and textures works beautifully. If you are a bit uncertain in designing a succulent planter, this kit has got you covered! There were 2 each of the 2-inch succulents, allowing for both diversity as well as harmony and rhythm to the arrangement. The succulents were not labeled, but were healthy and very well-packaged, arriving in terrific condition. One of the large echeveria was a bit cramped in transit, but it should perk up well in just a few days.
Arrange and rearrange the potted plants until you have a grouping you like. The only space for the largest plants was in the center of the star, so I started there first. I love a really full planting, and they provided enough succulents to make that happen. But there isn’t a ton of space, so be sure to knock excess soil from the roots of the succulents, before nestling them into the soil.
How to Plant Your Succulents
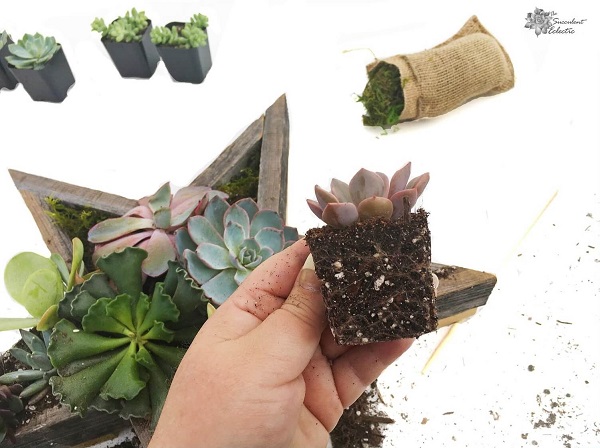
Squeeze the sides of the pot together, to loosen the plant inside the pot. Slide the root ball out of the pot.
Knock Loose Soil From the Roots of the Succulent
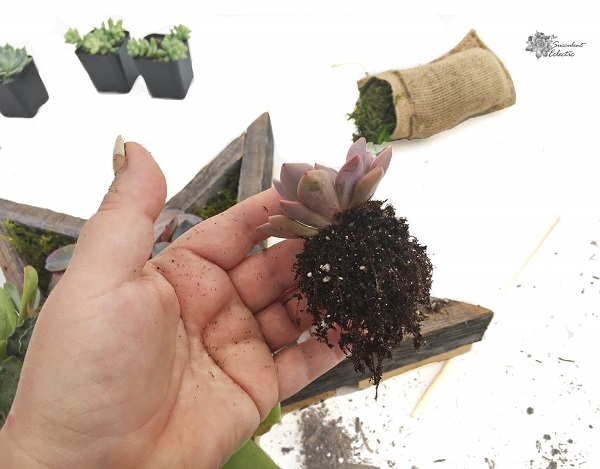
Knock the loose soil from the roots. This will not harm the plant. Now you can tuck the plant into a smaller opening in your planter.
Backfill with Soil, Fully Covering the Roots
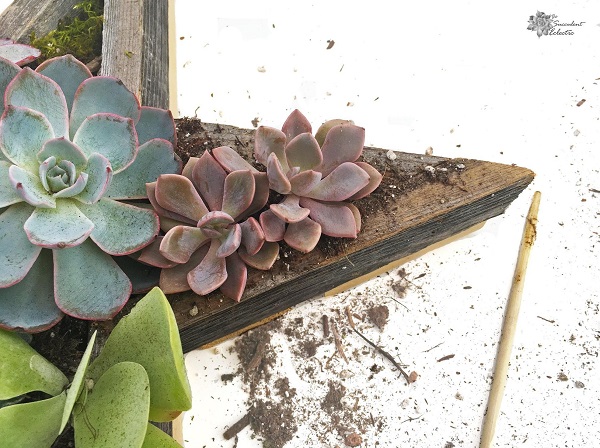
Backfill with soil. Be sure to cover all of the roots with soil. Tuck in the roots, and tamp down the soil with your chopstick. When the planter is fully planted, use the soft bristle brush to whisk away all excess soil. Some succulents have a protective wax coating that will be harmed and look unsightly if you wipe it with your fingers. I always use a soft paintbrush to tidy soil off of my succulents.
Star Shaped Planter Filled With Succulents
Now that your star-shaped planter is filled with succulents, it is time to add the top dressing of moss. While I love the finishing touch of moss in a reclaimed wood planter, here it performs double duty. This planter can be hung on the wall after the succulents have rooted in. For this to work, without losing any soil, the moss must be added to help hold in the soil.
Adding Moss Top Dressing to Star Shaped Planter
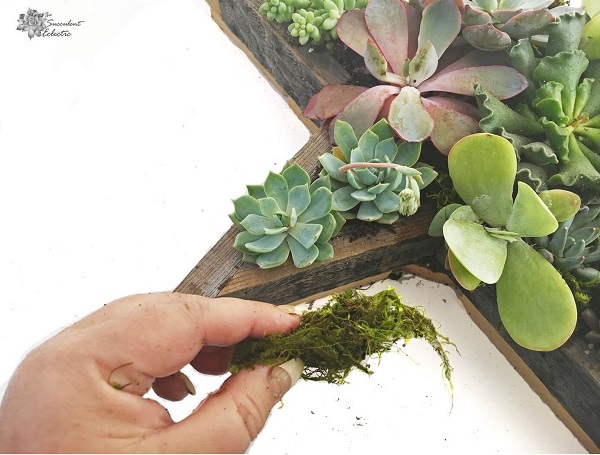
Once again, pre-soak the moss to make it pliable. Then squeeze out the excess water. Roll a section of moss to tuck into the side of the planter.
Fix Moss Into the Planter
Using the enclosed chopstick, push the rolled moss into the planter, tucked between the frame of the planter. The moss will help to hold the soil into place and fan out to cover any bare spots.
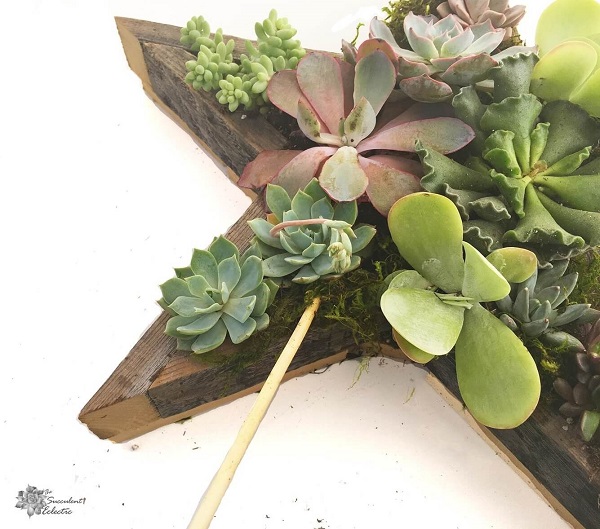
Moss Added to Star Shaped Planter

Using the chopstick, tuck the moss tightly into place. You can see that though I used a sizeable bit of moss, you only see a little peeking out. I like to see a whisper of moss – not a shout. Continue to roll the moss and tuck it into the frame all around the planter. Then, add just a trace of moss to any spots where you can see soil between the plants.
The succulents are now fully secure, without a trace of soil leaking from the planter.
Succulent Star Shaped Planter Care

Once you have fully planted your star and added the moss, it is time to water. Water your new planter just as you always water your succulents – thoroughly, and only when the soil is dry. Water the planter well, until water is draining from the planter. Give it bright light, from dappled or indirect sun up to a half day of direct sun.
After a couple of weeks, the roots should be well settled into the planting. If you would like to hang your planter, add a hanger to the back, and hang it where it will receive bright light, but no more than a half day of direct sun. If you find any of the plants are loose, tuck them back into place. if several plants seem a bit loose, give the star another couple of weeks before hanging it. I plan to hang mine in a few weeks, and I will add a photo to this post when I do. I was just so excited for a 4th of July DIY – I didn’t want to wait! 🙂
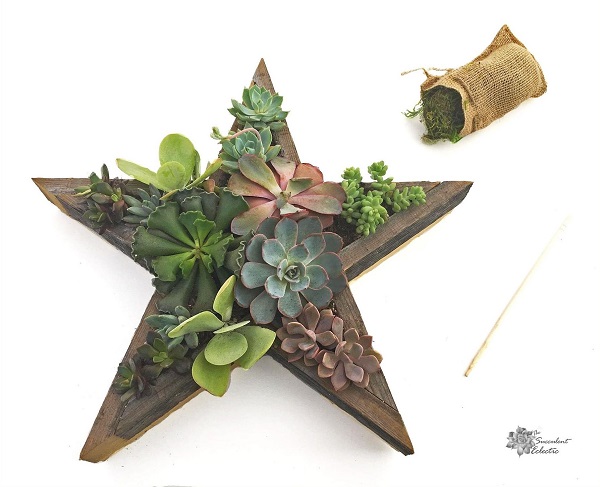
4th of July DIY Succulent Star Shaped Planter
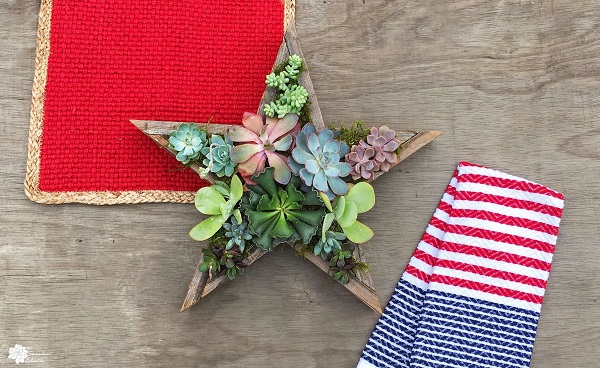
I absolutely love my 4th of July DIY succulent star shaped planter! It will have pride of place at our Independence Day BBQ. I am very impressed with the quality of the succulents, the planter and the kit Succulent Gardens provided. If the timing had not been so perfect, I would have had a tough time choosing. They have redwood planter kits in a wide range of shapes, including a heart, triangle, hexagon, a number 1, block letters, the state of California and a saguaro cactus among others. (I really want that cactus! And the heart, and…)
Whether you want to create your own succulent planting or to give one as a gift, I would highly recommend one of Succulent Gardens beautiful planter kits. This combines the joy of working with the succulents and designing the arrangement yourself, with the guaranteed great results of buying an arrangement done by an expert. I call that a win-win! 🙂
You can do this!

P.S. For more succulent care and my FREE course, 7 Steps to Succulent Success, please subscribe! Thanks so much!
P.P.S. Why not join my Facebook Group for succulent lovers? We talk about succulent care, propagation, succulent identification, and design. It’s a warm and welcoming group that would love to meet you!